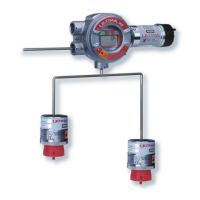
5. Install the provided end-of-line filter at the end of the sampling
tubing, if applicable.
6. Check for leaks along the entire length of the sample tubing line.
Any leak will dilute the gas sample from the area of interest and
give a lower than actual gas reading.
Exhaust Line Placement
1. Attach a 1/4-inch (6.35 mm) OD sample tubing to the exhaust
outlet fitting on the Aspirated Sampling Module Unit.
2. Route the exhaust tubing into a safe area where the gas sample
can be vented. Avoid any sharp bends or elbows. Route the tubing
to allow any collected water to drain.
• The maximum exhaust tubing length is 20 feet (6 meters).
NOTE: Do not run the exhaust tubing in water or across areas of
vibration or across doorways, man ways or access ways;
otherwise, a leak in the exhaust tubing or a tripping hazard
may result.
3. Fasten the exhaust tubing to supports using suitable hardware
(not supplied).
4. Fasten the end of the exhaust tubing in the area of interest by
using suitable hardware (not supplied)
• Exhaust inlet should be pointed downward to prevent dirt and
water from entering the exhaust tubing line.
NOTE: Exhaust to a safe or non-hazardous area only.
5. Check for leaks along entire length of the exhaust tubing line.
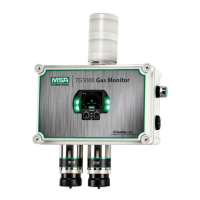
Aspirator Connection
Connect the Aspirated Sampling Module to compressed air via the 1/4"
OD tube fitting at the top of the unit. The compressed air must be
instrument-grade quality. Maximum inlet air pressure must not exceed
25 psig (172 kPa).
Connecting the Aspirated Sampling Module to an inferior-
quality or an over-pressure air supply can cause incorrect
gas readings or damage to the Sampling Module.
"
WARNING
2-7
 Loading...