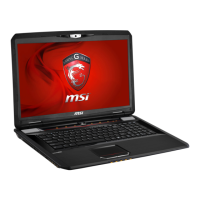
Do you have a question about the MSI GX70 and is the answer not in the manual?
Move the unlock button base as shown in the left picture.
Release the button and move the battery pack base as shown.
Remove one M2.5*7mm screw and the ODD Module as directed.
Remove the ODD Bezel component as illustrated.
Remove two M2*3mm screws and the ODD Bracket.
Remove seven M2.5*7mm screws to detach the bottom door.
Remove two M2.5*5mm screws and the HDD Module as directed.
Remove two M3*4mm screws securing the HDD brackets.
Remove one M2.5*5mm screw and the FAN cable to detach the Fan.
Remove three M2.5*5mm screws and four spring screws for heatsinks.
Use a screwdriver to open the CPU slot and remove the CPU Module.
Push DRAM side shielding and remove the DRAM Module as per the image.
Remove one M2.5*5mm screw to detach the VGA card.
Remove two M2*4mm screws to detach the HDD2 Board.
Remove the Middle Cover before the Keyboard, minding the Sensor board FPC.
Remove the Sensor board component.
Remove one M2*3mm screw to detach the WLAN Antenna and card.
Remove the hinge caps on both the left and right sides.
Disconnect and remove the LVDS cable as illustrated.
Disconnect and remove the MIC cable.
Remove two M2.5*7mm screws securing the right LCD hinge.
Remove two M2.5*7mm screws securing the left LCD hinge.
Remove five M2*4mm screws to detach the keyboard.
Push the connector as shown and then remove the cable.
Remove twelve M2.5*7mm screws.
Remove two M2.5*7mm screws to detach the upper case.
Disconnect and remove the Touchpad FFC.
Disconnect the Speaker cable and the Audio Cable.
Disconnect and remove the USB Cable.
Remove two M2.5*5mm screws to detach the Audio board.
Remove two M2.5*5mm screws to detach the USB board.
Remove one M2*4mm screw to detach the HDD1 Board.
Remove one M2.5*5mm screw to detach the main board.
Remove the Speaker and Woofer modules from the lower case.
Remove two M2*3mm screws to detach the T/P board.
Remove the T/P iron shielding.
Remove the T/P module.
Remove two rubber covers.
Remove two M2.5*5mm screws to detach the LCD bezel from the sides and top.
Remove three M2.5*5mm screws securing the left LCD hinge.
Remove three M2.5*5mm screws securing the right LCD hinge.
Remove six M2.5*5mm screws.
Disconnect camera cable and remove the display module from the LCD cover.
Disconnect and remove the LVDS cable from the display module.
Remove six M2*3mm screws.
Remove the CMOS camera module following the indicated sequence.
Remove the MIC Module as illustrated in the picture.
Remove the Wireless L-Antenna board from the LCD Cover.
Remove the Wireless R-Antenna board from the LCD Cover.
| Processor | AMD A10-5750M |
|---|---|
| Graphics | AMD Radeon HD 8970M |
| Display | 17.3-inch Full HD (1920x1080) |
| RAM | 8GB DDR3 |
| Operating System | Windows 8 |
| Weight | 3.9 kg |
| Battery | 9-cell |