Variable Speed Drive
Transmission Removal and Installation
NOTE: Prior to performing transmission removal
and installation, it is necessary to remove the
upper drive belt.
1). Remove both rear hub caps from the rear wheel
assemblies.
2). Loosen both hex cap screws securing the rear
wheel assemblies to the axles.
3). Raise the rear of the tractor off the ground.
4). Remove both center hex cap screws and bell
washers from the rear wheel assemblies.
5). Remove both rear wheel assemblies from the
tractor.
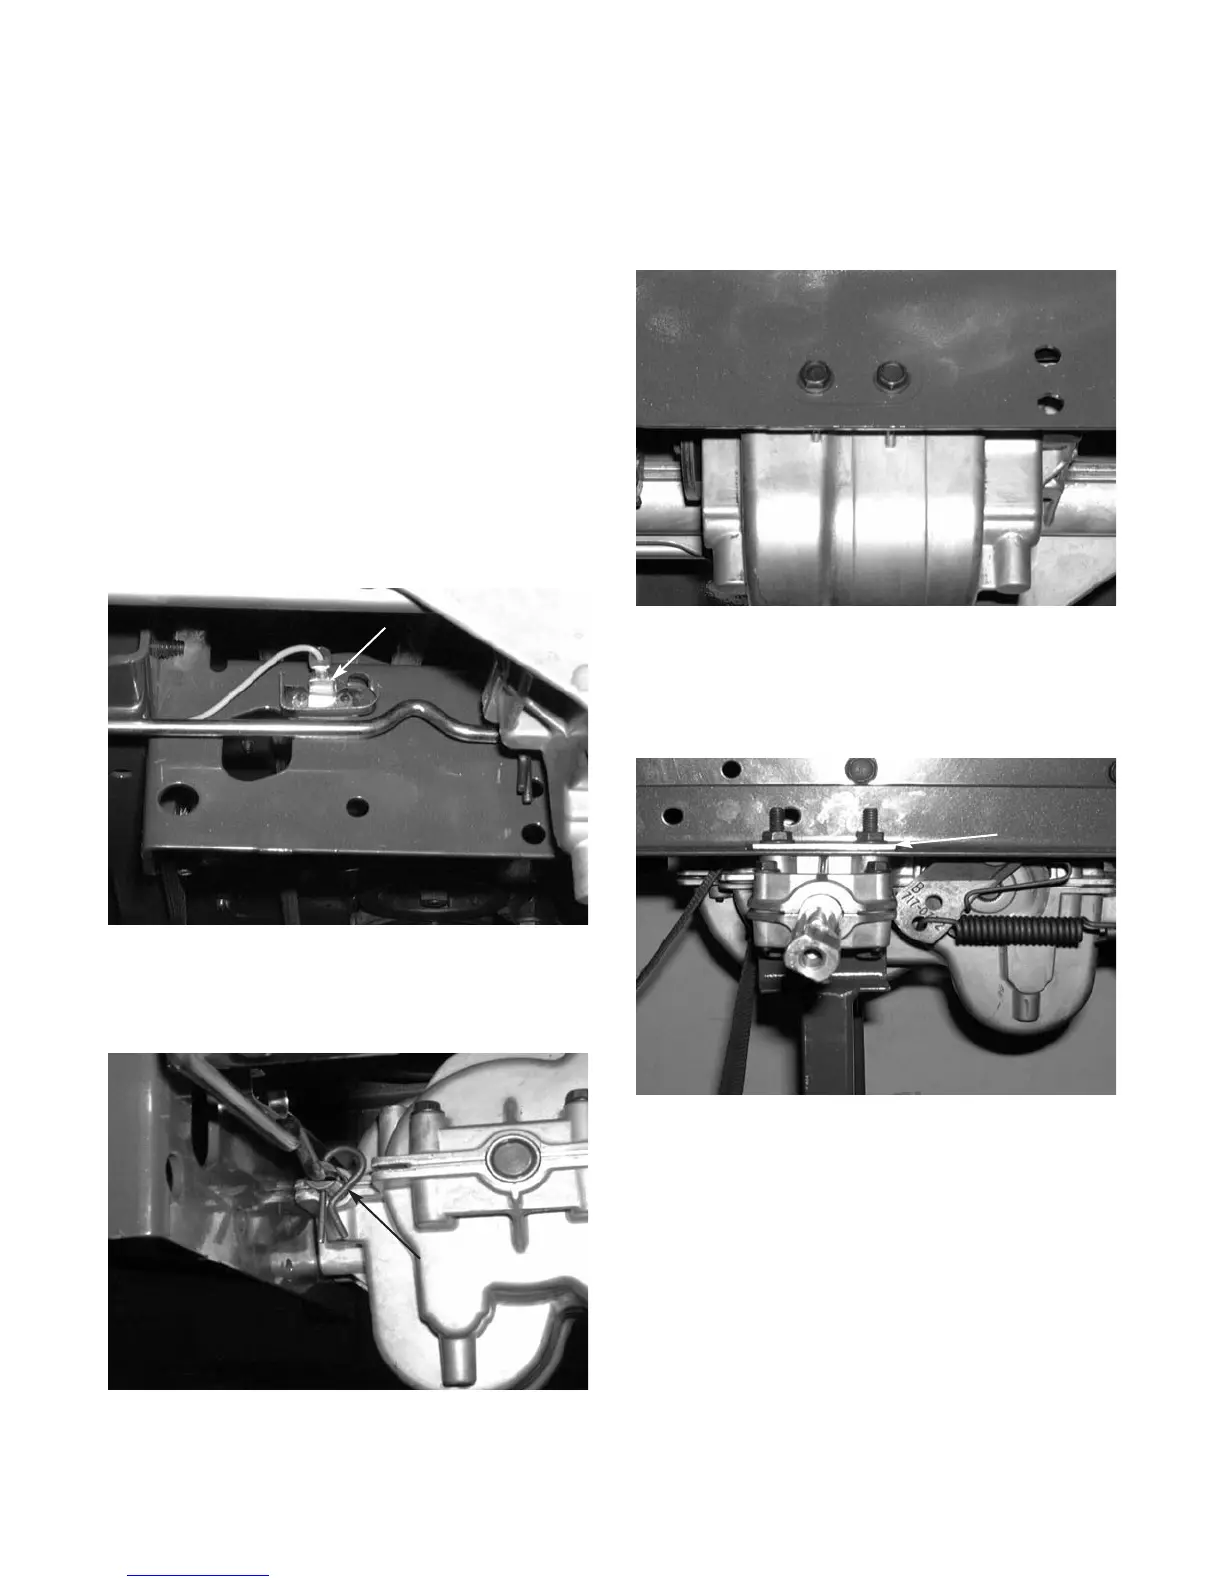
6). Disconnect the reverse safety switch. See figure
1.
FIGURE 1.
7). Remove the hair pin that secures the shift link-
age to the shift fork and set the shift linkage
aside. See figure 2.
FIGURE 2.
Reverse Safety Switch
Hairpin
8). Remove both of the self tapping screws that
secure the transmission to the front torque brack-
et using a 3/8 socket. See figure 3.
FIGURE 3.
9). Support the bottom of the transaxle.
10). Remove all four hex bolts and lock nuts securing
the transmission to the frame using a 1/2" socket
and a 1/2" wrench. See figure 4.
FIGURE 4.
11). Remove both transmission mounting brackets
from the top of the frame.
12). Remove the hex bolt and lock nut securing the
variable-speed pulley to the transmission using a
9/16 socket and a 9/16 wrench.
13). Remove the locking hex nut from the brake actu-
ation arm on the transmission. See figure 5.
NOTE: During reassembly, perform the brake
adjustment section.
Transmission
Mounting
Bracket
10

 Loading...