15
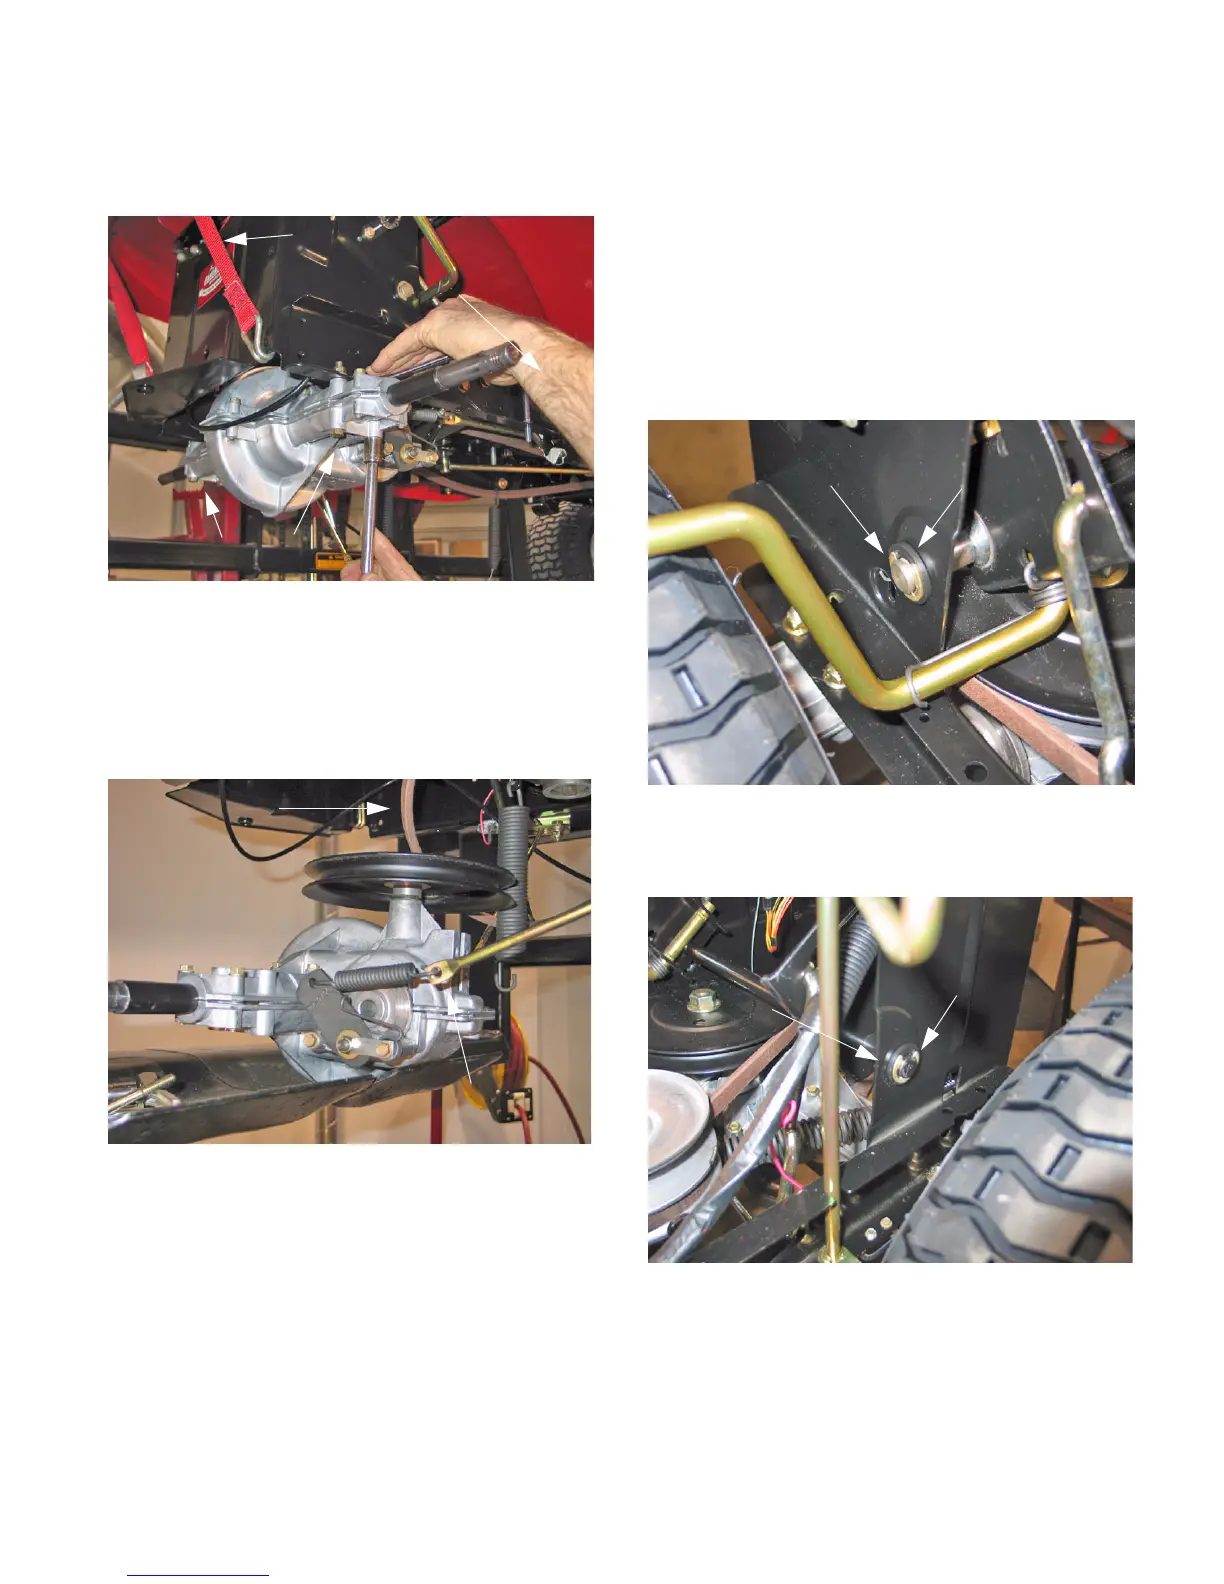
11.9. Using a ½” socket, remove the four bolts, lock
washers and nuts securing the transmission to
the frame. See Figure 48.
NOTE: Support the transmission during this pro-
cedure to keep it from falling from the unit.
11.10. As you remove the transmission, slip the upper
drive belt from around the transmission pulley.
See Figure 49.
11.11. Disconnect the brake rod spring from the brake
arm. See Figure 49.
11.12. Service the transmission and install in the
reverse order of disassembly.
NOTE: During assembly, route the upper drive
belt around the transmission pulley as you install
the transmission into the tractor.
Figure 48
Support Straps
Transmission Mounting Bolts
Figure 49
Brake Rod and Spring
Upper Drive Belt
12. DECK LIFT ASSEMBLY
NOTE: You might be inclined to try to remove
the deck lift assembly without removing the
fender assembly. While it can be done, it is much
easier to take the few minutes to remove the
fender.
12.1. Remove the fender assembly as described in
section 5.
12.2. Remove E-clips from both ends of deck lift shaft.
See Figure 50.
12.3. Remove plastic hex bushings. Inspect for wear
and damage replace as needed. See Figure 51.
Figure 50
Right “E” Clip
Plastic Bushing
Left “E” Clip
Plastic Bushing
Figure 51
www.mymowerparts.com
For Discount White Outdoor Parts Call 606-678-9623 or 606-561-4983