5
3.7. Inspect the pulleys and pulley bearings for dam-
age and wear. Replace as needed.
NOTE: When reassembling be sure to install the
spacer under the pulley and the thinner flat
washer on top.
NOTE: Lubricate the idler bracket with a small
amount of lithium grease during assembly. Per-
form this lubrication on a yearly basis.
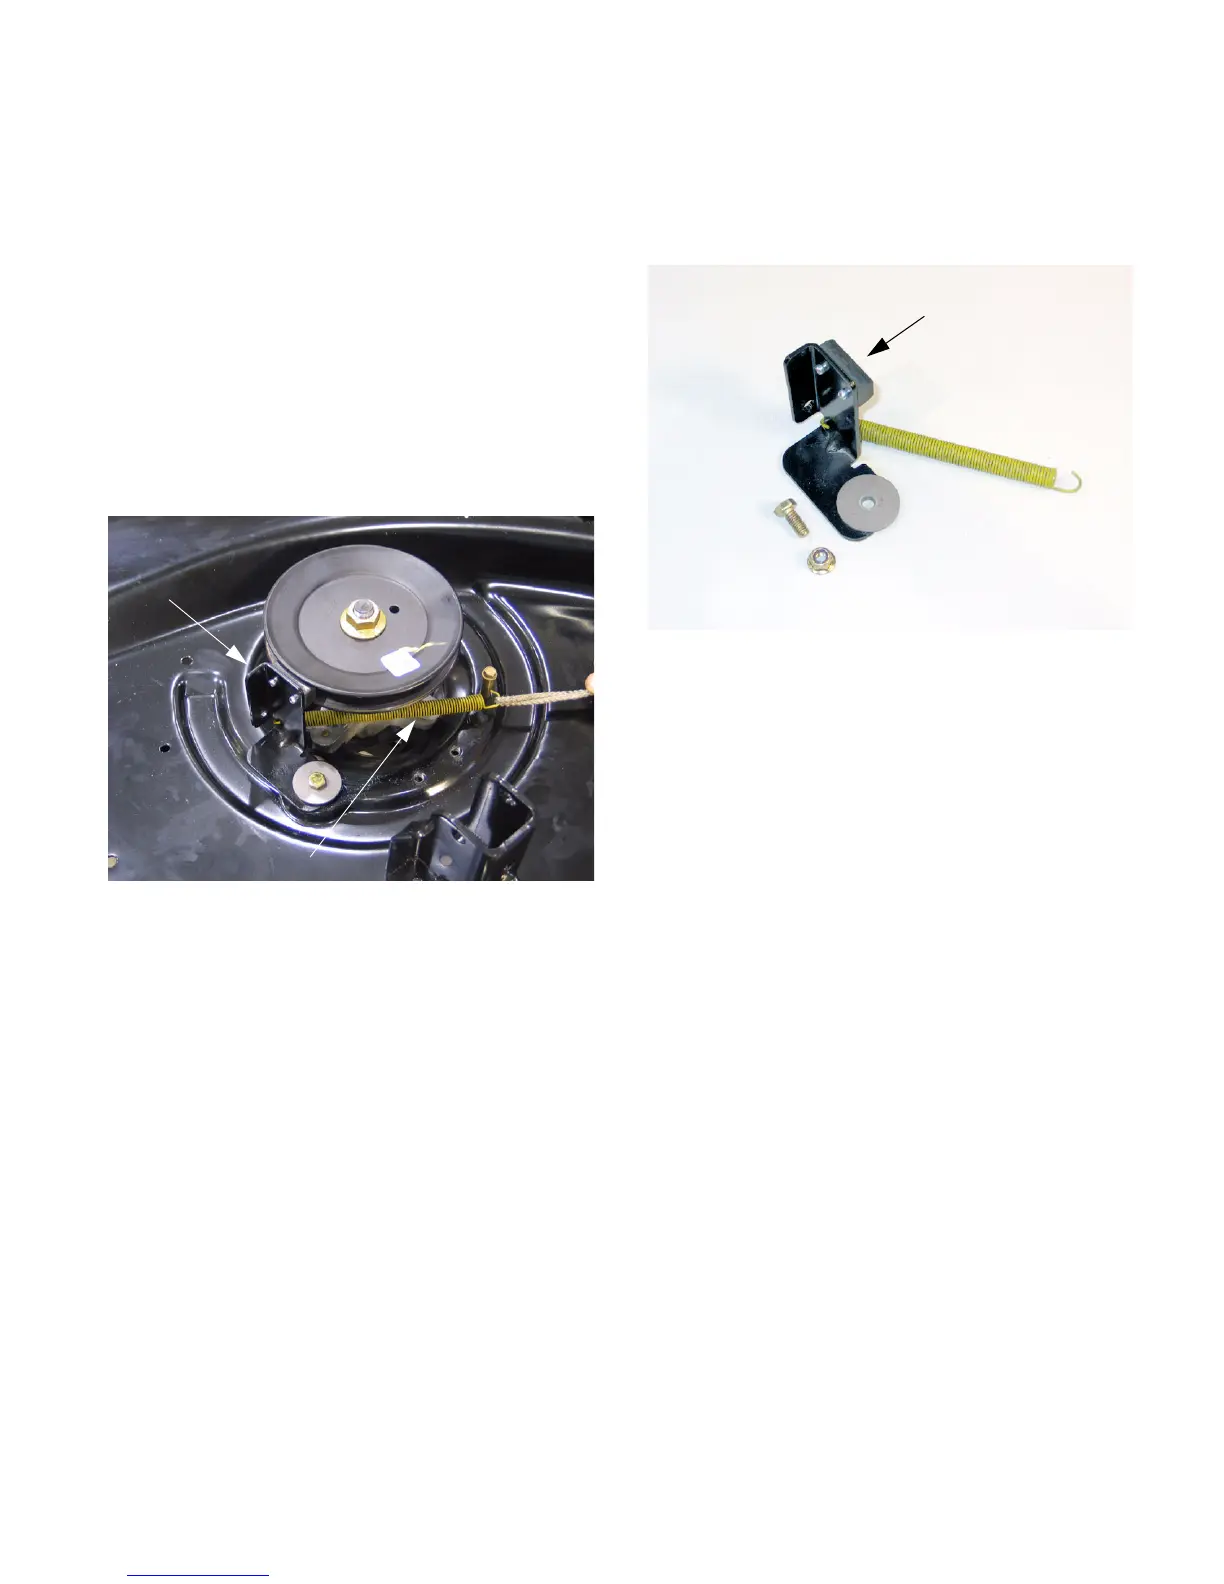
4. RIGHT SPINDLE BRAKE
4.1. Remove the brake spring attached from the deck
frame to the brake assembly at the right spindle.
See Figure 13.
NOTE: Although similar, this spring is different
from the spring on the Idler arm. This spring may
be painted yellow.
Figure 13
Brake Assembly
Brake Spring
4.2. Using a ½ inch socket and a ½” wrench remove
the brake assembly bracket. Inspect the brake
puck for wear or damage. The brake puck is riv-
eted to the bracket and must be replaced as an
assembly. See Figure 14.
5. SPINDLE REMOVAL
5.1. Remove the deck from the unit. See DECK
REMOVAL Section.
5.2. Remove the blade drive belt. See BLADE
DRIVE BELT REMOVAL Section.
5.3. Remove the deck Idler bracket and spindle
brake bracket. See DECK IDLER BRACKET
REMOVAL Section.
Figure 14
Riveted Brake Puck
www.mymowerparts.com
For Discount White Outdoor Parts Call 606-678-9623 or 606-561-4983