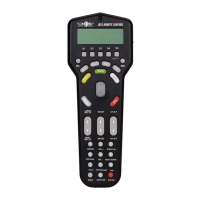
11. Select FORWARD or REVERSE
for the direction the engine is facing in
the Lash-up (the engine must already
be facing this way on the track)
12. Repeat steps 7-9 for the remaining
engines you want to add to the lash-up
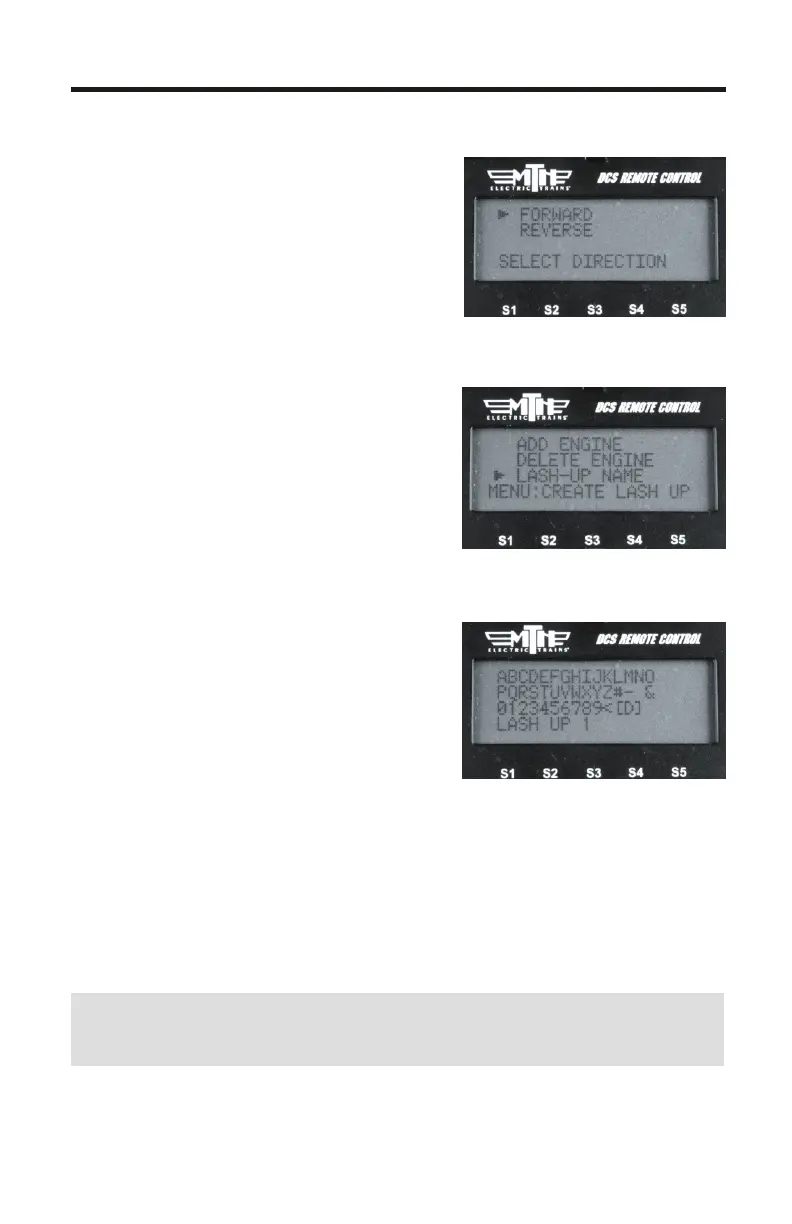
13. If you make a mistake on adding
an engine you can use the DELETE
ENGINE function to select the engine
to delete from the lash-up
14. Once you have completed adding
engine in the position and which
direction they are facing you can now
give your new lash-up a name. Select
LASH-UP NAME
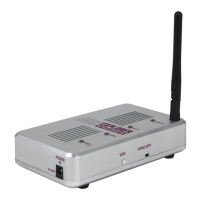
15. Enter the name of the lash-up in
16 characters or less and then select
the “D” character at the end of the list
to tell the remote you're done. If you
make a mistake while entering the lash-
up name you can use the “<” character
to backspace and correct the text
16. Now that you have completed the lash-up building process your
engines will power on and then each one will sound it's horn/whistle
three times to signify that it's received the lash-up data and is ready to
operate. Once all the engines in the lash-up have sounded their
horn/whistle the new lash-up will appear in your DCS remote in the
INACTIVE ENGINE list.
NOTE: When TMCC lash-ups are built in the DCS Remote they
Are placed at locations 91-99 in the DCS Remote
17. Press the ENG button and scroll down to the new lash-up you
built and press the thumbwheel (Select)
11
Create TMCC Lash-up Cont.