Temposonics
®
R-Series V Analog
Operation Manual
I 27 I
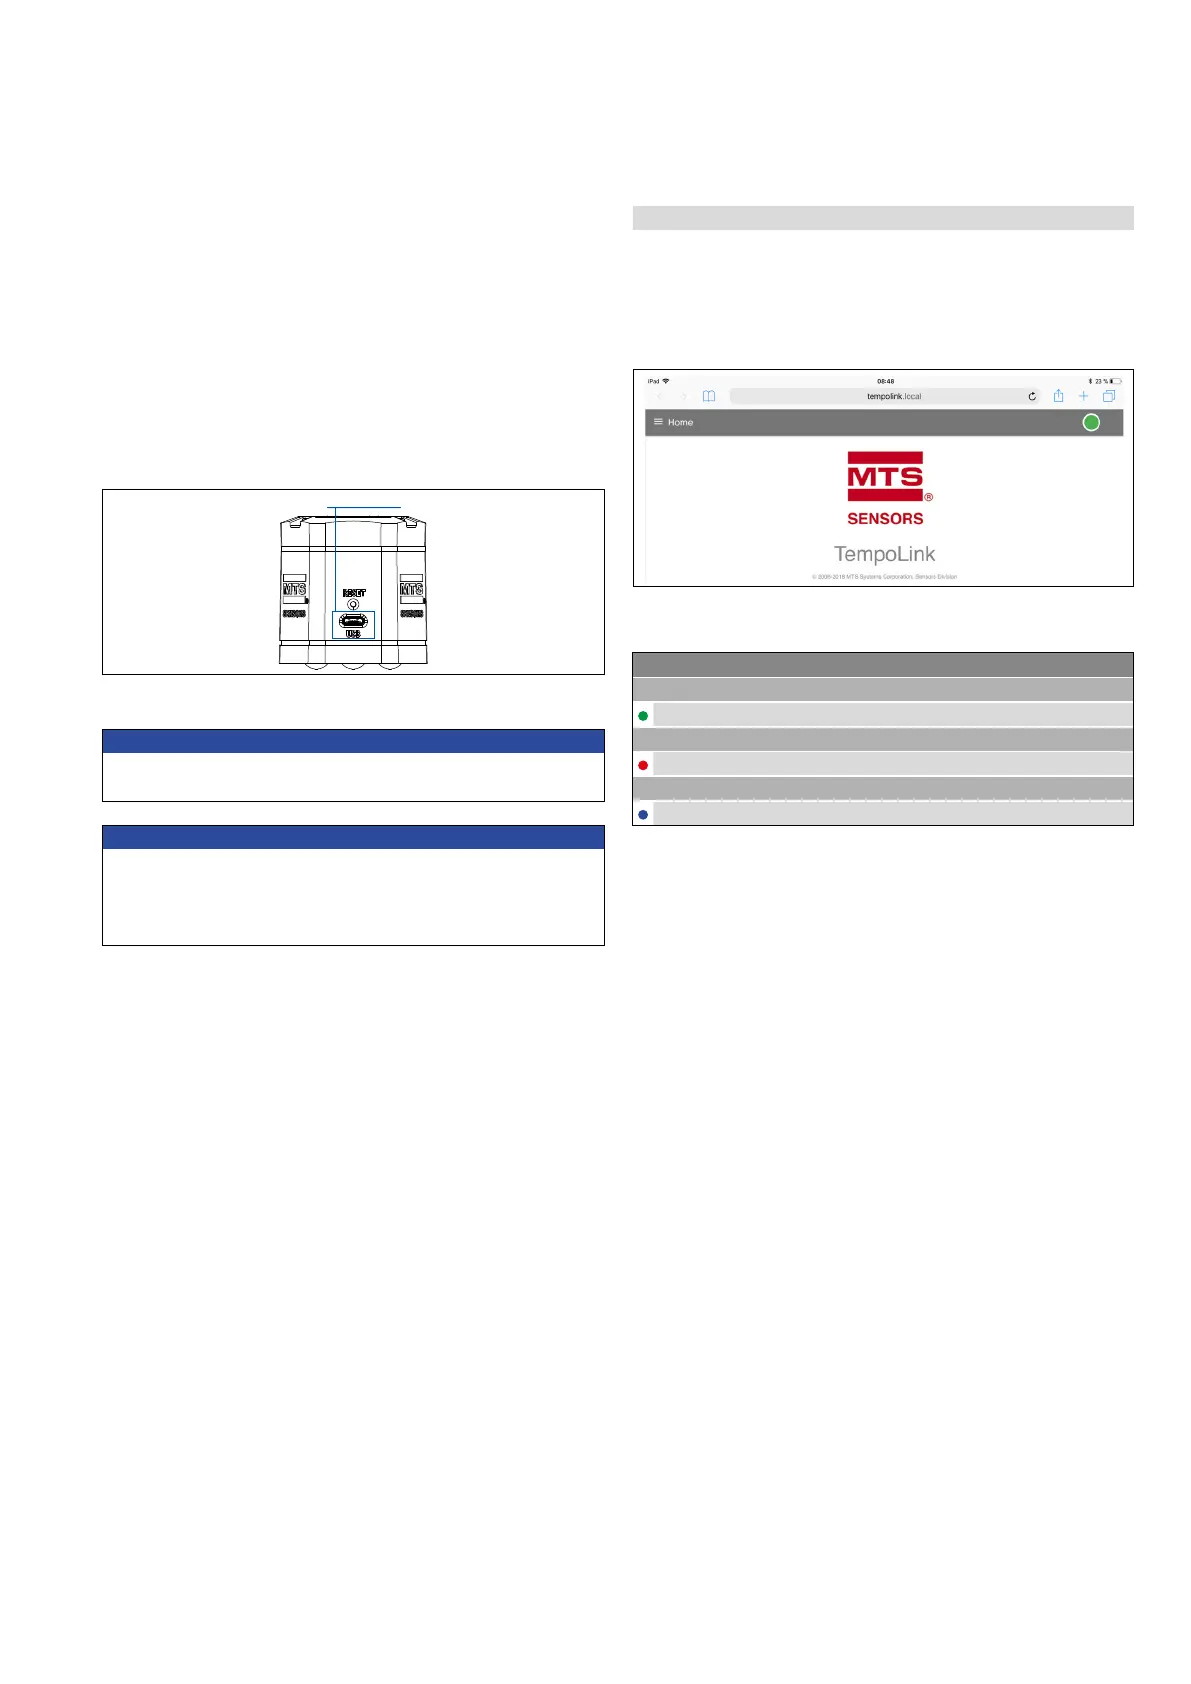
5.5.3 Establishing a connection via browser
After the connection via Wi-Fi or USB is established, open the browser
and go to the website-URL: tempolink.local/
The connection icon in the top right shows the status of the
connection between the TempoLink smart assistant and the sensor.
Connection status
Green Information
ON Connection to sensor is established
Red Information
ON Connection to sensor is not established
Blue Information
ON
Sensor in command mode
Connecting a computer via USB connection
The TempoLink smart assistant can also be connected via USB. If the
computer is Wi-Fi enabled deactivate Wi-Fi on the computer before
setting up the USB connection.
Connect the USB cable with the micro USB connector to the port
labeled “USB” on the TempoLink smart assistant. Next, connect
the USB type-A connector to a free USB port of the computer. The
USB connection simulates a network card. In the folder “network
connections” on the computer the connection is shown as “IP-over-
USB” or “Remote NDIS”.
NOTICE
Only one device can be connected to the TempoLink smart assistant
at a time in order to display the graphical user interface.
Fig. 37: USB port on the TempoLink smart assistant
NOTICE
Disable all Wi-Fi and LAN connections before connecting TempoLink
smart assistant via USB.
Connecting to the user interface may take longer if Wi-Fi and LAN
connections are active.
Fig. 38: Start page of the graphical user interface
Fig. 39: Connection status
 Loading...