AP-76942_Rev 1.0 Page 15/19
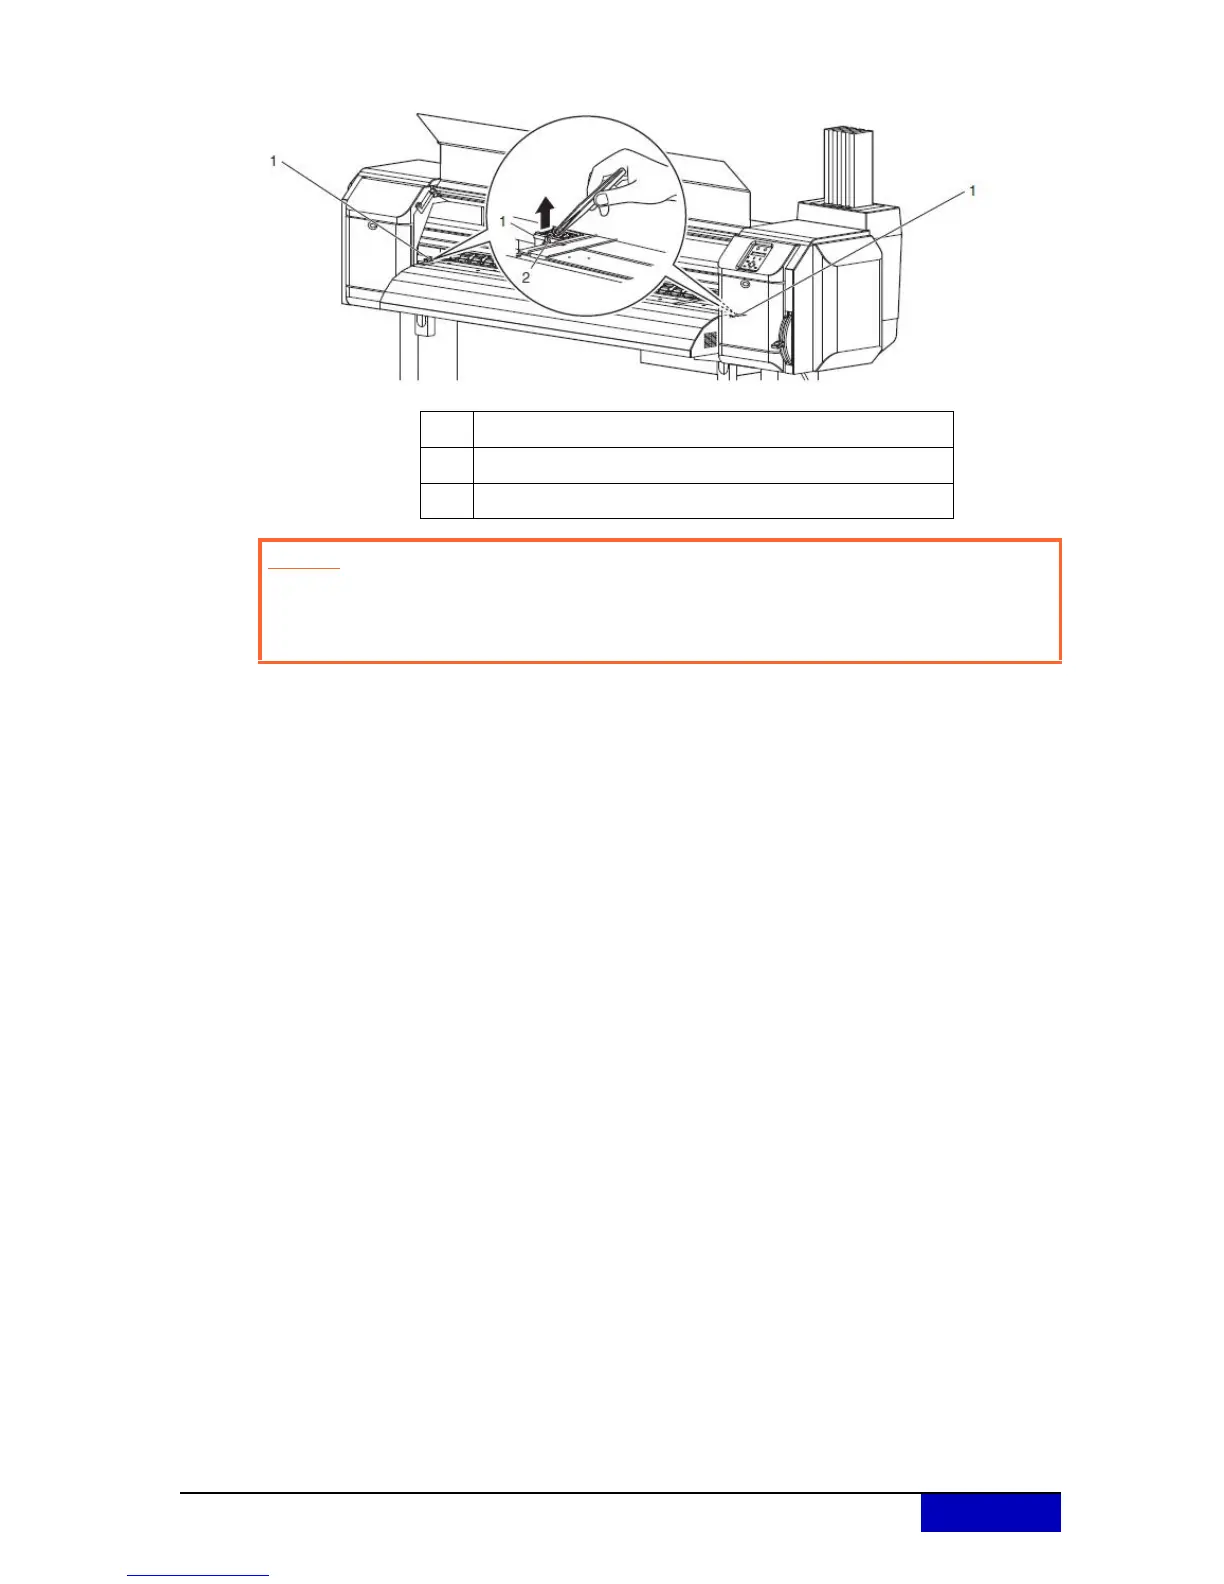
Step 5: Use tweezers to remove the flushing-box sponge.
Step 6: Install the ne
w flushing-box sponge.
Step 7: Close the front cover.
Step 8: Press the [Enter] key.
The print head returns to its original position.
“CR Mainte.: Start” is displayed.
Step 9: Press the [Menu] key.
Flushing-box sponge replacement is complete.
N° Name
1 Flushing boxes
2 Flush
ing-box sponges
Caution
Do not drop waste fluid when replacing the flushing-box sponges.
If waste fluid comes into contact with the grid roller, the surface of the grid roller
will be damaged, and the media feed function may be affected.
 Loading...