AP-76943_Rev 1.0 Page 15/19
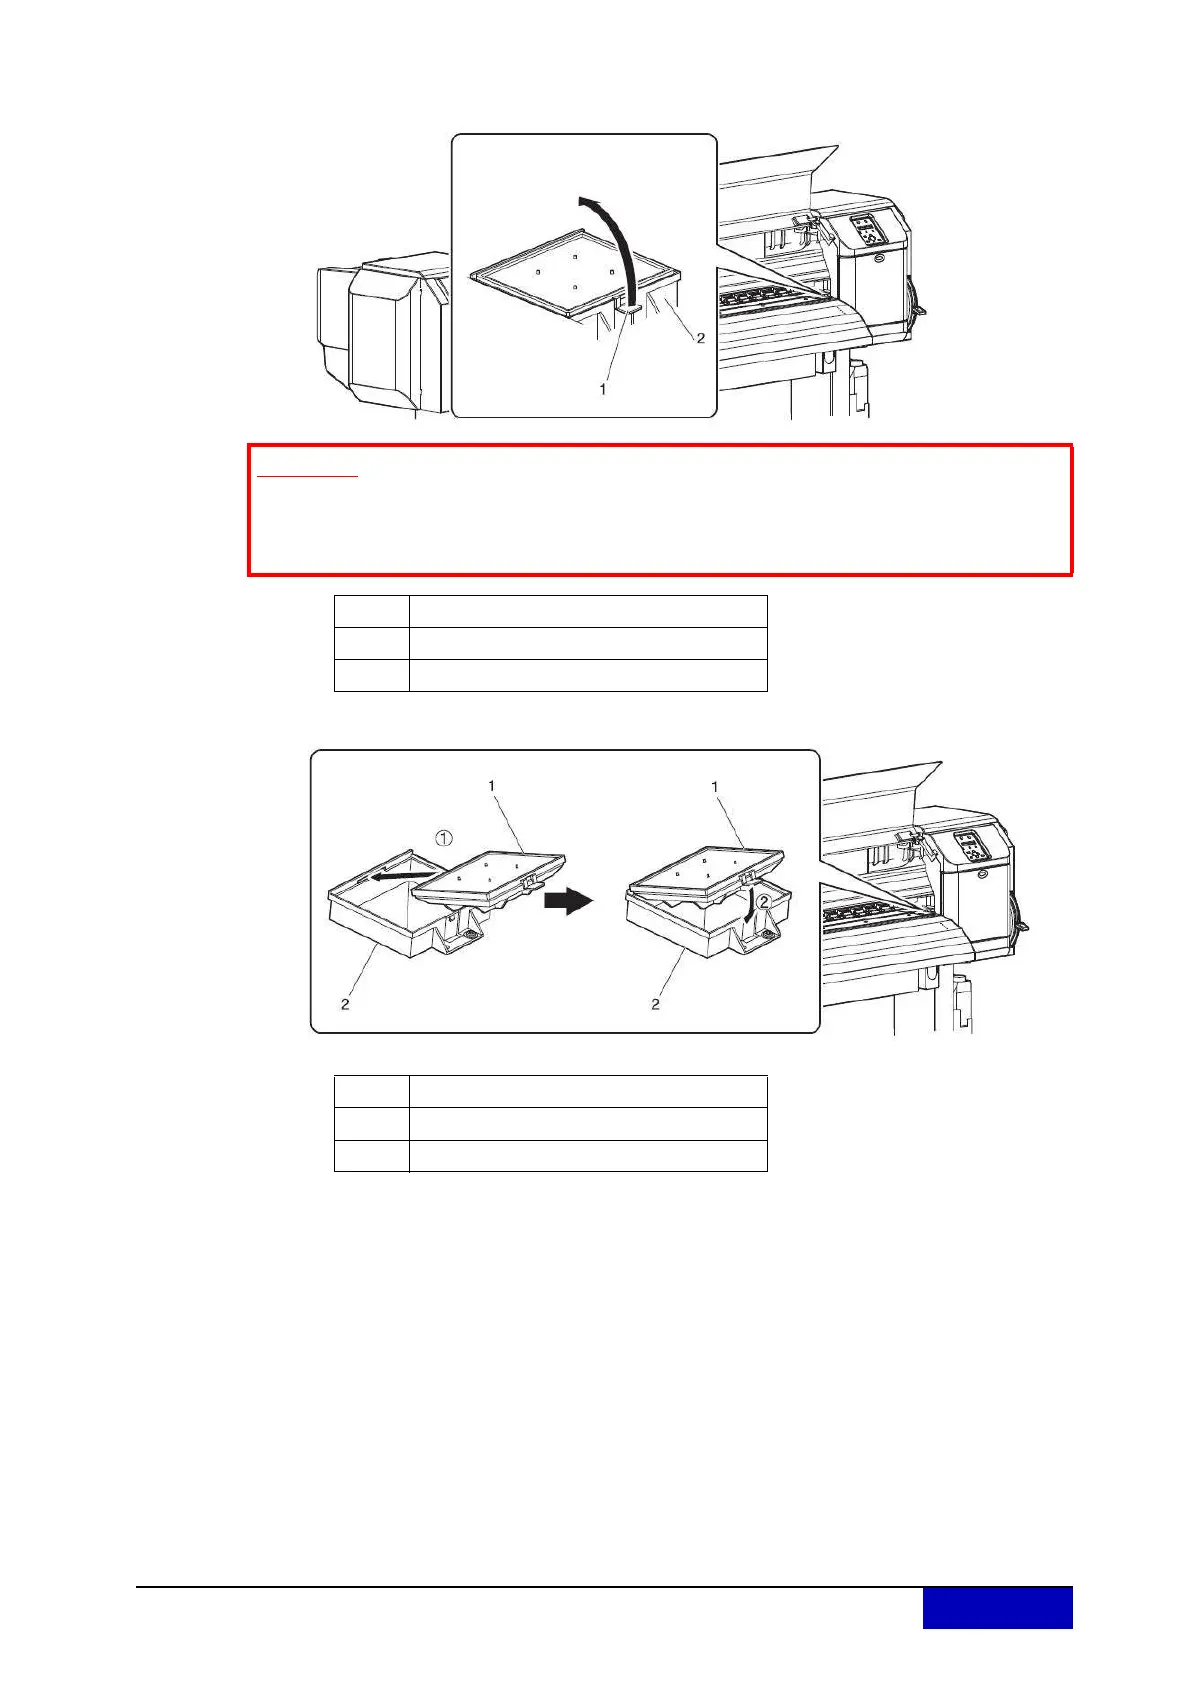
Step 5: Lift the flushing-box sponge tab and unhook. Then, remove the flushing-box sponge.
Step 6: Install the new flushing-box sponge.
Step 7: Close the front cover.
Step 8: 8. Press the [Enter] key.
Print head returns to its original position.
“CR Mainte.: Start” is displayed.
Step 9: Press the [Menu] key.
Flushing-box sponge replacement is complete.
Important
Do not spill waste fluid when replacing the flushing-box sponge. If waste fluid
comes into contact with the grid roller, it may damage its surface and affect
media feeding.
No. Name
1 Flushing-box sponge tab
2 Flushing-box
No. Name
1 Flushing-box sponge tab
2 Flushing-box