NI Digital Multimeters Getting Started Guide 14 ni.com
7. Configuring and Testing in MAX
To configure and test the DMM in MAX, complete the following steps:
1. Launch MAX (Start»All Programs»National Instruments»Measurement
& Automation).
MAX automatically detects the DMM you installed.
2. Expand Devices and Interfaces.
If you are using a DMM with the LabVIEW Real-Time Module, expand Remote Systems. Find
the target device IP address or name, expand it, and then expand Devices and Interfaces.
Note Only NI-DAQmx devices are listed under Remote Systems»Devices and Interfaces.
(Windows Vista) Windows Vista does not support Traditional NI-DAQ (Legacy) for DMMs. Refer
to the Supported Hardware section of the NI-DMM Readme file at Start»All Programs»National
Instruments»NI-DMM»Documentation to determine which operating system is compatible with
your DMM.
3. Verify that the DMM appears under Devices and Interfaces.
The DMMs appear in the NI-DAQmx and Traditional NI-DAQ (Legacy) folders in Devices and
Interfaces, as follows.
Notes If the DMM is not listed, press <F5> to refresh. If the DMM is still not listed, repeat the steps
in the 5. Installing the Hardware section. If the DMM still does not appear, visit NI Technical
Support at ni.com/support. For more information about using MAX, refer to the available help
files within MAX.
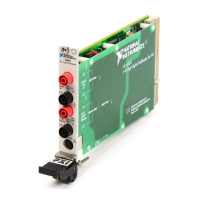
The NI PXI-4070 is supported by both NI-DAQmx and Traditional NI-DAQ (Legacy). When present
with both versions of NI-DAQ, the NI PXI-4070 is listed with a different name under the NI-DAQmx
and Traditional NI-DAQ (Legacy) folders in Devices and Interfaces.
Device Folder Name(s)
NI 4065, NI PCI-4070, NI 4071, NI 4072 NI-DAQmx
NI PXI-4070 NI-DAQmx and Traditional NI-DAQ (Legacy) *
NI 4050, NI 4060 Traditional NI-DAQ (Legacy) *
* Windows Vista does not support Traditional NI-DAQ (Legacy) for DMMs.
 Loading...