57
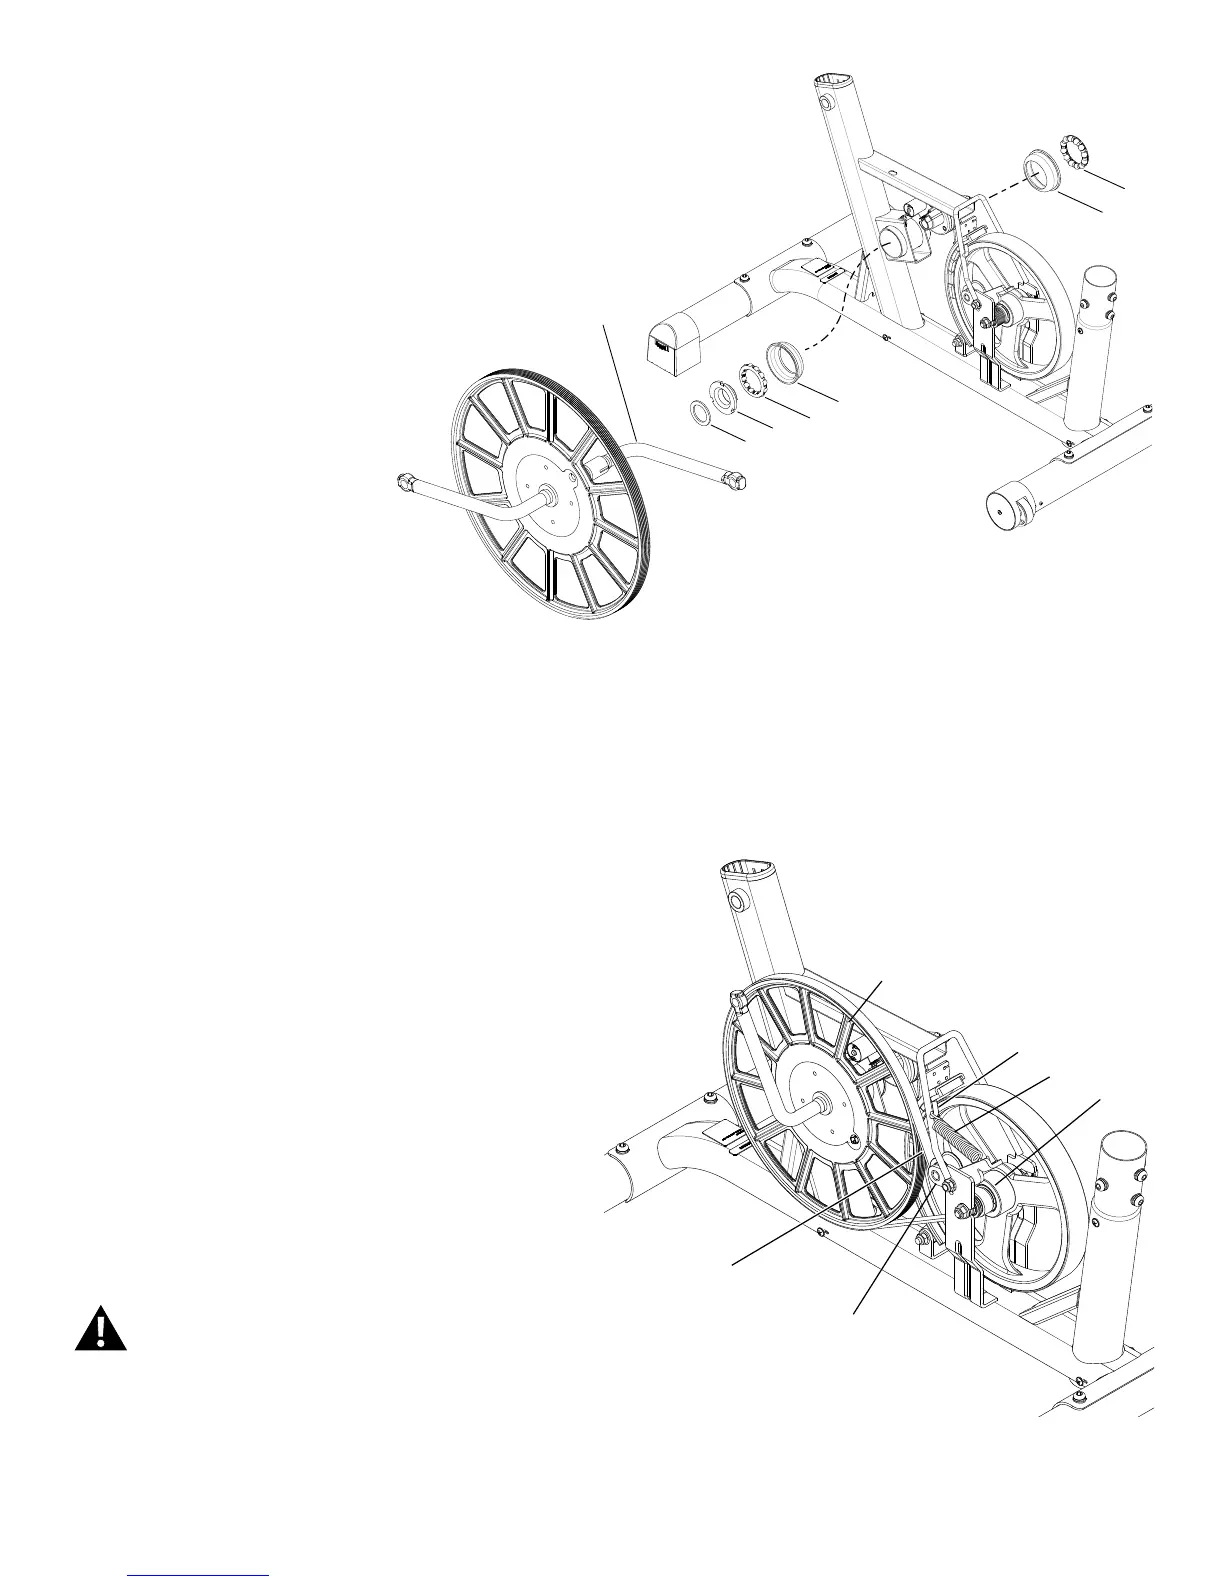
5. Carefully pull the Pulley Shaft Assembly (H) until it works out of the
Frame and releases the Washer (J), Bumper (K), Bearings (L) and Bearing
Brackets (M).
6. Installation is the reverse procedure.
NOTICE: Do not overtighten the crank hardware as this can damage
the bearings. Use these torque specs:
Bracket (G)—approx. 8Nm (6lb-ft)
Locknut (E)—approx. 25Nm (18.5 lb-ft)
7. Put the Drive Belt (B) onto the Drive Pulley (A). Make sure the Drive
Belt is aligned on the Flywheel pulley (N), Belt Tensioner (C) and Drive
Pulley. Be sure that the upper portion of the Drive Belt (B) is under the
bearings on the Belt Tensioner (C).
8. Using the needlenose pliers, reattach the Belt Tensioner spring
(C1). Make sure that the belt tension is correct. Refer to the “Belt Tension
Adjustment” section in this manual.
Note: This step may require two people.
9. Final Inspection
Inspect your machine to ensure that all hardware is tight and components
are properly assembled.
Do not use until the machine has been fully assembled and
inspected for correct performance in accordance with the
Owner’s Manual.
M
M
L
L
K
J
H
A
B
C1
D
N
C
 Loading...