11
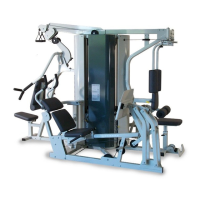
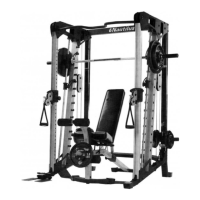
Nautilus NS300X
Step 3 Components:
Procedure:
ASSEMBLY
STEP 3
# Component Qty
13
14
15
16
17
29
57
65
69
71
72
73
74
Pec Fly Mount
Pec Fly Cam
Right Pec Fly Arm
Left Pec Fly Arm
Pec Fly Handle
Plastic Cap
Hex Bolt 3/8” x 3 1/4”L
Cap Head Allen Screw 1/2”L
1 3/8” x 1/2” Flat Washer
3/8” Flat Washer
1/2” Lock Nut
3/8” Lock Nut
Shim Washer
1
2
1
1
2
4
2
2
4
4
4
2
4
A.
Attach Pec Fly Mount (13) to Main Base Frame using the hardware
shown. Tighten hardware firmly.
B. Slide Pec Fly Cam (14) onto Left Pec Fly Arm (16) paying close
attention to the orientation shown above. Attach the Left Pec Fly
Arm (16) to the Pec Fly Mount (13) using the hardware shown. Tighten
hardware securely making sure that the Pec Fly Arm can rotate freely.
C. Repeat step B using Right Pec Fly Arm (15).
D. Install Pec Fly Handle (17) in Left Pec Fly Arm (16) using the hardware shown.
Tighten hardware securely making sure that the Pec Fly Handle (17) can rotate
freely. Install Cap Head Allen Screw (65) to Pec Fly Handle (17) as shown.
Tighten Firmly. NOTE: Make sure that the Path of the Pec Fly Handle
is similar to the path shown in the Top View.
E. Repeat step D using the Right Pec Fly Arm (15).
F. Install Plastic Cap (29) in the four locations shown. The Plastic Cap (29)
should snap into place locking around the Shim Washer (74).
17
65
69
72
74
29
73
71
57
13
15
16
14
3 1/4" L
1/2" L