www.nektartech.com Nektar Pacer User Guide 15
Preset Recall MIDI Configuration (M CFG)
Up to 16 messages for triggering can be programmed in the MIDI configuration menu when a preset is recalled. Note that you do need to
store the preset after you have created the settings you need, so they are stored with the preset that you want to trigger them with.
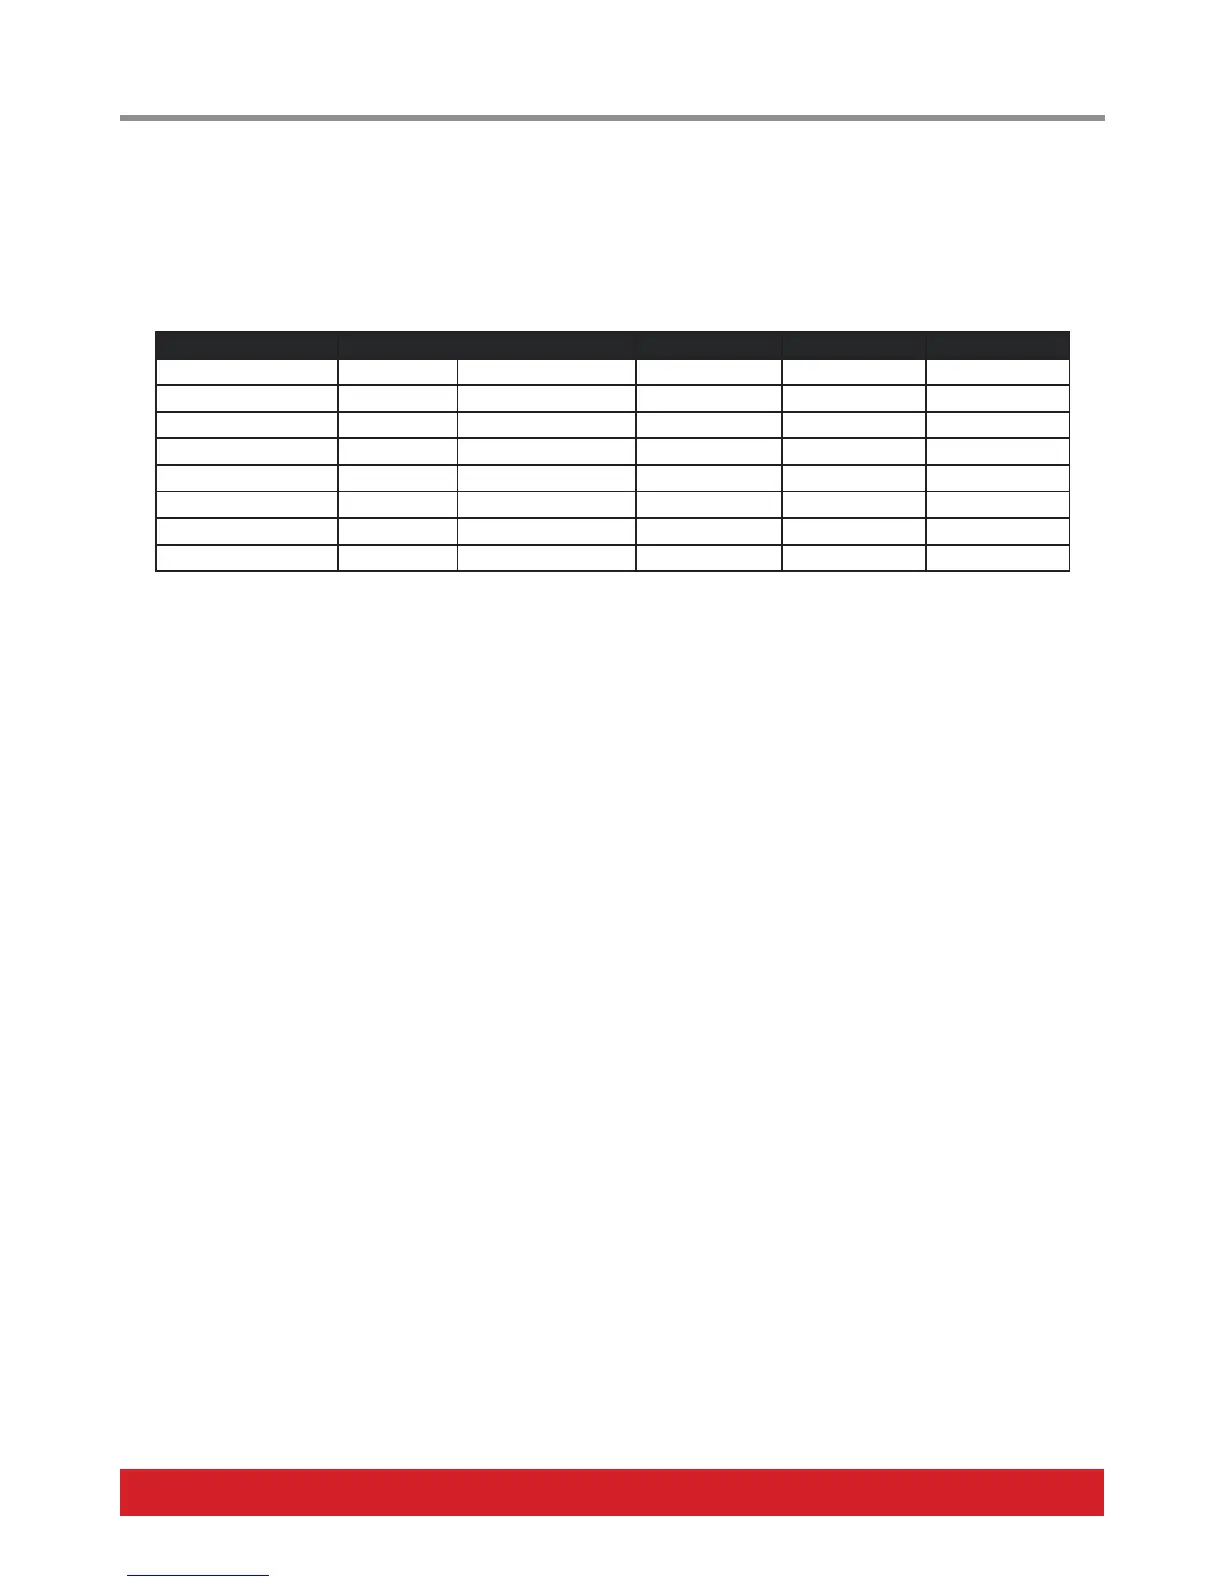
The following options are available:
Type Display Abb. Data 1 Data 2 Data 3 MIDI Channel
MIDI CC CC MIDI CC (0–127) Value (0–127) n/a 0=Global, 1-16
MIDI Note NT Note (0–127) Velocity (0–127) n/a 0=Global, 1-16
MIDI Program & Bank PGBNK Program (0–127) Bank LSB (0–127) Bank MSB (0–127) 0=Global, 1-16
MIDI NRPN Coarse NRPNC Value (0–127) LSB (0–127) MSB (0–127) 0=Global, 1-16
MIDI NRPN Fine NRPNF Value (0–127) LSB (0–127) MSB (0–127) 0=Global, 1-16
MIDI Machine Control MMC Device ID (0–127) Command (0–127) n/a n/a
Pacer Relay Outputs RELAY Mode (nO/nC/Lt)* Select (1–4) n/a n/a
O OFF n/a n/a n/a n/a
This menu works very similar to the Control Edit menu and these are the steps you need to go through to set it up:
• From the top level menu, move the [Data Encoder] until “Save” appears in the display.
• Press the [Data Encoder] and “Store” appears in the display.
• Move the [Data Encoder] and select “M CFG”
• Press the [Data Encoder] to select the menu.
• The display now shows “1” in the display. This represents the first message of 16 that you can program. Move the [Data Encoder] to
select a different message number but if this is the first message you will be assigning, simply press the [Data Encoder] to select.
• “Type” now appears in the display. Press the [Data Encoder] to select and then move the [Data Encoder] following to select one of the
options in the chart above.
• Press [Data Encoder] when you have found the message type you want.
• Use the [Data Encoder] to select and set the Data options and MIDI Channel as per the chart above.
• To program the next message, press the [Preset] switch and select the next message number.
• When all messages have been configured press [Preset] until you see “Store” in the display. You will need to save the preset or all
settings will be lost when you recall a different preset.
• To exit the Save menu completely at any time, press [Preset] until you see “PACER” in the display.
 Loading...