6 Nektar Pacer User Guide www.nektartech.com
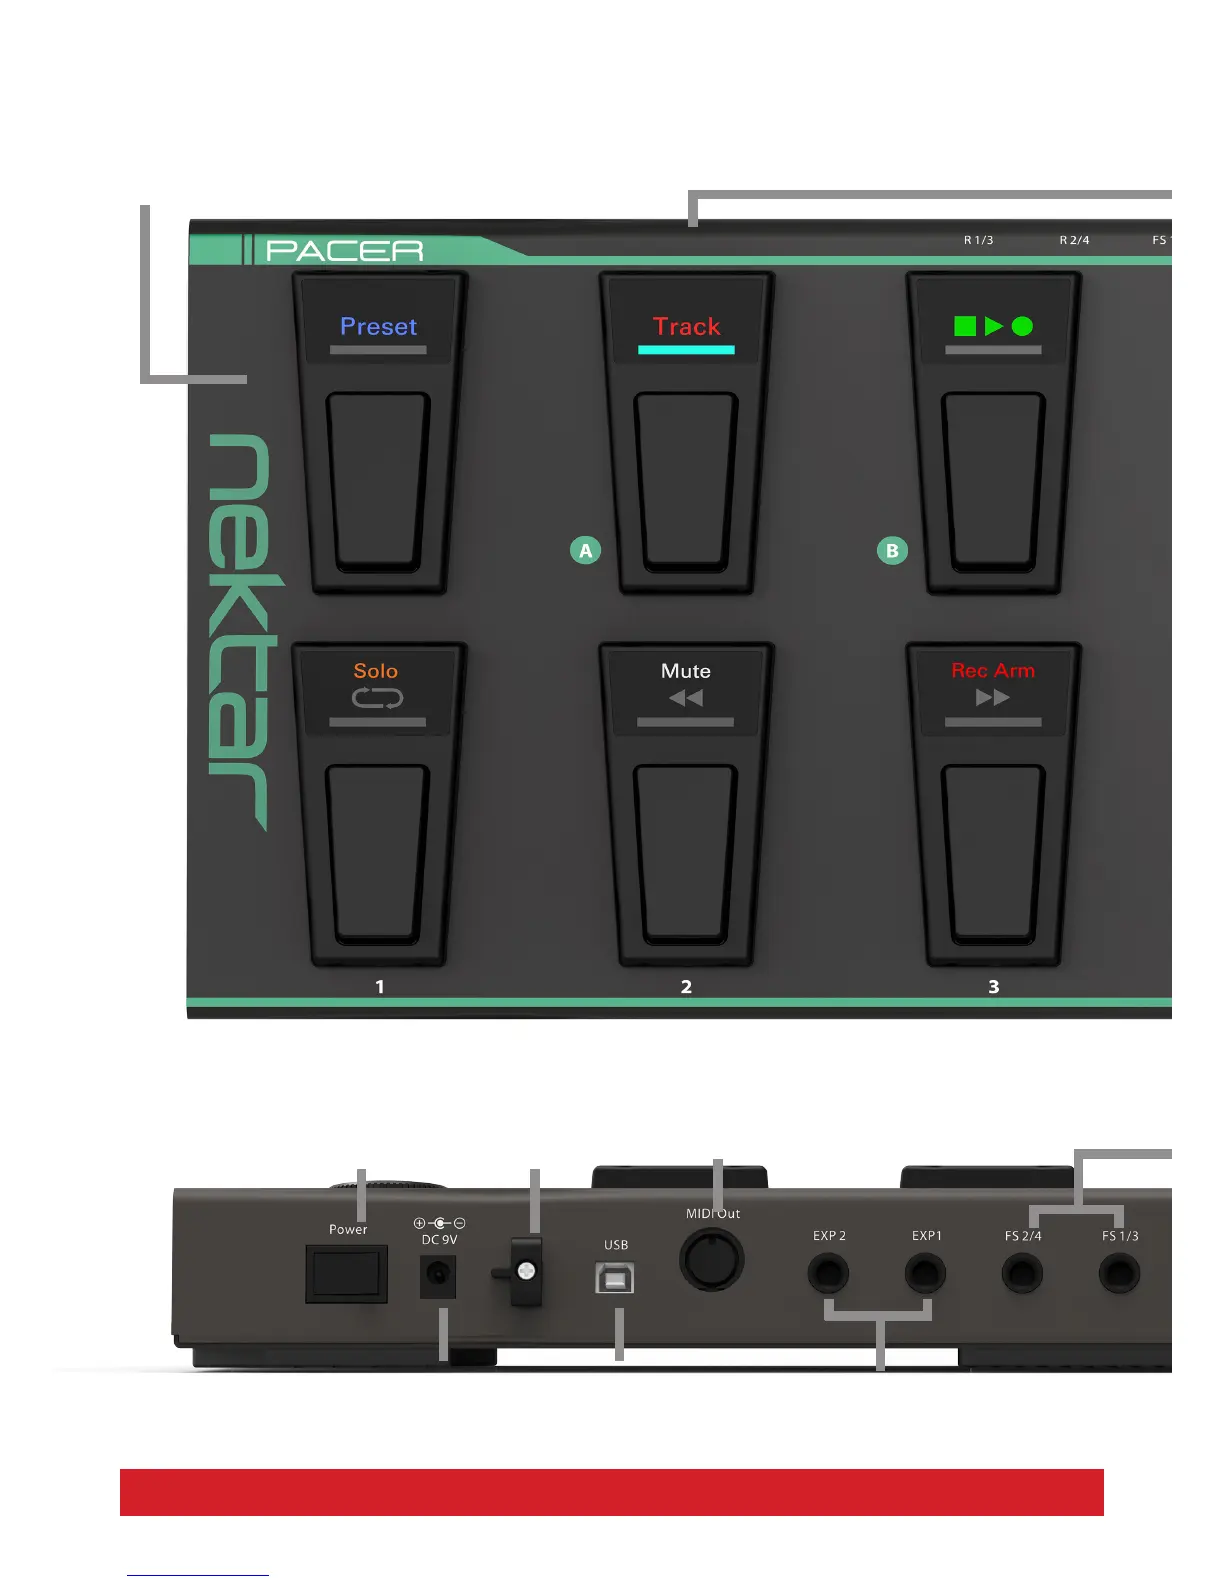
MIDI Output Jack
Connect external MIDI equipment.
Can be used as USB MIDI interface as
well as for direct control - or both.
Cable Tie
Tie your USB or PSU cable.
Unscrew with screwdriver and
tighten again for secure t.
Expression Pedal sockets 1 & 2
Connect standard expression pedals for
additional real-time control.
USB Connector
Connect to USB host/computer.
Unit powered via USB.
Pacer Functional Overview
Power Supply
Power supply socket,
9V / 600mA, center negative,
2.1mm barrel connector.
(PSU optional)
Power On/O
Preset Switch
Press and hold for 2 seconds. Then select a preset using the switches
by rst selecting bank A/B/C/D, followed by preset number 1-6.
[Preset] is also the back button when navigating Pacer menus.
Switches A-D
Factory preset assignments for these 4 switches are:
A: Track preset (for DAW control). Default is MCU, if MCU is
activated in your DAW it will work instantly.
B: Transport preset (for DAW control). Default is MCU, if MCU is
activated in your DAW it will work instantly.

 Loading...