www.nektartech.com Nektar Pacer User Guide 7
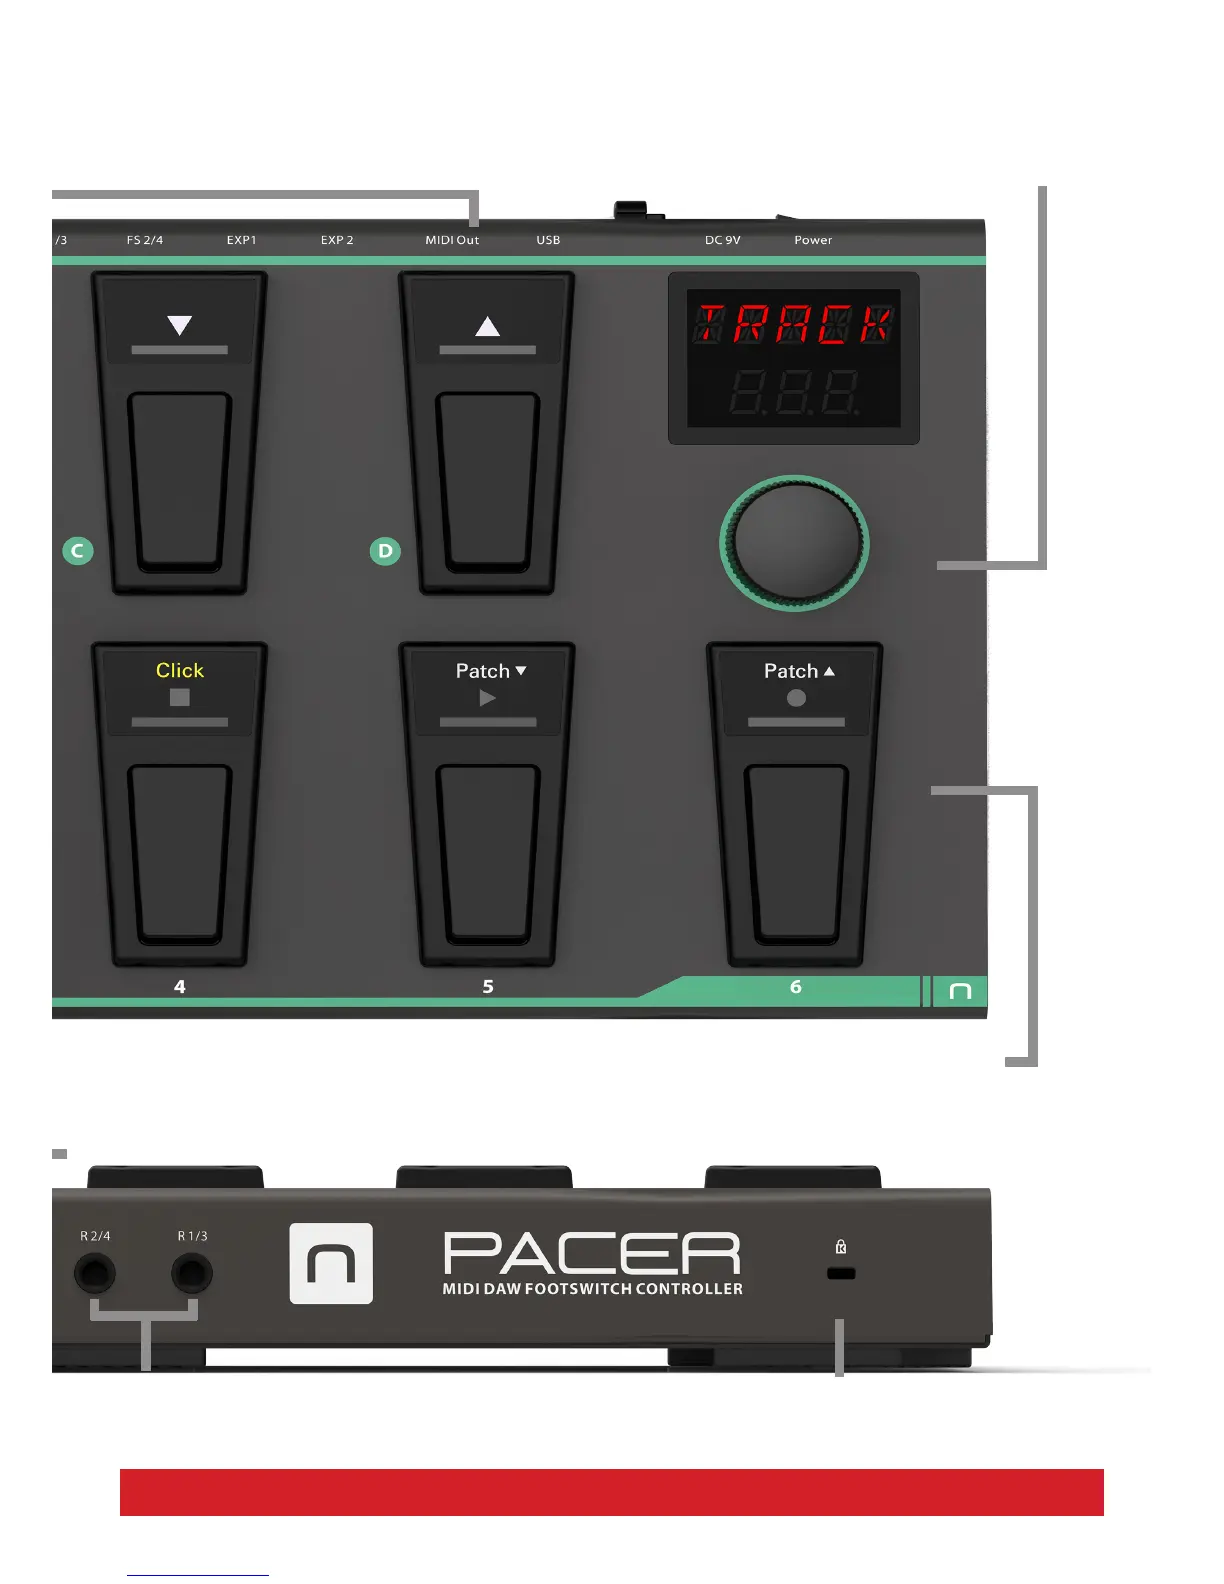
Footswitch sockets 2/4 and 1/3
2 TRS 1/4” jack sockets allow connection
of up to 4 external footswitch pedals.
Kensington Lock
Relay sockets 2/4 and 1/3
1/4” TRS jacks, require Y-splitter/insert
cables to connect all 4 relays. 1/4” TS
jacks can be used to connect 2 relays.
Data Encoder/Push Select
Turn Data Encoder to scroll through menus
and options.
Press the encoder cap to select.
Switches 1-6
Assignable switches can be programmed to send MIDI messages, control one
of the 4 relays or load presets. When DAW Transport or Track functions are
assigned, the top and middle row icons are illuminated.
C: Load previous preset. If Track or Transport are active, C and D are used to
select tracks in your DAW.
D: Load next preset. Each of the switches can be congured to send any other
function or MIDI message.
 Loading...