Do you have a question about the NETGEAR Nighthawk RS400 and is the answer not in the manual?
Steps to unpack the router and identify package contents.
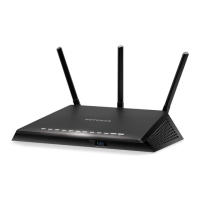
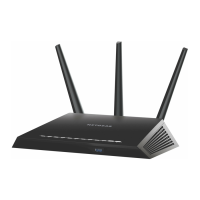
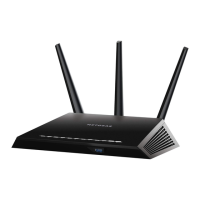
Instructions for connecting the router's three antennas.
Description of status LEDs and control buttons on the router's top panel.
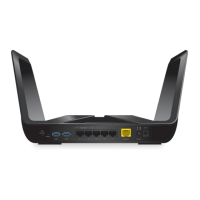
Overview of connectors and buttons on the router's rear panel.
Details about information found on the router's bottom and top panel labels.
Guidelines for optimal placement of the router for best WiFi performance.
Step-by-step instructions for connecting the router to power and network.
Methods for connecting to the router via wired Ethernet or WiFi.
Explanation of different login types: ISP, WiFi, NETGEAR account, and router login.
How to access router settings using a web browser.
Steps to automatically configure the router's internet connection via a web browser.
Procedure to log in to the router's web interface for management.
Instructions for changing the router's web interface language setting.
Guide to using the setup wizard for automatic internet configuration.
Steps for manually configuring internet connection settings.
Configuring internet settings for PPPoE connections requiring login credentials.
Configuring internet settings for PPTP or L2TP connections with login.
Steps to configure IPv6 internet connection types.
Explanation and adjustment of the Maximum Transmission Unit (MTU) setting.
Overview of NETGEAR Armor features and management options.
Steps to activate NETGEAR Armor via the Nighthawk mobile application.
Accessing and modifying NETGEAR Armor settings using the Nighthawk app.
Accessing and modifying NETGEAR Armor settings through the web portal.
Steps to activate and manage NETGEAR Armor through the router's web interface.
Navigating to the NETGEAR Armor portal from the router's web interface.
Temporarily disabling or re-enabling NETGEAR Armor security features.
Setting up parental controls using Circle with Disney.
Configuring rules to permit or deny internet access for devices.
Managing lists of devices allowed or blocked from network access.
Blocking specific websites by entering keywords or domain names.
Removing keywords from the list used for blocking internet sites.
Exempting a specific computer from internet access blocking rules.
Configuring rules to block specific internet services based on type.
Setting schedules for blocking internet sites and services.
Configuring the router to send email alerts for security events.
Configuring Dynamic Quality of Service for better traffic management.
Prioritizing WiFi voice and video traffic using WMM QoS settings.
Enabling UPnP to enhance network connectivity for devices.
Managing Smart Connect to automatically select the fastest WiFi band.
Configuring Wide Area Network (WAN) settings for internet connectivity.
Configuring a default DMZ server for specific application needs.
Adjusting Local Area Network (LAN) IP address and subnet mask settings.
Modifying the router's name displayed on the network.
Configuring the DHCP server's IP address pool for network devices.
Turning off the router's DHCP server to use an external one.
Assigning static IP addresses to specific devices on the network.
Configuring the router to function as a WiFi access point.
Configuring the router to operate in bridge mode for wireless connectivity.
Restoring the router's mode to default router operation.
Creating bridges for port groups or VLAN tags for specific network needs.
Configuring static routes for advanced network traffic management.
Using WPS to easily connect WiFi devices without a password.
Configuring essential WiFi network parameters like SSID and security.
Modifying the WiFi password and selecting security protocols like WPA2.
Configuring enterprise-level WiFi security using RADIUS servers.
Configuring outdated WEP security for WiFi networks.
Adjusting WiFi data rates (Mbps) for different bands.
Adjusting the router's WiFi signal transmission power.
Creating a separate WiFi network for guests with custom security.
Enabling or disabling the router's 2.4 GHz and 5 GHz WiFi radios.
Scheduling when the WiFi signal should be turned on or off.
Configuring default settings for Wi-Fi Protected Setup (WPS).
Managing implicit beamforming to improve WiFi signal quality.
Managing airtime fairness to ensure equal network time for clients.
Managing MU-MIMO for improved performance with multiple clients.
Adjusting advanced WiFi parameters for testing and configuration.
Checking for and installing new firmware versions for the router.
Configuring automatic firmware updates for the router.
Steps to manually install a specific firmware version on the router.
Instructions for changing the router's administrator password.
Setting up password recovery options for the router admin account.
Procedure to recover a forgotten router administrator password.
Backing up, restoring, or resetting the router's configuration settings.
Displaying general information about router status and network settings.
Viewing traffic statistics for the router's Internet port.
Verifying the current status of the router's internet connection.
Accessing and reviewing logs of router activity and events.
Listing all devices currently connected to the router's network.
Using traffic meter to monitor and control internet data usage.
Configuring the router's time zone for accurate logging and scheduling.
Setting a preferred NTP server for network time synchronization.
Customizing LED behavior on the router for reduced distraction.
Resetting the router to its original factory default configuration.
Specifications for USB storage devices compatible with the router.
Steps for physically connecting a USB storage device to the router.
Methods to access connected USB storage devices from Windows.
Assigning a drive letter to a USB storage device in Windows.
Steps to access USB storage devices connected to the router from macOS.
Using ReadySHARE Vault software for automated computer backups.
Configuring FTP access for file transfer within the local network.
Browsing shared folders on a connected USB storage device.
Creating new shared folders on a USB storage device.
Modifying settings for existing shared network folders on USB devices.
Setting up router to share only approved USB devices for security.
Accessing files on USB storage remotely via ReadyCLOUD service.
Establishing a VPN connection to securely access the network remotely.
Configuring Dynamic DNS services for VPN access.
Creating a new account for a Dynamic DNS service.
Using an existing Dynamic DNS account for VPN connections.
Modifying existing Dynamic DNS account settings.
Enabling and configuring the router for OpenVPN service.
Installing OpenVPN client utility and configuration files on devices.
Networking prerequisites for establishing VPN connections.
Establishing a VPN tunnel from a Windows computer to the router.
Accessing home internet service remotely via VPN.
Restricting VPN client access to only the home network, not the internet.
Configuring port forwarding rules for services and applications.
Creating custom rules for port forwarding specific services.
Modifying existing port forwarding rules.
Deleting port forwarding rules that are no longer needed.
Configuring port triggering rules for dynamic port management.
Creating custom rules for port triggering services.
Modifying existing port triggering rules.
Setting the timeout period for open ports in port triggering.
Temporarily disabling port triggering without removing rules.
Deleting port triggering rules that are no longer required.
General tips for troubleshooting common router issues.
Recommended sequence for restarting network devices to resolve issues.
Verifying physical connections for power and network integrity.
Ensuring WiFi settings on devices match router settings.
Verifying computer/device network settings for router connectivity.
Interpreting router LED status indicators for troubleshooting.
Steps to resolve issues preventing login to the router's web interface.
Adding security exceptions in browsers for router access.
Diagnosing problems with loading web pages despite internet access.
Troubleshooting issues where router configuration changes are not retained.
Diagnosing and resolving problems with WiFi device connectivity.
Using the ping utility to test network connectivity and diagnose issues.
Details of the router's default factory configuration settings.
Specifications of the router including hardware and performance metrics.
| NAT functionality | Double firewall protection (SPI and NAT) |
|---|---|
| DoS attack prevention | Yes |
| VPN support | Secure access to your home network away from home |
| Cabling technology | 10/100/1000Base-T(X) |
| Networking standards | IEEE 802.11a, IEEE 802.11ac, IEEE 802.11b, IEEE 802.11g, IEEE 802.11n |
| Ethernet LAN data rates | 10, 100, 1000 Mbit/s |
| Ethernet LAN interface type | Gigabit Ethernet |
| DSL WAN | - |
| WAN connection type | RJ-45 |
| Wi-Fi band | Dual-band (2.4 GHz / 5 GHz) |
| Wi-Fi standards | 802.11a, 802.11b, 802.11g, Wi-Fi 4 (802.11n), Wi-Fi 5 (802.11ac) |
| Top Wi-Fi standard | Wi-Fi 5 (802.11ac) |
| WLAN data transfer rate (max) | 1625 Mbit/s |
| WLAN data transfer rate (first band) | 600 Mbit/s |
| Product type | Tabletop router |
| Product color | Black |
| LED indicators | Power |
| Flash memory | 128 MB |
| Internal memory | 256 MB |
| Processor cores | 2 |
| Processor frequency | 1 MHz |
| USB 2.0 ports quantity | 1 |
| Ethernet LAN (RJ-45) ports | 4 |
| Power source type | DC |
| Package depth | 348 mm |
| Package width | 256 mm |
| Package height | 79 mm |
| Package weight | 1450 g |
| Number of products included | 1 pc(s) |
| Antennas quantity | 3 |
| Cables included | DC, LAN (RJ-45) |
| Browser supported | Internet Explorer, Microsoft Edge, Google Chrome, Firefox, Safari |
| Windows operating systems supported | Windows 10, Windows 2000, Windows 7, Windows 8, Windows Vista, Windows XP |
| Master (outer) case width | 190 mm |
| Master (outer) case height | 298 mm |
| Master (outer) case length | 380 mm |
| Master (outer) case weight | 380 g |
| Depth | 184.5 mm |
|---|---|
| Width | 285 mm |
| Height | 50 mm |
| Weight | 750 g |