Do you have a question about the NETGEAR RND4000 - ReadyNAS NV+ NAS Server and is the answer not in the manual?
Details typographical conventions, message formats, and manual scope for the NETGEAR ReadyNAS User Guide.
Explains how to navigate and utilize the features of the HTML version of the manual.
Provides instructions for printing pages or chapters from the manual using HTML or PDF formats.
Configure network interface settings like IP address, subnet mask, speed, duplex, and MTU for ReadyNAS.
Set the ReadyNAS hostname, default gateway, and DNS settings for network identification and resolution.
Configure the ReadyNAS to act as a DHCP server to assign IP addresses to network clients.
Configure administrator password, security modes, and password recovery features for the ReadyNAS.
Select between Share, User, or Domain security modes to manage access and authentication for the ReadyNAS.
Manage user and group accounts, including creating groups and setting disk quotas for access control.
Configure network file sharing services like CIFS, NFS, AFP, FTP, HTTP, and Rsync for client access.
Learn about ReadyNAS RAID technologies, Flex-RAID and X-RAID, for managing data storage volumes.
Schedule and manage snapshots for data backup and recovery, understanding their usage and space requirements.
Manage network shares, including adding, deleting, and fine-tuning access permissions for each share.
Set up and manage automated backup tasks for the ReadyNAS, including source, destination, and schedule.
Configure the ReadyNAS to act as a print server for connected USB printers, supporting CIFS/SMB and IPP.
Configure system settings including clock, alerts, network protocols (SNMP, SMTP), performance, language, and updates.
Set the system timezone, date, and time for accurate file timestamping and logging.
Configure email alerts for system events like disk failures, quota violations, or low disk space warnings.
Optimize ReadyNAS performance by adjusting settings related to journaling, OS compatibility, and write caching.
Learn how to perform firmware updates for the ReadyNAS, either remotely or via local file upload.
Configure power saving features like disk spin-down, power timers, and UPS integration for the ReadyNAS.
Options for powering off, rebooting, or performing system checks on the ReadyNAS device.
Accessing ReadyNAS shares from a Windows operating system via hostname or IP address.
Accessing ReadyNAS shares on MAC OS X using AFP protocol via Finder's Go menu.
Connecting to ReadyNAS AFP shares on Mac OS X using the Bonjour service for network discovery.
Accessing ReadyNAS shares on Mac OS X via AppleTalk protocol by selecting the NAS device in Network.
Accessing ReadyNAS shares on Mac OS 9 using Connect to Server from the Finder menu.
Mounting ReadyNAS shares on Linux/Unix clients using the NFS protocol via command line.
Accessing ReadyNAS shares through a web browser using HTTP or HTTPS protocols.
Accessing ReadyNAS shares using FTP or FTPS (FTP-SSL) for file transfer.
Accessing ReadyNAS shares via Rsync protocol for efficient file transfer and backup.
Connecting to ReadyNAS for media streaming via UPnP AV or Home Media Streaming Server services.
View the overall health of the ReadyNAS, including disk status, fan, temperature, and UPS.
Detailed view of disk, fan, temperature, and UPS status, with access to disk SMART logs.
Access and clear system management logs, with an option to download all logs for analysis.
Procedure for identifying and replacing a failed disk in various ReadyNAS models.
Guidance on ordering replacement disks, noting vendor, model, and warranty status.
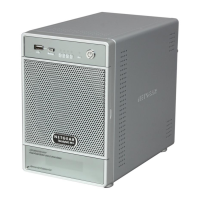
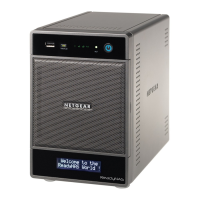
Step-by-step guide for replacing a failed disk in the ReadyNAS NV+ using hotswap bays.
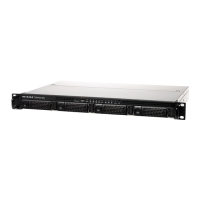
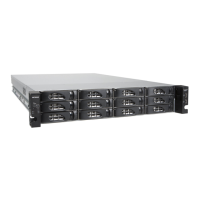
Instructions for replacing a failed disk in the ReadyNAS 1100, noting hotswap capability.
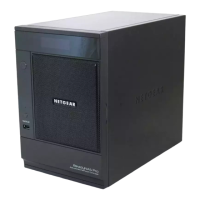
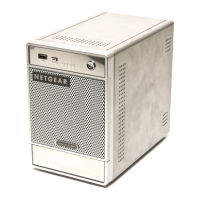
Procedure for replacing a failed disk in the ReadyNAS 600/X6, with variations for Rev A and Rev B.
Process of RAID volume resynchronization after replacing a failed disk.
Functions of the system reset switch: firmware reinstallation, factory default, and RAID mode change.
Guide to configuring RAID setups (X-RAID, RAID 0/1/5) on ReadyNAS 1100 and NV+ models.
Instructions for backing up data from the ReadyNAS to a connected USB drive.
Details on the backup button functionality for the ReadyNAS1100 using the front USB port.
Details on the backup button functionality for the ReadyNAS NV+ using the front USB port.
Procedure for safely removing the system module from the ReadyNAS 1100 unit.
Methods for changing user passwords, either by administrator or by users themselves.
Explanation of RAID Level 0, focusing on its striping for performance but lack of redundancy.
Description of RAID Level 1, highlighting its mirroring for redundancy and capacity limitations.
Details on RAID Level 5, emphasizing balance of capacity, performance, and redundancy.
Overview of X-RAID technology, focusing on its expandability and media streaming optimization.
Restrictions and valid formats for domain or workgroup names in the ReadyNAS.
Valid formats and restrictions for host names, including short and fully-qualified names.
Rules for creating share names, including allowed characters, reserved names, and Unicode support.
Constraints for setting share passwords, including allowed characters and length limits.
Guidelines for naming user or group accounts, including character sets and reserved names.
| Model | RND4000 |
|---|---|
| Device Type | NAS Server |
| Form Factor | Desktop |
| Drive Bays | 4 |
| RAID Levels | 0, 1, 5, X-RAID |
| RAM | 256 MB |
| File System | EXT3 |
| Operating Humidity | 20% to 80% non-condensing |
| Maximum Internal Raw Capacity | 8 TB |
| Supported Drive Types | SATA |
| Protocols | CIFS/SMB, AFP, NFS, FTP, HTTP, HTTPS |
| Operating Temperature | 0 to 40 °C |
| Interfaces | 1 x Gigabit Ethernet, 3 x USB 2.0 |
| Power Supply | External AC adapter |