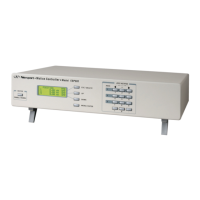
December 2019 29 LDC-3706 Series Laser Controller
Operating a Laser in Constant Power Mode
The LDC-3706 Laser Controllers allows operation of the laser current source driver in a Constant
Power mode. In this mode, the controller drives current to the laser to the extent required to reach a
setpoint power value (in mW). The control loop feedback parameter is photodiode current, which the
controller converts into optical power via the user-defined Photodiode Responsivity Parameter. If
laser power changes due to internal or external environmental conditions, the controller will increase
or decrease the current to the laser (as appropriate) in order to maintain the power setpoint.
1. Plug the LDC-3706 instrument into an appropriate AC power source supplying the correct
mains voltage and frequency for the instrument (refer to the rear panel for the correct ratings)
2. Turn on the LDC-3706. The laser output will be disabled at power up and the unit will
automatically configure its parameters to the state which existed when the power was last
shut off.
3. If the temperature controller is required please refer to the section below on temperature
control prior to enabling the laser current output.
4. Press the LASER MODE soft button until the POWER LED is illuminated.
5. Select the maximum output current range for the laser by pressing the RANGE soft button
under LASER RANGE. For best performance select the lowest range that allows the laser to
be run at the maximum desired output current.
6. Press LASER under PARAMETER to adjust the laser current limit, voltage limit, power limit,
calibration PD responsivity value, photodiode reverse voltage bias, and LD TEC error link.
To calculate the calibrated photodiode responsivity value first measure the output of the laser
with a calibrated detector. Second measure the corresponding photodiode current either with
the LDC-3706 or a calibrated current meter. The calibrated PD responsivity is calculated by
dividing the photodiode current by the output power (µA / mW).
The default responsivity value is 0.0 µA; the end user is required to enter in the appropriate
calculated value for the LDC-3706 instrument to display the laser power in mW. Otherwise,
the Constant Power Mode will only be configurable in µA photodiode current units.
Furthermore, a proper photodiode bias voltage must also be set for current reading to be
provided, as this default value is 0.0V.
7. Under the ADJUST section press the LASER soft button and use the knob to adjust the
output power to the desired output. Press the ON soft button under LASER MODE. It is
advised when using a new laser or connection to the laser to set the output to zero prior to
enabling the output. Once the output is enabled slowly ramp the current to the desired
output.
8. The user can display measured voltage, photodiode current, photodiode power set point, and
measured current in either the left or right side of the LASER display by pressing the LEFT or
RIGHT display soft buttons under the LASER display.
 Loading...