19
3.2.1. Detailed assembly procedure
1
Attaching the power cord and startup of the device
I
II
A
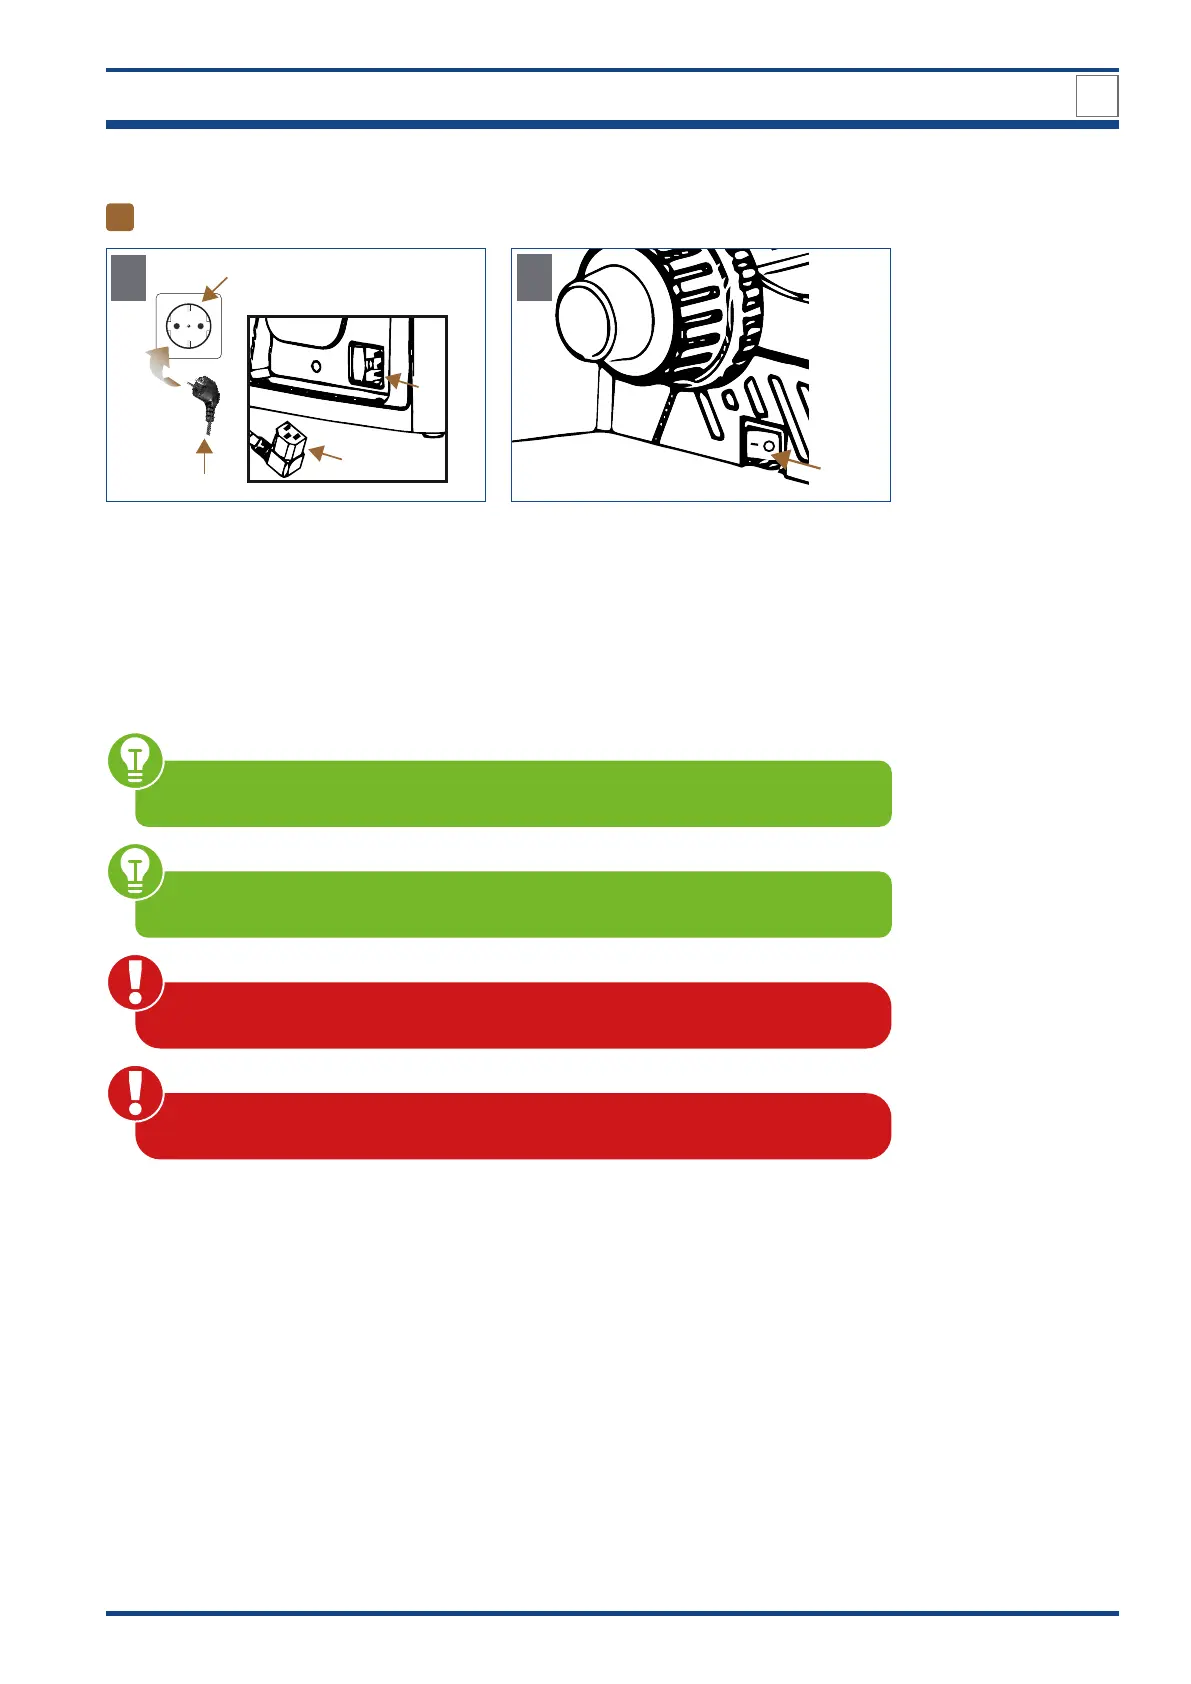
Illustration 004: Connecting the power cord and commissioning.
Connect the cold-device plug (I) to the ap-
propriate mains in (II) on the back of the mi-
croscope.
Insert the main power plug (III) into the pow-
er socket (IV).
V
B
Move On/Off switch (V) to position I to turn
on the device on the left side of the micro-
scope.
DESIGN OF NE620T
3
Make sure the supplied voltage matches the instruments specifications: 100-240 V,
50/60 Hz.
Make sure that the main switch is set to O (OFF) before connecting the power cord.
To avoid electric shock, connect the cold-device plug to a properly grounded pow-
er socket. These cold-device plug has three-pin plugs to ensure proper grounding.
Cables and cords are vulnerable when bent or twisted. Never subject them to
excessive force.