20
2
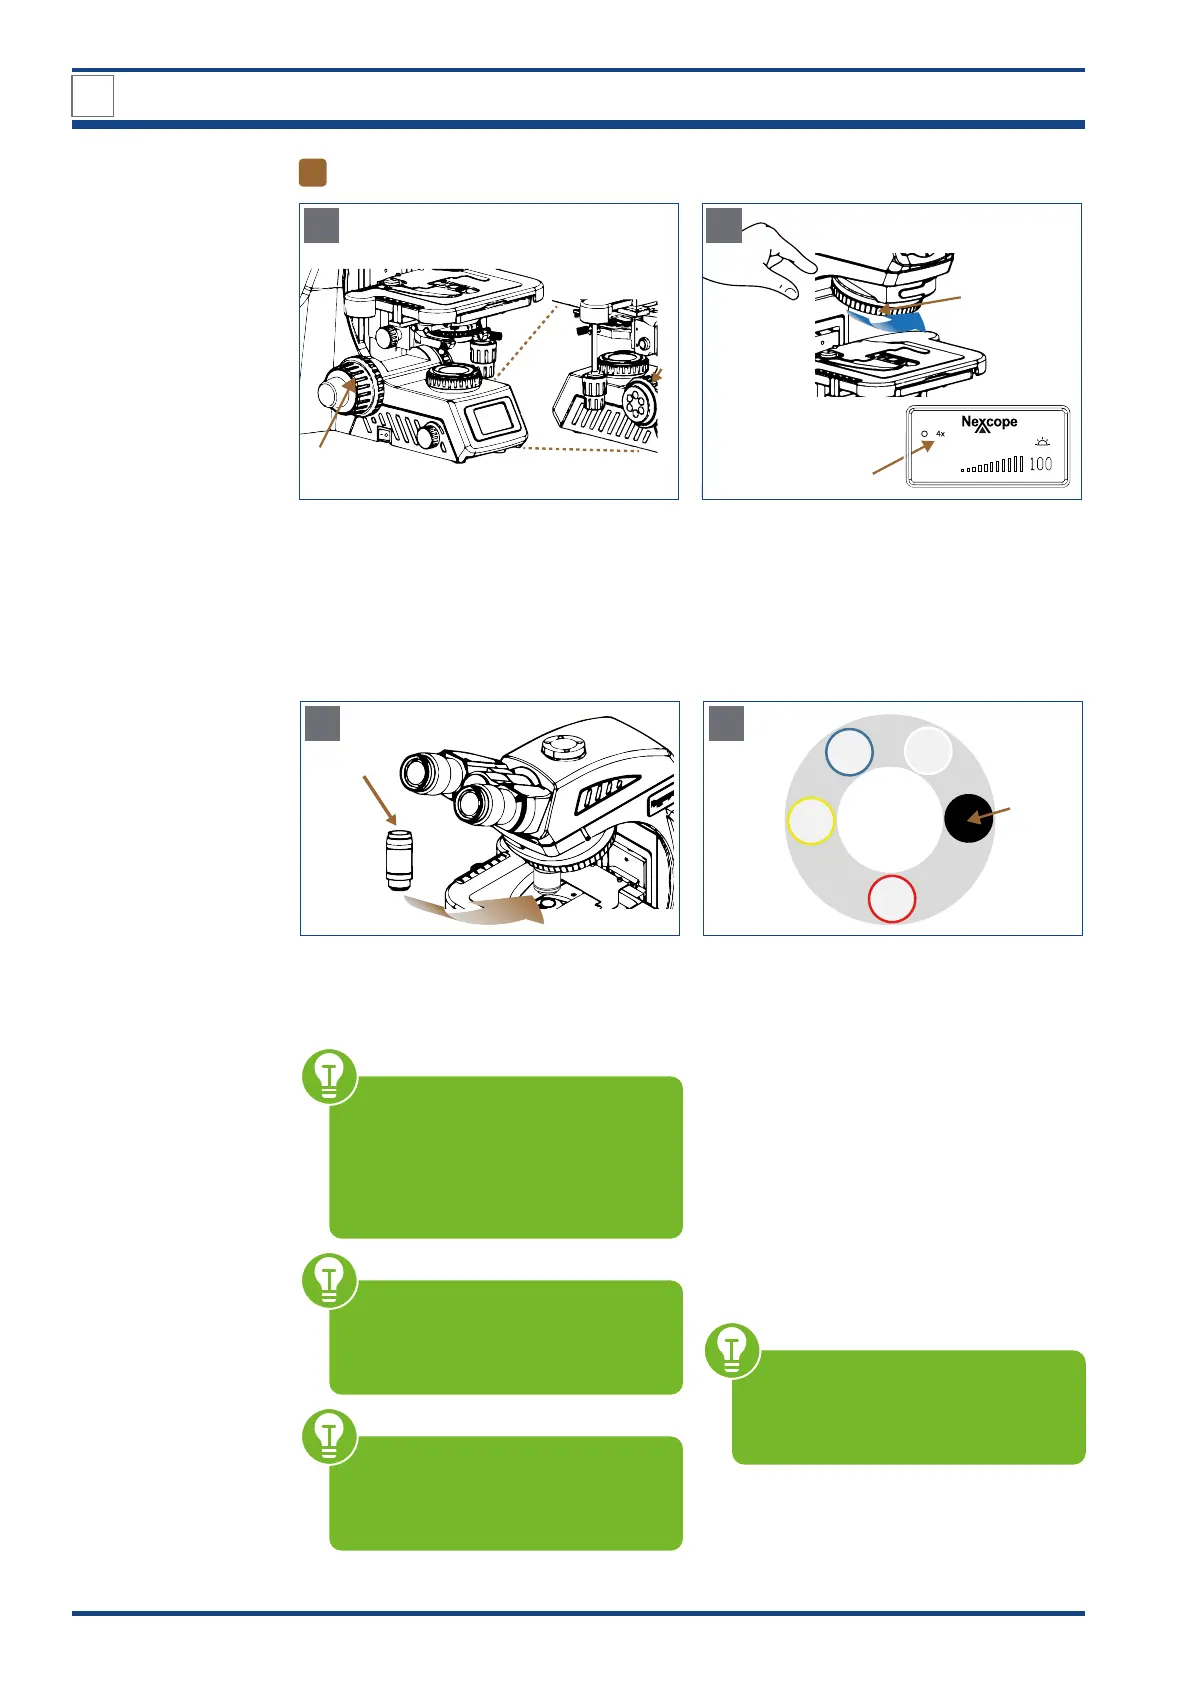
Installing objectives
I
II
A
Illustration A/B: Installing objectives: Preparatory measures.
Use the coarse focusing knob (I) to turn the
cross stage to the lowest position.
Check that no limit is set for the coarse focus
movement by limit knob (up-stop) (II).
III
IV
Created b
y
O
l
e
k
s
a
ndr Pana
s
ovskyi
LCD
B
Turn the encoded quintuple objective nose-
piece (III) by hand until the LCD shows the
programmed position for the 4x objective
(IV).
4x
V
C
Illustration C/D: Inserting the objectives.
Screw the 4x objective (V) into the assigned
free space on the nosepiece.
Before each use, check the front lens
of the objective for dirt. The closer
a contamination is to the object or a
camera sensor, the greater its effect on
the visual or recorded image. There-
fore clean the objectives regularly.
Start up the device before inserting
the objectives on the nosepiece. Only
in this way will you be assigned the
predefined space for each objective.
The objectives snap into place with
an audible “click” when they are po-
sitioned in the beam path. Only in this
position does the lighting come on.
10x
4x
40x
100x
VI
D
Repeat procedure B and C for the next high-
er objectives to occupy the programmed po-
sitions on the nosepiece until all objectives
are mounted.
The sequence is defined so that the magnifi-
cation increases continuously when turning
counterclockwise.
The following objectives are included in de-
livery: Plan achromatic objectives (NIS60):
4x, 10x, 40x, 100x oil.
Protect the free opening on the objective
nosepiece with the black protective cap (VI).
Always start with the lowest magni-
fication: you then have a large fo-
cus range and additionally protect the
microscope from damage.
3
DESIGN OF NE620T