This allows the Dash Cam to be setup for 'Authorised use only', therefore preventing un-authorised
operation, or removal of the camera. Three elements of anti-tamper security are available, which can
be used individually or all together, as required.
This is a three stage process, using the supplied Security Pack:
2x Locking covers
2x Anti-tamper screws (machined screws for use with the locking covers)
1x Anti-tamper screw (self-tapping screw for use with cable lock)
2x Dust caps
Security screwdriver
1 Cable Lock
The cable lock can be secured to the mount. This prevents the car adaptor or hardwire kit
power plug from being disconnected from the mount and hence stopping the recording.
Once the car adaptor or hardwire kit have been connected to the mount and the cable lock
has been located correctly, use 1x anti-tamper screw (self-tapping screw) to secure the cable
lock to the mount. Tighten the screw until the head is flush with the top surface and do NOT
overtighten.
anti-tamper screw (self-tapping)
Anti-Tamper Security Installation
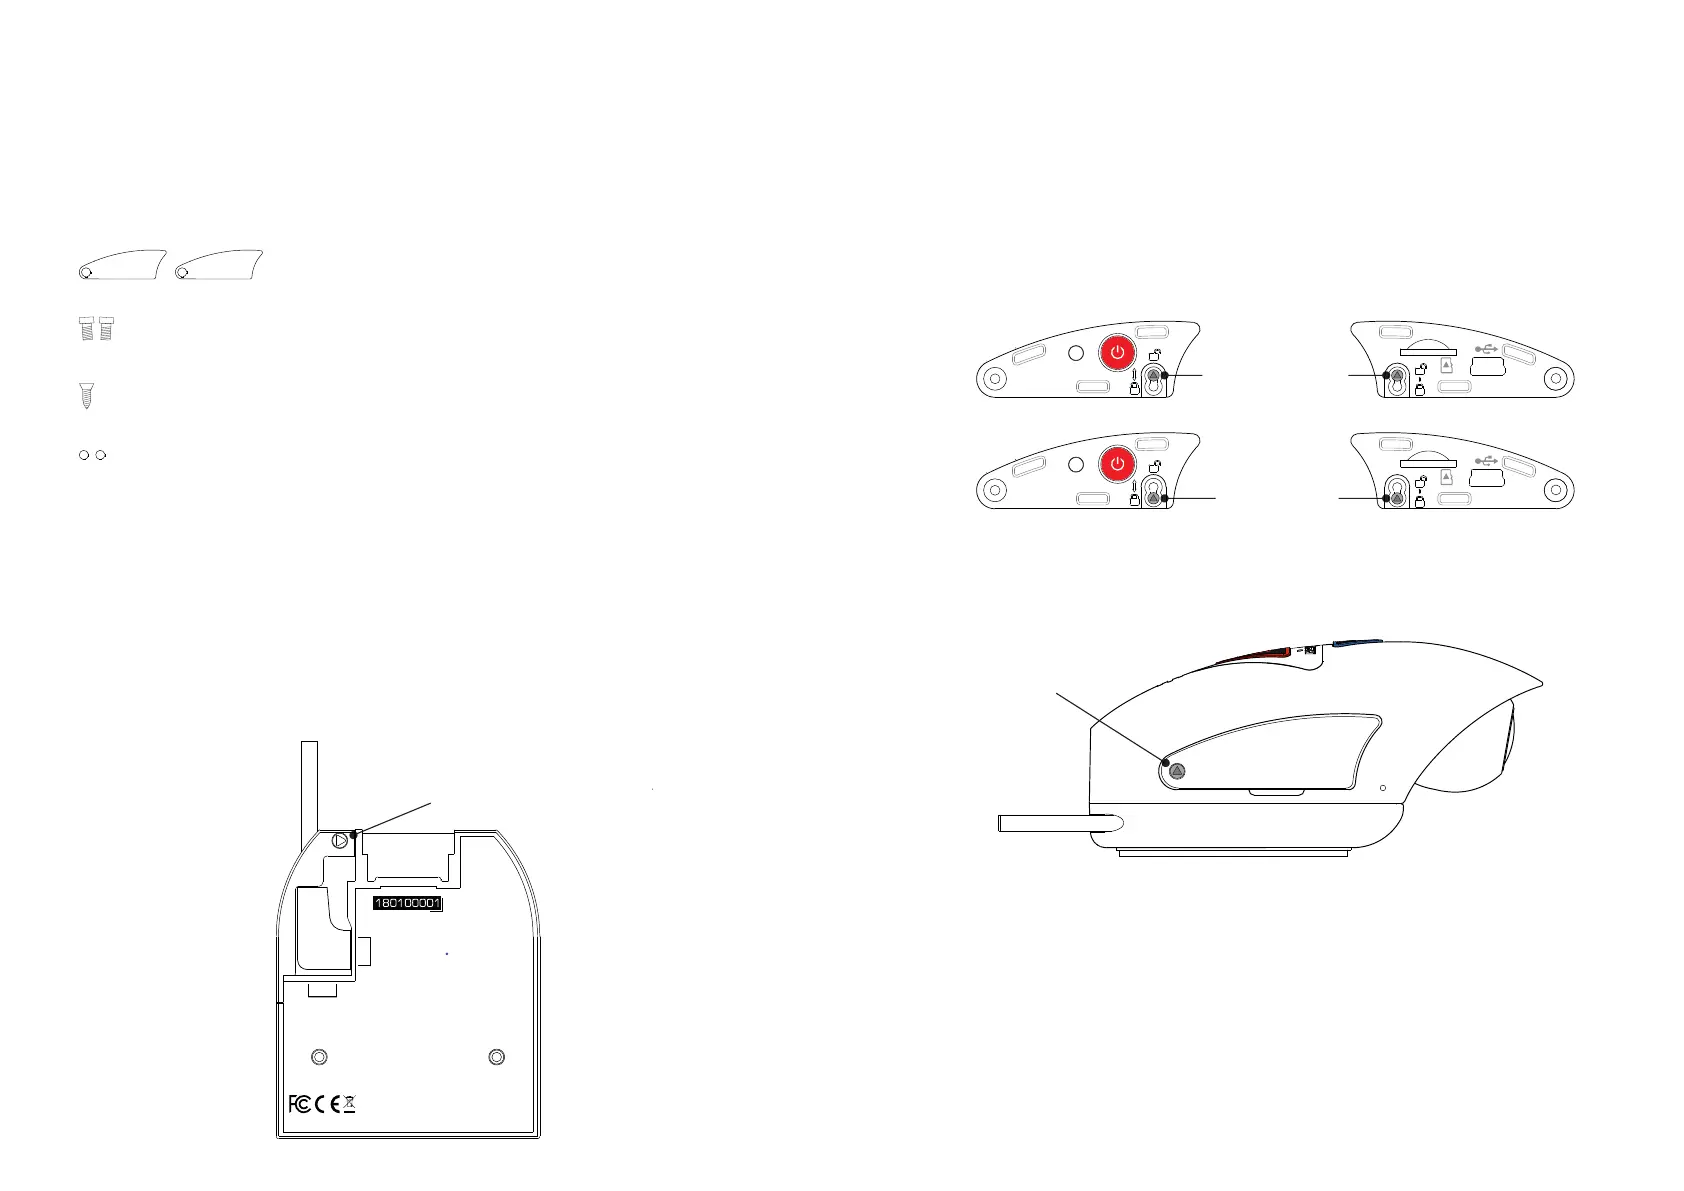
2 Camera to Mount Locking Screw
The camera can be secured to the mount to prevent un-authorised removal.
Remove the two side covers to gain access to the ‘camera to mount’ locking screws,
these are found on both sides of the camera.
With the camera attached to the mount and using the supplied security screwdriver,
loosen the two anti-tamper screws, taking care NOT to remove them fully.
Slide the anti-tamper screws down into the ‘locked’ position and then re-tighten.
3 Locking Covers
Replace the normal side covers with the two locking covers and secure them to the
camera using the anti-tamper screws (machined screws).
Carefully insert the supplied rubber dust caps, covering the heads of the anti-tampers screws.
Note
- To prevent un-authorised user's from accessing the camera via the Cam Viewer App,
remember to change the Wi-Fi Password within the Setup menu.
locked position
unlocked position
T gugv
T gugv
Anti-tamper screw
(machined)
31
Made in China
For use with 90 connector
5VDC - I N
For use with
straight
connector
5VDC - I N
NBDVR380GWMNT

 Loading...