PC Connection
The dash cam has two available modes when connecting to a computer, these are:
Mass Storage Mode (Windows and Mac)
This mode is used to view, edit and share recordings using NEXTBASE Replay 3 playback software
on your computer.
Note:
- Mass Storage mode is ‘read-only’, this means that content on the SD card can only be read,
not updated or erased.
Update Mode (Windows and Mac)
This is used to Update the firmware on your Dash Cam, using NEXTBASE Replay 3.
Please see details within the NEXTBASE Replay 3 Playback software for more information.
Note:
- Update mode is ‘read+write’, this means that content on the SD card can be updated and
erased. This in turn lets NEXTBASE Replay 3 write the new firmware to the SD card, allowing
the automatic update to take place.
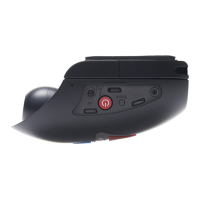
Connecting the Dash Cam to your Computer
The USB socket is located on the left had side of the Dash Cam, underneath the removable
side cover. The side cover may or may not be screwed down, depending on how you have chosen
to setup the Dash Cam.
Once the side cover has been removed, connect the supplied USB cable to the Dash Cam and
then to your computer.
Do NOT connect the USB cable to the Powered Mount.
Once connected the Dash Cam will power on and automatically enter Mass Storage mode, this
can be identified by the Protect Button flashing red.
To connect the Dash Cam in Update mode, press and hold the Protect button during
connection of the USB cable. Release the button once the Wi-Fi button flashes blue.
Note:
- ALWAYS turn off the Dash Cam before disconnecting from your computer.
40
 Loading...