© National Instruments Corporation 7 NI cDAQ-9178/9174 User Guide and Specifications
DIN-Rail Mounting Kits
• NI 9915 DIN-Rail Kit—For the NI cDAQ-9178.
• NI 9912 DIN-Rail Kit—For the NI cDAQ-9174.
Each DIN-Rail kit contains one clip for mounting the chassis on a standard 35 mm DIN-Rail. To mount
the chassis on a DIN-Rail, fasten the DIN-Rail clip to the chassis using a number 2 Phillips screwdriver
and two M4 × 17 screws. The screws are included in the DIN-Rail kit. Make sure the DIN-Rail kit is
installed as illustrated in Figure 5, with the larger lip of the DIN-Rail positioned up. When the DIN-Rail
kit is properly installed, the NI cDAQ-9178/9174 chassis is centered on the DIN-Rail.
Caution Remove the I/O modules before removing the chassis from the DIN-Rail.
Figure 5. DIN-Rail Installation on the NI cDAQ-9178
Panel Mount Kits
• NI 9905 Panel Mount Kit—For the NI cDAQ-9178
• NI 9904 Panel Mount Kit—For the NI cDAQ-9174
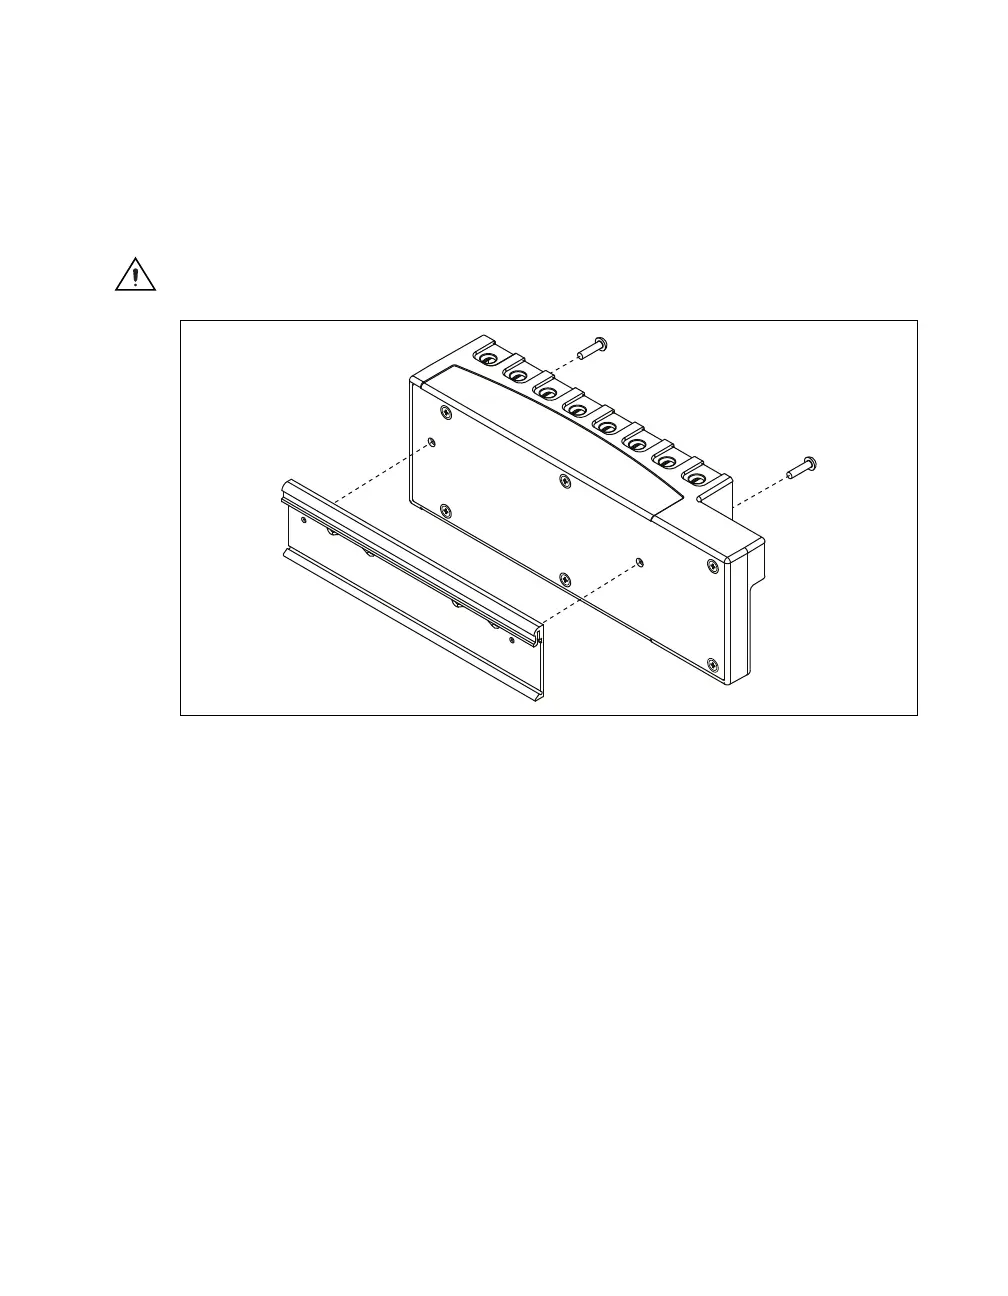
To mount the chassis on a panel, align the chassis on the panel mount accessory. Attach the chassis to
the panel mount kit using two M4 × 17 screws as shown in Figure 6. National Instruments provides
these screws with the panel mount kit. You must use these screws because they are the correct depth and
thread for the panel. These slots in the panel mount kit can be used with M4, M5, No. 8, or No.10
panhead screws. Figure 6 illustrates the panel dimensions and installation on the NI cDAQ-9178/9174
chassis. Refer to the documentation included with the panel mount kit for more detailed dimensions.