Setting the temperature (without room sensors
activated):
Setting range: -10 to +10
Default value: 0
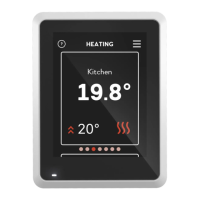
The display shows the set values for heating (curve
offset). To increase or reduce the indoor temperature,
increase or reduce the value on the display.
Use the control knob to set a new value. Confirm the
new setting by pressing the OK button.
The number of steps the value has to be changed to
achieve a degree change of the indoor temperature
depends on the heating installation. One step is usually
enough but in some cases several steps may be re-
quired.
Setting the desired value. The new value is shown on
the right-hand side of the symbol in the display.
Caution
An increase in the room temperature can be
slowed by the thermostats for the radiators or
under floor heating. Therefore, open the
thermostats fully, except in those rooms where
a cooler temperature is required, e.g. bed-
rooms.
TIP
Wait 24 hours before making a new setting,
so that the room temperature has time to
stabilise.
If it is cold outdoors and the room temperature
is too low, increase the curve slope in menu
1.9.1 by one increment.
If it is cold outdoors and the room temperature
is too high, lower the curve slope menu 1.9.1
by one increment.
If it is warm outdoors and the room temperat-
ure is too low, increase the value in menu 1.1
by one increment.
If it is warm outdoors and the room temperat-
ure is too high, reduce the value in menu 1.1
by one increment.
Menu 1.2 - ventilation (accessory required)
Setting range: normal and speed 1-4
Default value: normal
The ventilation in the accommodation can be tempor-
arily increased or reduced here.
When you have selected a new speed a clock starts a
count down. When the time has counted down the
ventilation speed returns to the normal setting.
If necessary, the different return times can be changed
in menu 1.9.6.
The fan speed is shown in brackets (in percent) after
each speed alternative.
TIP
If longer time changes are required use the
holiday function or scheduling.
Menu 1.3 - scheduling
In the menu scheduling indoor climate (heating/cool-
ing/ventilation) is scheduled for each weekday.
You can also schedule a longer period during a selected
period (vacation) in menu 4.7.
Menu 1.3.1 - heating
Increases or decreases in the accommodation temper-
ature can be scheduled here for up to three time peri-
ods per day. If a room sensor is installed and activated
the desired room temperature (°C) is set during the
time period. Without an activated room sensor the
desired change is set (of setting in menu 1.1). One step
is usually enough to change the room temperature by
one degree, but in some cases several steps may be
required.
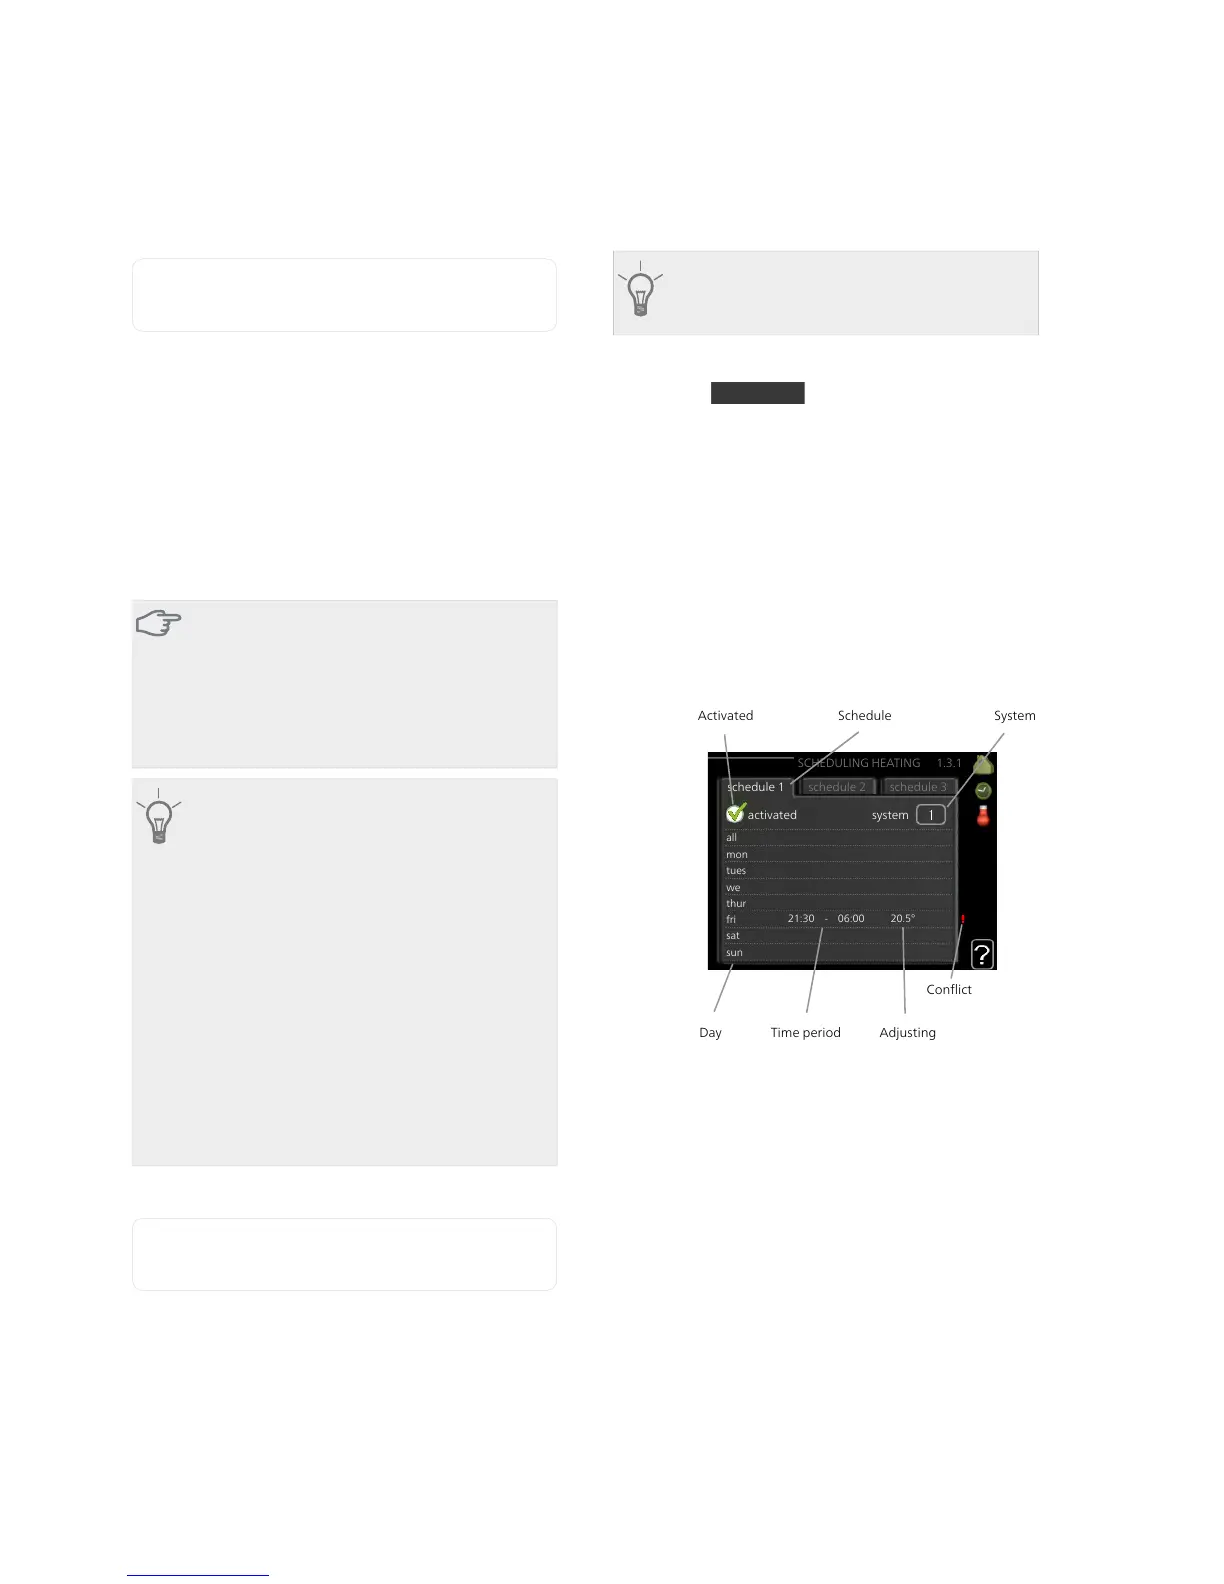
Schedule: The schedule to be changed is selected here.
Activated: Scheduling for the selected period is activ-
ated here. Set times are not affected at deactivation.
System: Which climate system the schedule is for is
selected here. This alternative is only displayed if more
than one climate system is present.
Day: Select which day or days of the week the schedule
is to apply to here. To remove the scheduling for a
particular day, the time for that day must be reset by
setting the start time to the same as the stop time. If
the line "all" is used, all days in the period are set for
these times.
Time period: The start and stop time for the selected
day for scheduling are selected here.
Adjusting: How much the heating curve is to be offset
in relation to menu 1.1 during scheduling is set here.
If the rooms sensor is installed the desired room tem-
perature is set in °C.
39Chapter 8 | Control - MenusNIBE™ VVM 325