58
Image Adjustment
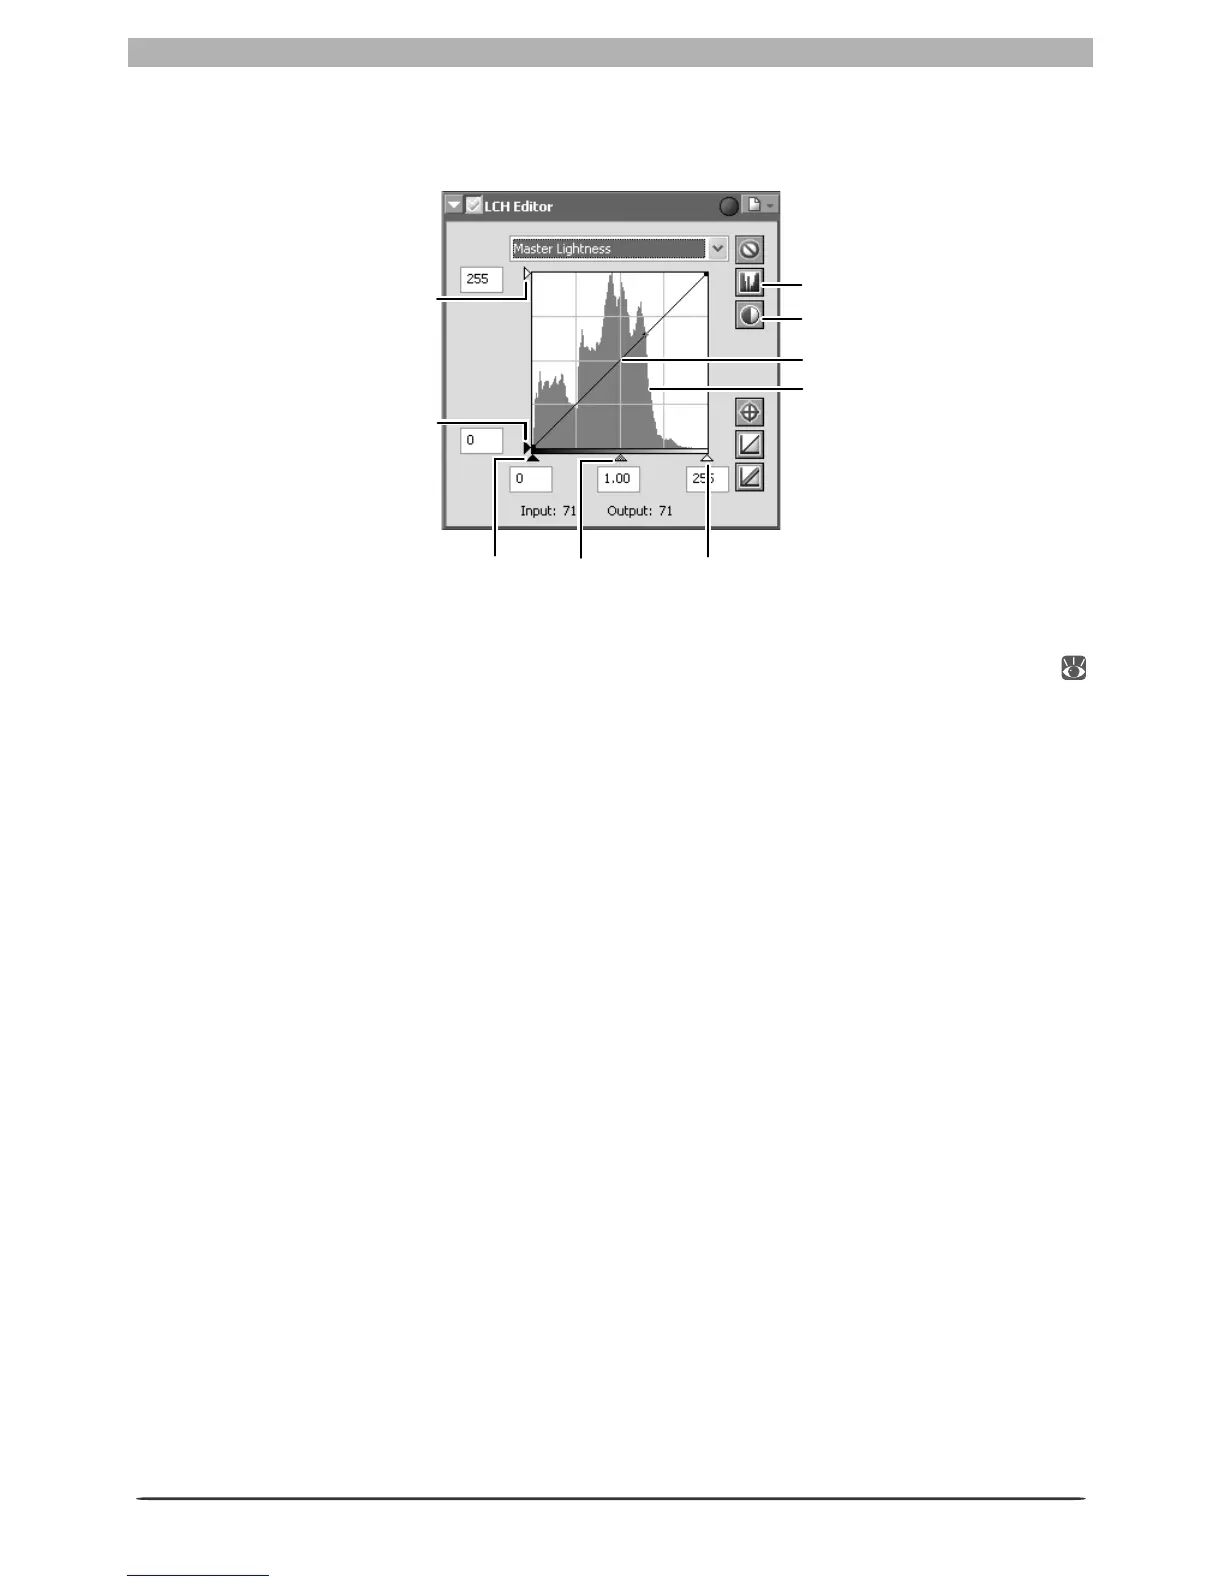
The Master Lightness Channel
Although it affects brightness rather than color, editing luminosity has a similar effect to edit-
ing the master curve in the Curves palette.
Luminosity curve: Maps luminosity in the original image (input) to the luminosity of the image
after editing (output). Any portion of the curve can be edited as described in “Curves” (
48); steepening the curve increases the difference between light and dark areas of the image,
increasing contrast.
Histogram: Shows the distribution of pixels of different luminosities in the input. The hori-
zontal axis corresponds to luminosity (in the range 0–255), the vertical axis to the number of
pixels.
Output level sliders: Choose the maximum (white point) and minimum (black point) values
for output.
Input level sliders: Choose the maximum (white point) and minimum (black point) input
levels.
Mid-point slider: Set the mid-point (gamma value). Moving the mid-point alters the bright-
ness of mid-tones while preserving detail in highlights and shadows.
Show Histogram button: Click to view the luminosity distribution for the fi nal image. Click
again to view the input luminosity distribution.
Auto Contrast button: Set the maximum and minimum input levels to exclude values for 0.5%
of the brightest and darkest pixels in the crop. The percentage of pixels excluded can be ad-
justed in the Advanced Color tab in the Preferences dialog.
Show Histogram button
Auto Contrast button
Histogram
White-point
input slider
Mid-point
slider
Black-point
input slider
Black-point output
level slider
White-point output
level slider
Luminosity curve