Installation and Owner’s Manual 14
Install the Lower and Upper Vents
1. Using the following chart, decide which vents and rough opening (RO) sizes to use:
Certied Vent P/N RO Height RO Width
Upper Roof Exhaust Cap 622293 N/A N/A
Upper Roof Exhaust Vent 616319 24 in. 5 1/4 in.
Lower Metal Intake 616010 13 5/8 in. 21 5/8 in.
Upper Exhaust & Lower Intake Plastic-large 621156 13 3/4 in. 21 1/2 in.
Upper Exhaust & Lower Intake Plastic-small 620505, 636264 6 3/16 in. 17 3/16 in.
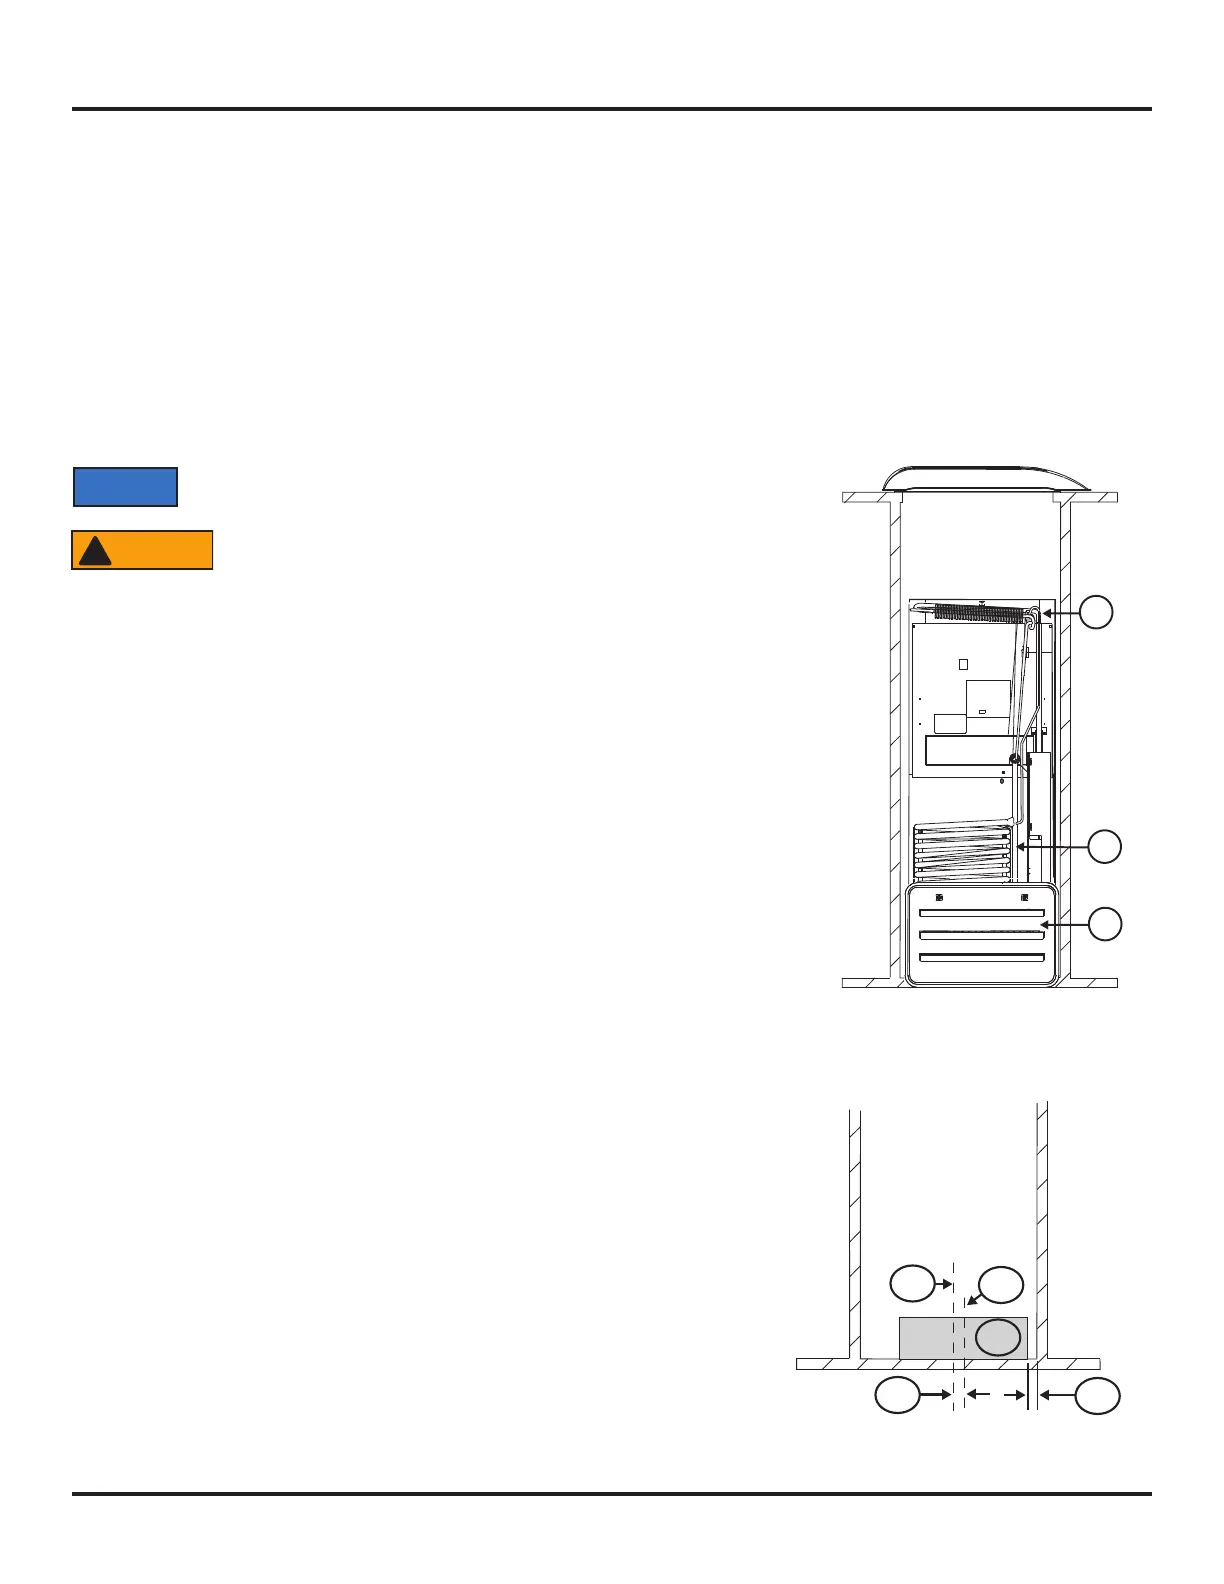
2. Install the lower intake vent (See Art01598, Art01599, and Art01602):
The lower intake vent is also the service access opening for the components
on the rear of the refrigerator.
Make sure the bottom of the opening of the lower intake vent is
even with or immediately below the oor level. This allows any
leaking propane gas to escape to the outside and not to collect at
oor level.
- Make sure the bottom of the opening of the lower intake vent [9] is even with or
immediately below the oor level.
- When using either 616010 or 621156 vent, align the lower intake vent vertically below the
coils [10] and the condenser [11] of the refrigerator.
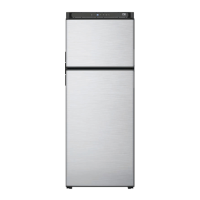
- When using either 620505 or 636264 vent, either:
- Make sure that the centerline [297] of the vent rough opening [295] is 1 1/2 inch to
the right of the enclosure centerline [296] (See Art02424).
OR
- Make sure that the right-hand edge of the vent rough opening [295] is 1 3/8 inch
[299] from the inside wall of the enclosure (See Art02424).
10
11
9
Art01602
WARNING
!
NOTICE
296
Art02424
298
295
297
299