Installation and Owner’s Manual 20
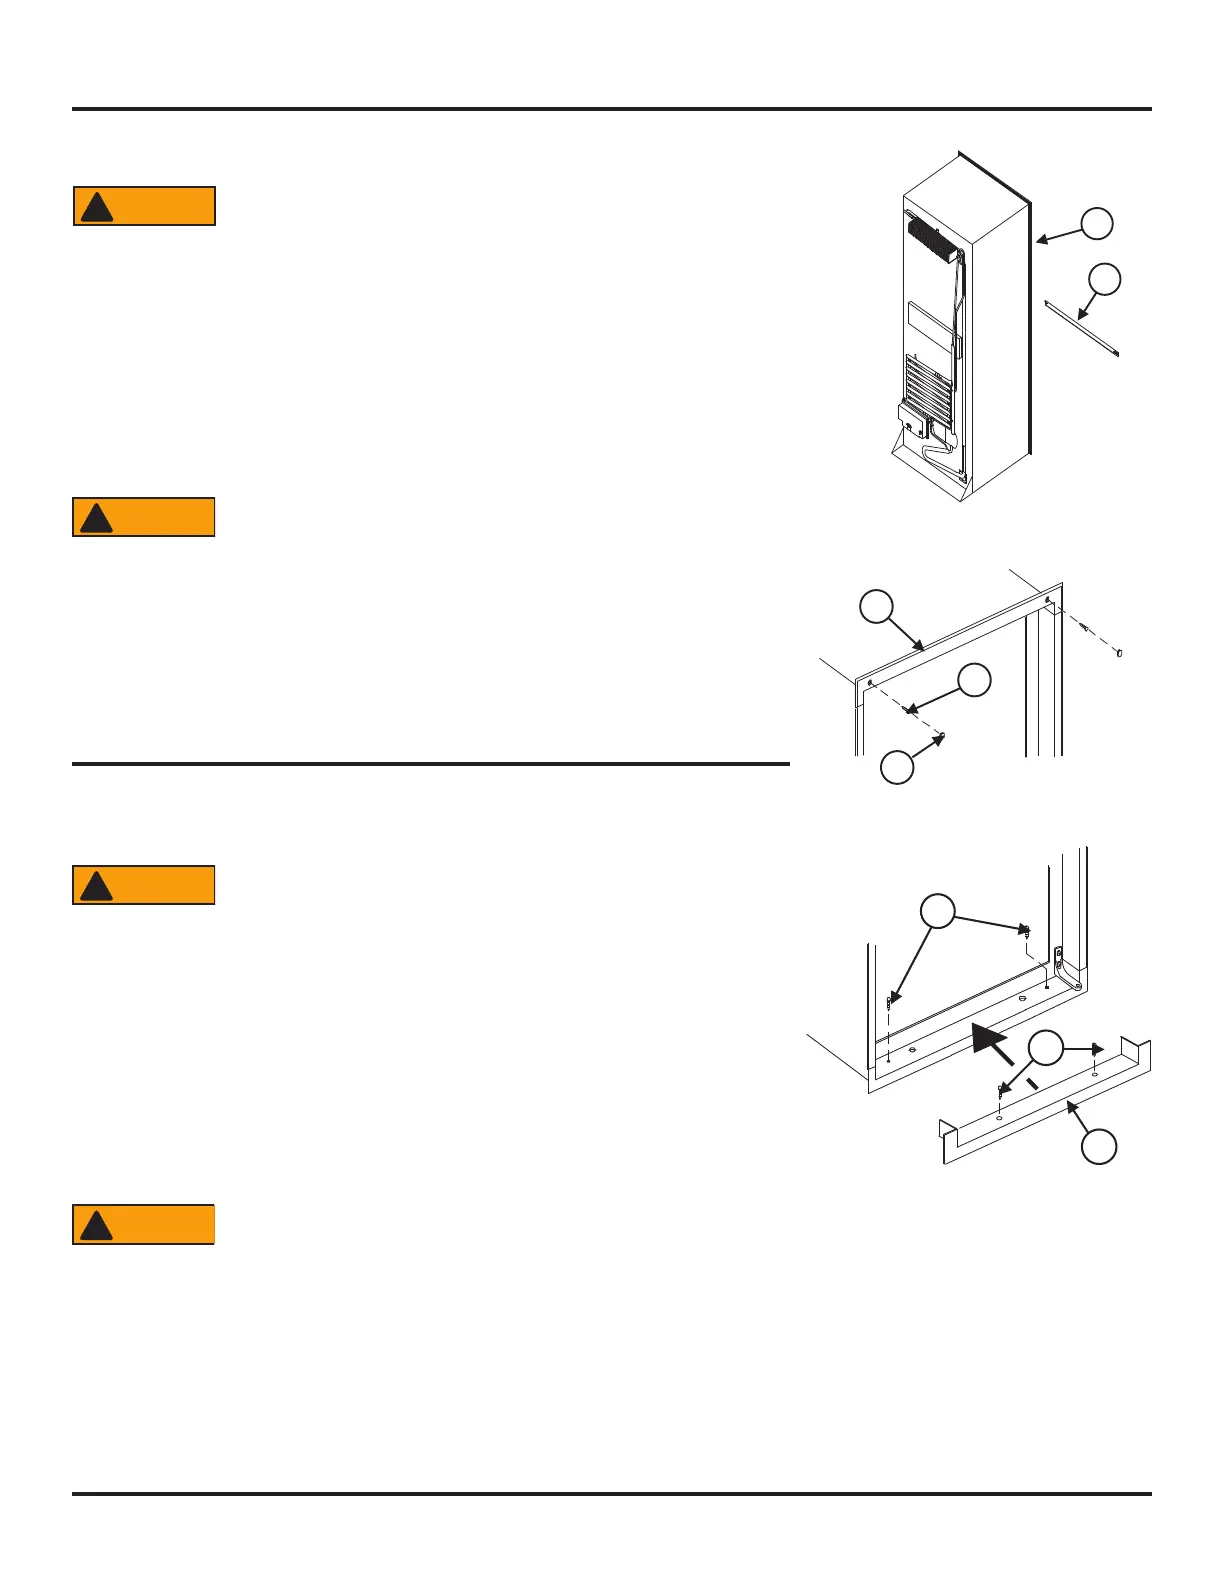
Put the refrigerator in position (See Art00963, Art00963, and Art00964):
Make sure the combustion seal [28] is not broken, is completely around
the refrigerator mounting anges, and is between the mounting anges
and the wall of the enclosure If the seal is not complete, exhaust fumes
can be present in the living area of the vehicle. The breathing of exhaust
fumes can cause dizziness, nausea, or in extreme cases, death.
- Push the refrigerator completely into the enclosure.
- Put the upper trim piece [40] onto the front of the refrigerator.
- put screws [41] through the upper and lower mounting anges on the front of the refrigerator
and into the enclosure wall and oor.
- Put a cap [42] on each of the screw holes in the upper trim piece [4] on the front of the refrigera-
tor.
Do not omit the bottom trim piece. This piece is part of the combustion
seal.
- Push the bottom trim piece [29] onto the front of the refrigerator.
- Put two screws [41] through the trim piece, the mounting ange, and into the oor.
- Put screws through the mountingange on the rear of the refrigerator and into the oor.
Install the Refrigerator
Art00962
28
29
Art00963
41
42
40
Art00964
41
29
41
Connect the Electrical Components
Connect the 120 volts AC supply:
Connect the AC power cord(s) only to a grounded three-prong
receptacle. Do not remove the round ground prong from any
of the AC power cords. Do not use a two prong adapter or an
extension cord with any of the AC power cords. Operation of
the refrigerator without correct ground can cause dangerous
electrical shock or death if you are touching the metal parts of
the refrigerator.
- Make sure the receptacle is positioned within easy reach of the lower intake vent.
- Make sure the power cord(s) does not touch the burner cover, the ue pipe, or any
hot component that could damage the insulation of the power cord.
Connect the 12 volts DC supply:
1. Determine the min. wire size and the max. fuse size to use:
If you use an incorrect wire size and/or fuse size, electrical re
can result.
- Use a minimum of 18 AWG wire and a maximum 6 Amp fuse.
- If the wire size is larger than the min. size, use the correct fuse per RVIA A119.2 standard or local codes.
WARNING
!
WARNING
!
WARNING
!
WARNING
!