24
LAN
PORT
CPU
BOARD
Network Cable
COMPUTER'S
LAN PORT
COMPUTER
FOR CONFIGURING
NETWORK SETTINGS
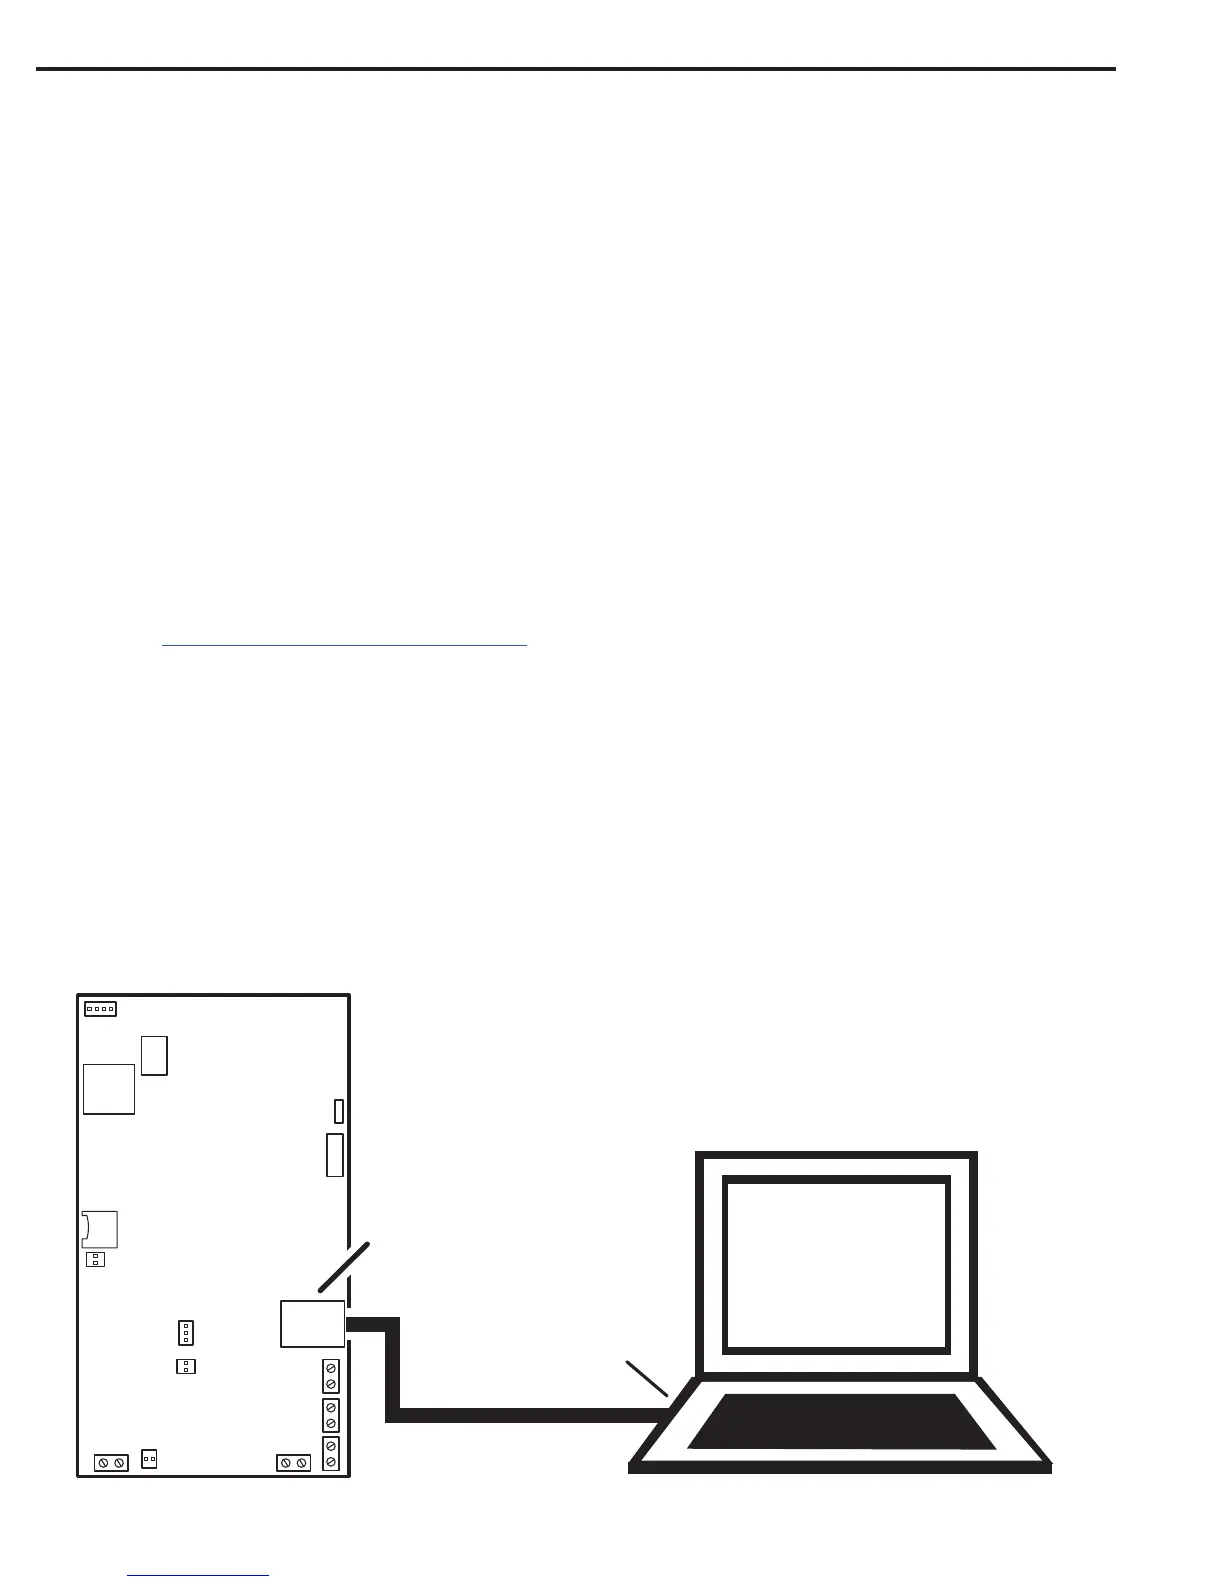
STEP 4: Conguring for a Local Area Network
The unit must be located in a trusted network environment where a protected network security system (rewall, etc.) is installed and maintained.
CAUTION: The system is exposed to potential risks if installed on a network without proper security precautions. Consult the appropriate on-site
IT administrator.
Obtain the following information from your network administrator before conguring the e3 Controller:
• IP address: ____________________________________
• Subnet Mask: ____________________________________
• Gateway: ____________________________________
• DNS 1 and 2: ____________________________________
NOTE: If a DHCP server is present, IP Addresses are dynamically assigned. A static IP address is strongly recommended for the EN-2M4
because a DHCP Server may assign a new IP Address. There may be times when you want to access the product directly.
Preparing for the Network
To allow for the system to be recognized on the local network, it is necessary to change the unit’s IP address as follows:
1. Connect your programming computer directly to the LAN port of the unit. A standard networking cable is used for the direct connection.
2. Assign a static IP address of 192.168.0.149 to the computer. (For instructions on how to change the static IP address of a Windows computer,
please visit: http://technet.microsoft.com/en-us/library/ff710457).
3. After assigning the static IP address for the computer, open a web browser and enter the IP address of the unit (Default = 192.168.0.250). The
static IP address will allow uninterrupted data transfer between devices.
4. The unit presents the login page. To log on, enter the default user ID and password (admin/admin).
5. Select the Network Setting icon, then the IP Address icon to display the page. Enter the static IP address, Subnet Mask, Gateway and DNS
server so that it matches the requirements of the local network. (Refer to the unit Programming Guide for detailed programming information.)
6. Click Save & Reboot and the system will reboot. (Reboot will take approximately 2 minutes.)
NOTE: The system data will be lost if the unit is powered down without performing Save & Reboot.
7. Disconnect the programming computer from the unit. The system is now ready for the local network.
8. Connect the networking cable from the Local Area Network to the unit’s LAN PORT jack. The local computers will then be able to access the
system by entering the IP address of the unit.
9. Connect the cable to the CPU board.
 Loading...