9
Entry System Mounting
The unit’s cabinet is designed to be mounted two ways:
• The unit can be mounted directly to a wall or at
surface.
• The unit can be mounted on a standard
gooseneck pedestal.
Choose a well lit location near the controlled opening.
Wiring access for power, telephone, network, earth
ground, and control outputs must be available to the
mounting location. If the optional remote accessories
are used, wiring access for these cables must also be
available to the mounting location.
Surface Mounting
The cabinet can be mounted on a wall or any suitable
at surface. The four 3/8” mounting holes or the four
self-drill locations can be used to attach the cabinet to
the surface.
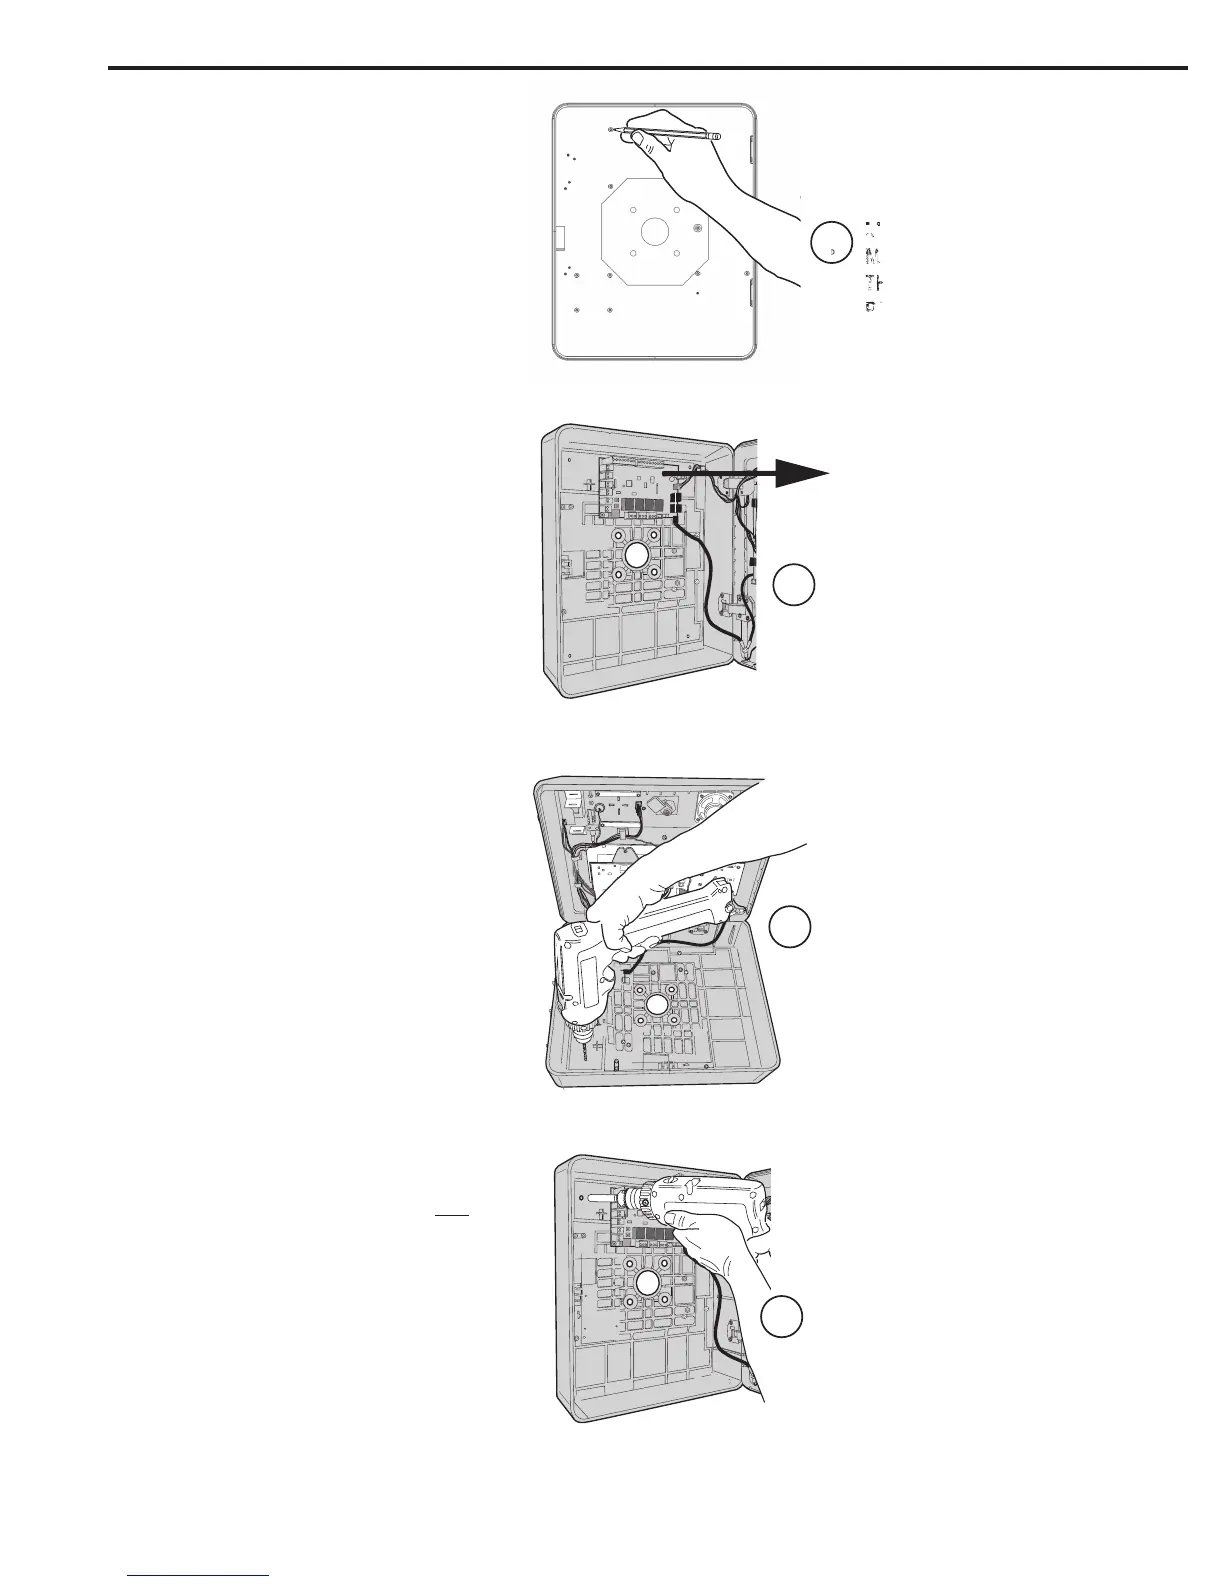
1. For wall mounting, hold the template at the
approximate mounting location where the display
will be about eye level or slightly above.
2. Remove the PCB Board to avoid metal shavings
affecting the PCB’s.
3. A) If using the 3/8” mounting holes, mark the four
mounting hole centers. Drill as required. Use the
appropriate fasteners for the mounting surface to
secure the cabinet.
B) If using the self-drill mounting holes, choose
the correct size bit for the fasteners and drill the
cabinet as required. Use the appropriate fasteners
and self-drilling or self-tapping screws for the
mounting surface to secure the cabinet.
C) Re-attach the PCB Board.
4. If the surface is uneven, be certain NOT to over
tighten the corners of the housing to avoid. Over
tightening could cause the housing to warp.
The use of a silicon seal is permitted along the
top and sides of the case where the unit meets
the mounting surface (ensure that the Weep holes
located along the bottom edge remain free of
silicon and debris). Ensure that water runoff from
building does not impact the unit.
CAUTION: Over tightening the mounting screws
on each corner may cause the housing to ex,
resulting in a poor front seal. Be sure to shim the
unit appropriately.
4
RE-ATTACH THE PCB BOARD, THEN ATT
THE CABINET WITH APPROPRIATE
HARDWARE FOR THE MOUNTING SURFACE
3
DRILL THE CABINET AT THE
PRE-MARKED LOCATIONS
MOUNTING
1
MARK THE (4) FOUR
MOUNTING HOLES USING
THE MOUNTING TEMPLATE
PROVIDED.
2
REMOVE PCB BOARD
TO AVOID METAL
SHAVINGS AFFECTING
THE PCB’S
 Loading...