ENGLISH
Before Use
1. Remove all the packaging materials.
2. Remove the glue and labels on the appliance.
3. Clean all parts thoroughly with hot water, a nonabrasive sponge, and mild dish
detergent, or in the dishwasher, top rack only.
4. Wipe the inside and outside of the Brio with a wet cloth. Do not immerse the Brio in
water. Dry thoroughly.
USE THE DRIP TRAY AT ALL TIMES.
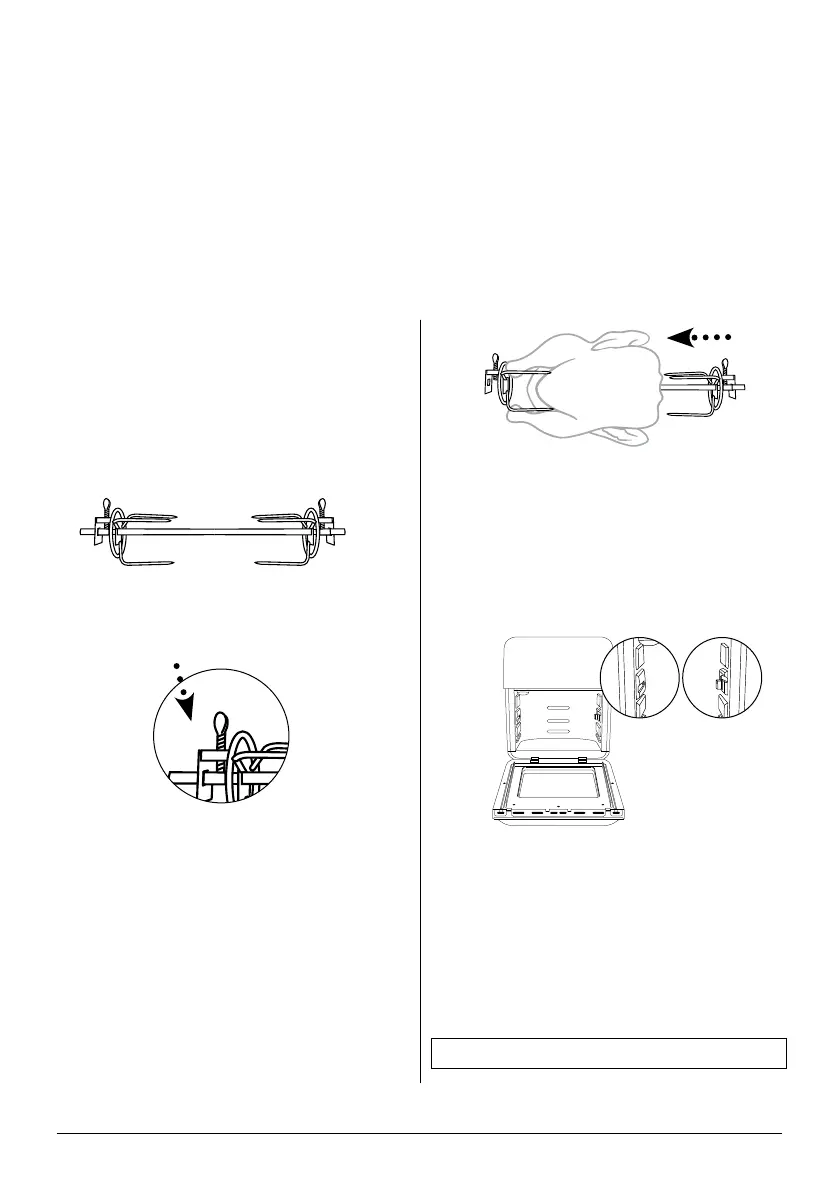
Rotisserie Skewer Assembly
To assemble the Rotisserie Skewer with
poultry and other meats, follow the steps
below:
1. Screw one Rotisserie Skewer fork
onto the end of the Skewer with the
rectangular end.
2. Push the Skewer through the
center of the meat until the Skewer
emerges from the other side.
3. Place the second Rotisserie Skewer
fork onto the other end of the Skewer
and push the fork forward until it
pierces the end of the meat. Tighten
the screw of the fork. If necessary,
loosen the screw and move the rst
fork forward until it pierces the other
end of the meat then retighten. Make
sure both screws are tight and in
place.
Screw
4. After securing the food on the
Rotisserie Skewer, slide it into the
Brio between Position 2 and Position
3. The rectangular end of the spit
should be on the left. Keep the right
side slightly tilted upward while sliding
it in.
5. Bring down the right side of the spit
into the Shaft Bracket, then insert
the left spit (bar) of the Skewer into
the Shaft Support Hole in the inner
wall.
Left Right
ASSEMBLY GUIDE
nuwavenow.com | 7