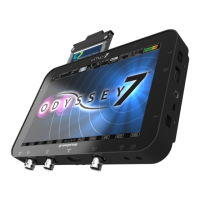
ODYSSEY7 - LEFT SIDE
There are two Function buttons, F1 LOCK and F2 SHUT DOWN.
F1 LOCK
Lockout control for the Odyssey7 touchscreen. Push to engage and SCREEN LOCK will appear in the
center of the touchscreen’s Upper Tool Bar. Push F1 again to disengage. Engaging F1 also re-calibrates
the touchscreen.
F2 SHUT
DOWN
Preferred method to power down the Odyssey7. Properly closes les on the SSDs and performs other
maintenance funcons (see Geng Started -- Powering Down). Push to acvate prompt asking SAFELY
POWER DOWN UNIT? In a future free rmware update it will be possible to program these buons for
addional funcons.
ODYSSEY7- RIGHT SIDE
There are three connector ports, (top to bottom) USB, HDMI OUT and RMT.
USB
An access point for servicing by Convergent Design.
HDMI OUT
Output to an HDMI compable device
RMT
A remote control connecon to the Odyssey7 supports remote trigger and tally. A future
rmware update will allow control interface with funcons of the Odyssey7.
KENSINGTON LOCK PORT
A rectangular hole above the RMT port is for accepng a Kensington Security Lock.
MOUNTING
The Odyssey7 features three ¼-20 threaded sockets, one on the lower rear of the case and one each
on the left and right sides of the case. Do not exceed 11mm of depth when inserting a bolt, otherwise
damage may occur to the Odyssey7. Additionally, there are four M3 threaded sockets on the rear of the
case and two M4 sockets on each of the sides of the case.
ANATOMY
CONTINUED »
10