43984801TH Rev.1
53 /
Oki Data CONFIDENTIAL
3. Parts replacement
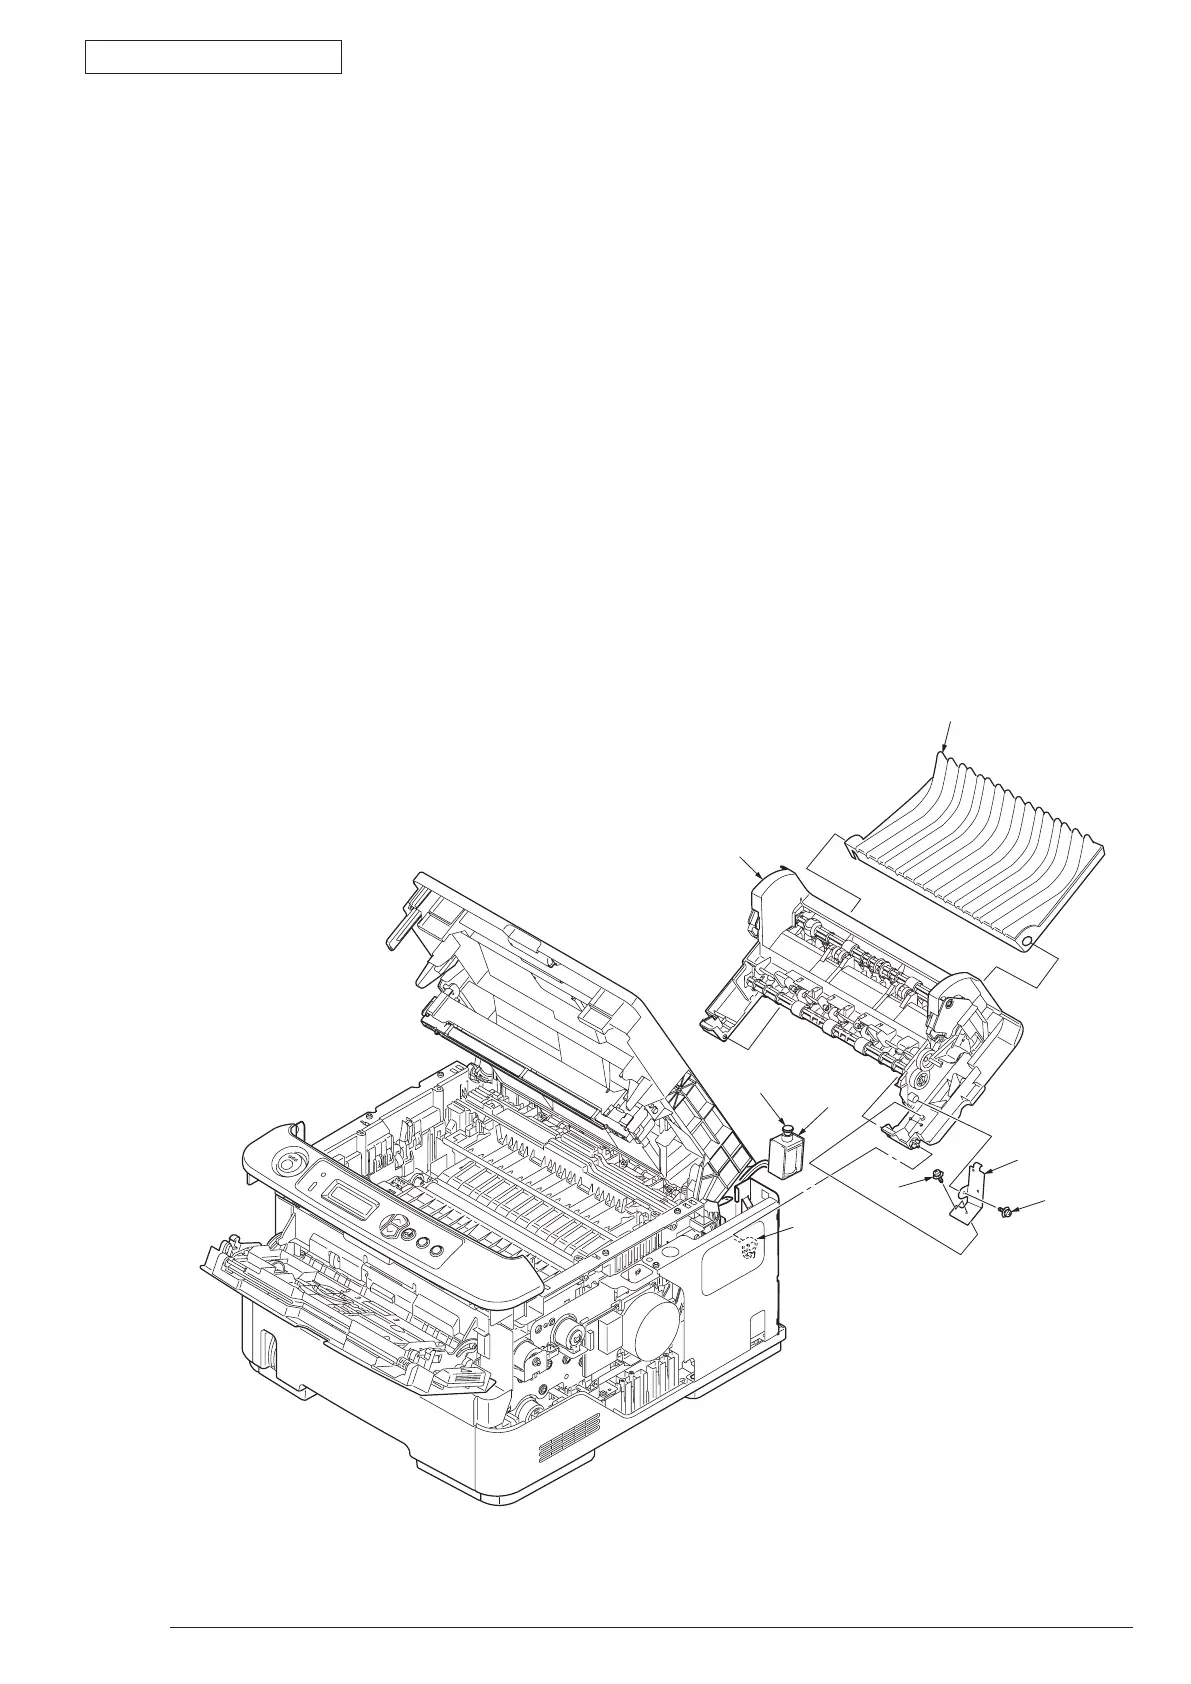
3.3.15 Rear-Cover-Assy
(1) Open Rear-Cover-Assy.
(2) Open Stacker-Cover-Assy.
(3) Remove Cover-Side-R. Remove Cover-Side-L. (Refer to 3.3.3/3.3.4)
(4) Remove Cover-Face Up-A
①
from the supporting point with opening the right side supporting point part
of Rear-Cover-Assy.
(5) R
emove the 2 screws (Black)
②
. Remove Plate-Solenoid
③
.
(6) R
emove Solenoid
❹
from Rear-Cover-Assy
❺
.
Bec
ause the plunger is not fixed, beware of not to drop or lose it.
(7) Remove Rear-Cover-Assy by bowing down the supporting point part of Rear-Cover-Assy to the inner
side.
(8) I
nstalling is performed by the inverse procedure with removing.
(Note on removing / installing)
1. B
eware of not to touch the DC motor inattentively (Do not rotate motor).
2. A
bout the installing of Rear-Cover-Assy
❺
, remove Cover-Face Up-A
①
, make the supporting
point part to a bowed situation and then perform installing.
❹
①
❺
②
③
②
Supprting point
Plunger