CK30/CK40
4
2-2 Detailed Assembly Procedure
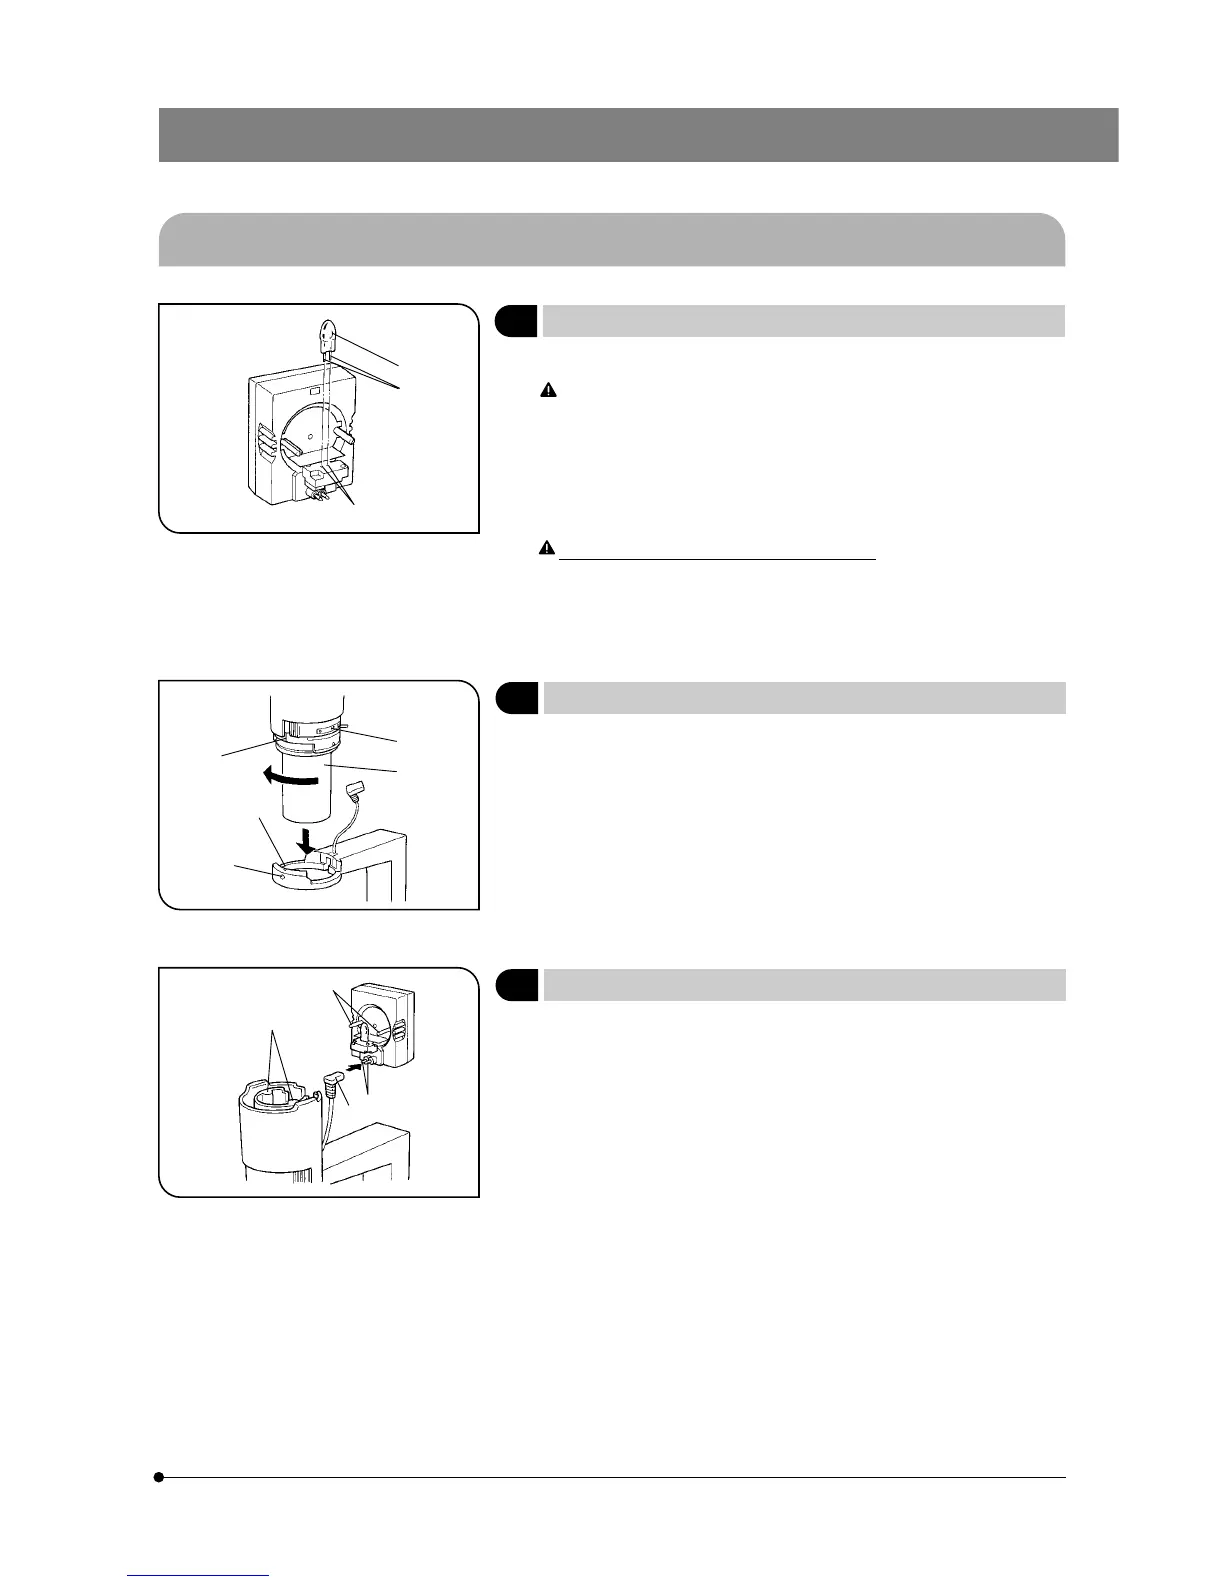
1 Mounting and Replacing the Bulb
(Fig. 3)
}Use only the specified Philips 5761 halogen bulb, 6 V 30 W HAL.
To prevent reduced bulb life or cracking, do not touch the bulb with
bare hands. If fingerprints are accidentally left on the bulb, wipe the
bulb with a soft cloth.
1. Hold the bulb @ with gauze or other protective material and insert the
bulb pins ² into the lamp socket’s pin holes ³ as far as they will go.
# Insert the bulb gently. Squeezing too hard will damage the bulb.
Bulb replacement during use or after use:
The bulb and the lamp socket surfaces and vicinity will be extremely
hot during use and right after use. Set the main switch to “ \ ” (OFF)
and disconnect the power cord from the wall outlet. Then allow the
old bulb, lamp housing and vicinity to cool before replacing the bulb.
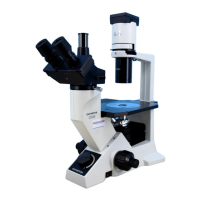
2 Installing the Transmitted Illumination Unit
(Fig. 4)
1. While aligning the indicator groove ² on the transmitted illumination unit
@ with the notch ³ on the lamp housing support´s brace, insert the
illumination unit @ gently into the support’s brace.
2. Turn the illumination unit @ 90° clockwise so that “ AS ” on the filter
holder faces directly to the front. Then tighten the clamping screw ƒ
using the Allen wrench provided with the microscope body to fix it se-
curely.
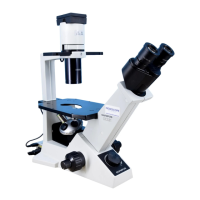
3 Installing the Lamp Socket
(Fig. 5)
1. Connect the plug @ with the socket pin ². Then, while aligning the
guide pins ³ with the condenser’s guide holes |, push the lamp socket
gently onto the Illumination unit.
Fig. 3
Fig. 4
Fig. 5
@
²
³
@
²
³
|
ƒ
@
²
³
|