/
/
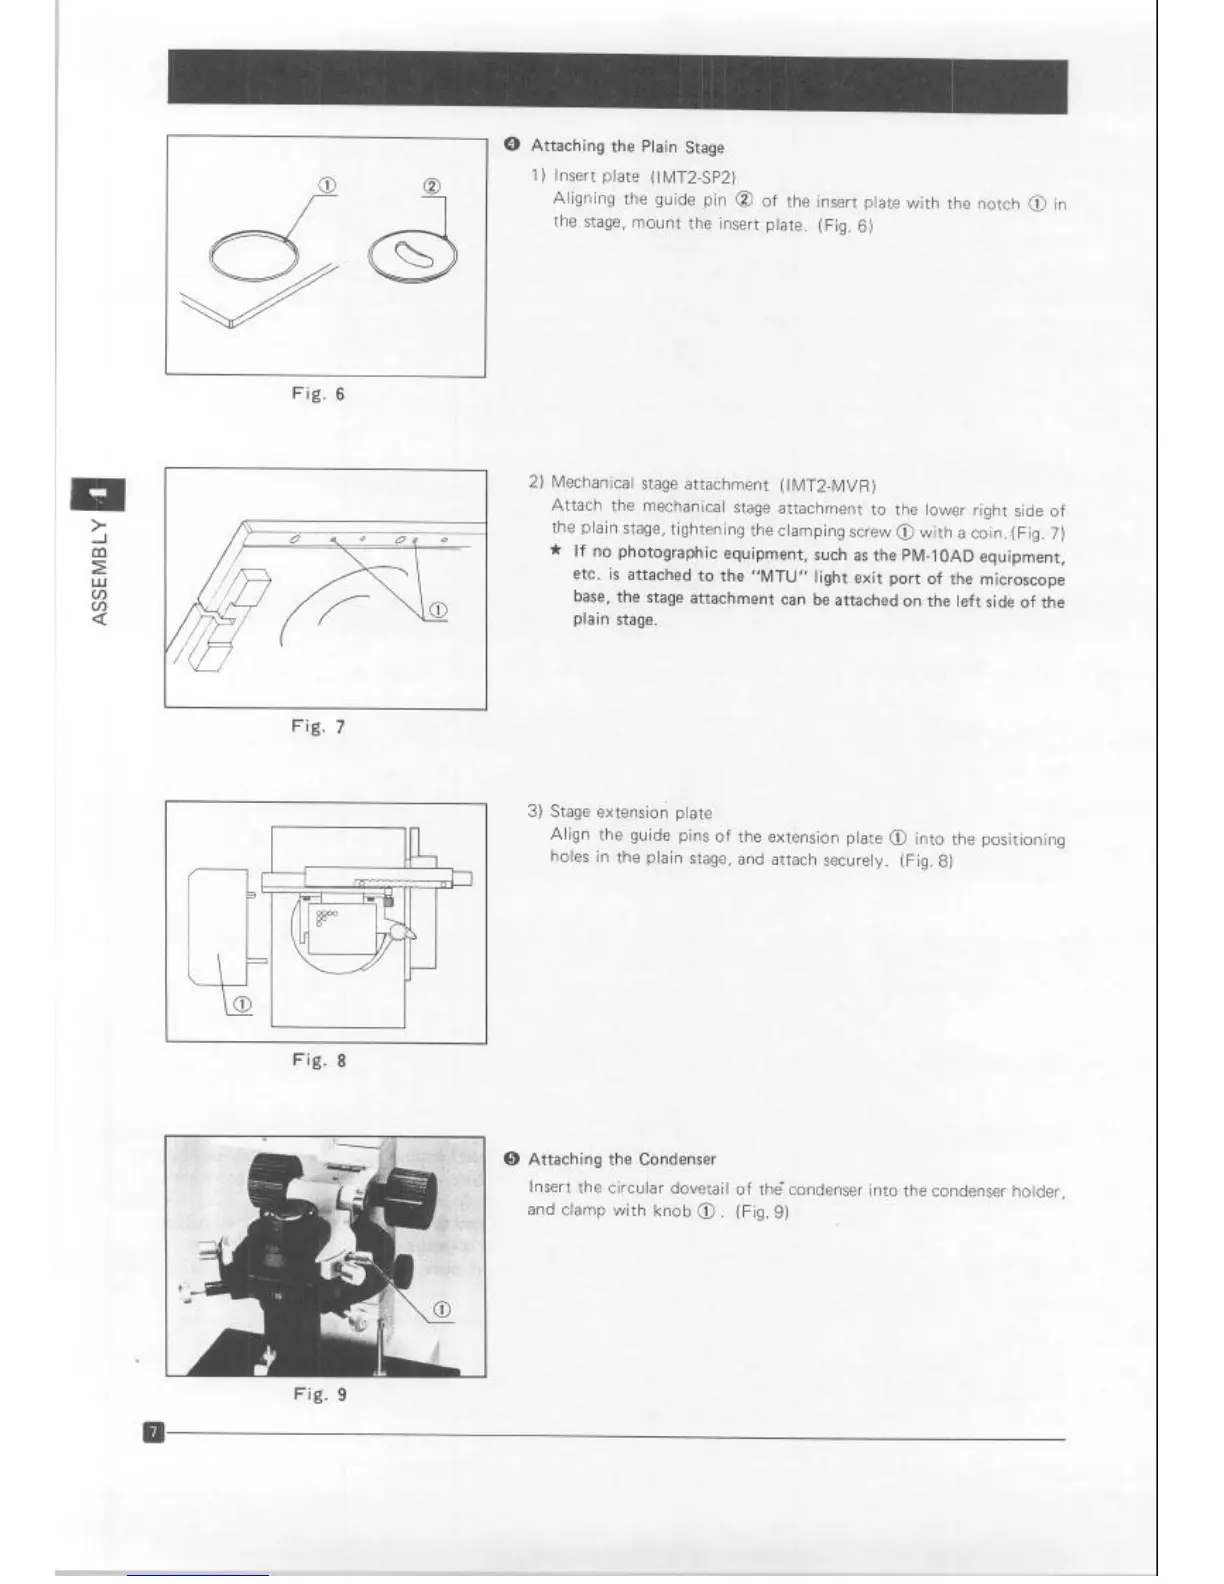
Fig. 6
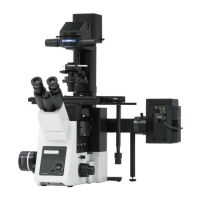
Fig. 7
0 Attaching the Plain Stage
1) Insert plate (I MT2SP2)
Aligning the guide pin @ of the insert plate with the notch @ in
the stage, mount the insert plate. (Fig. 6)
2) Mechanical stage attachment (IMT2-MVR)
Attach the mechanical stage attachment to the lower rrght side of
the plain stage, tightening the clamping screw @ with a coin. (Fig. 7)
* If no photographic equipment, such as the PM-1OAD equipment,
etc. is attached to the “MTU” light exit port of the microscope
base, the stage attachment can be attached on the left side of the
plain stage.
3) Stage extension plate
Align the guide pins of the extension plate 0 into the positioning
holes in the plain stage, and attach securely. (Fig. 8)
Fig. 8
0 Attaching the Condenser
Insert the circular dovetail of thg condenser into the condenser holder,
and clamp with knob @ (Fig. 9)
Fig. 9
Artisan Technology Group - Quality Instrumentation ... Guaranteed | (888) 88-SOURCE | www.artisantg.com