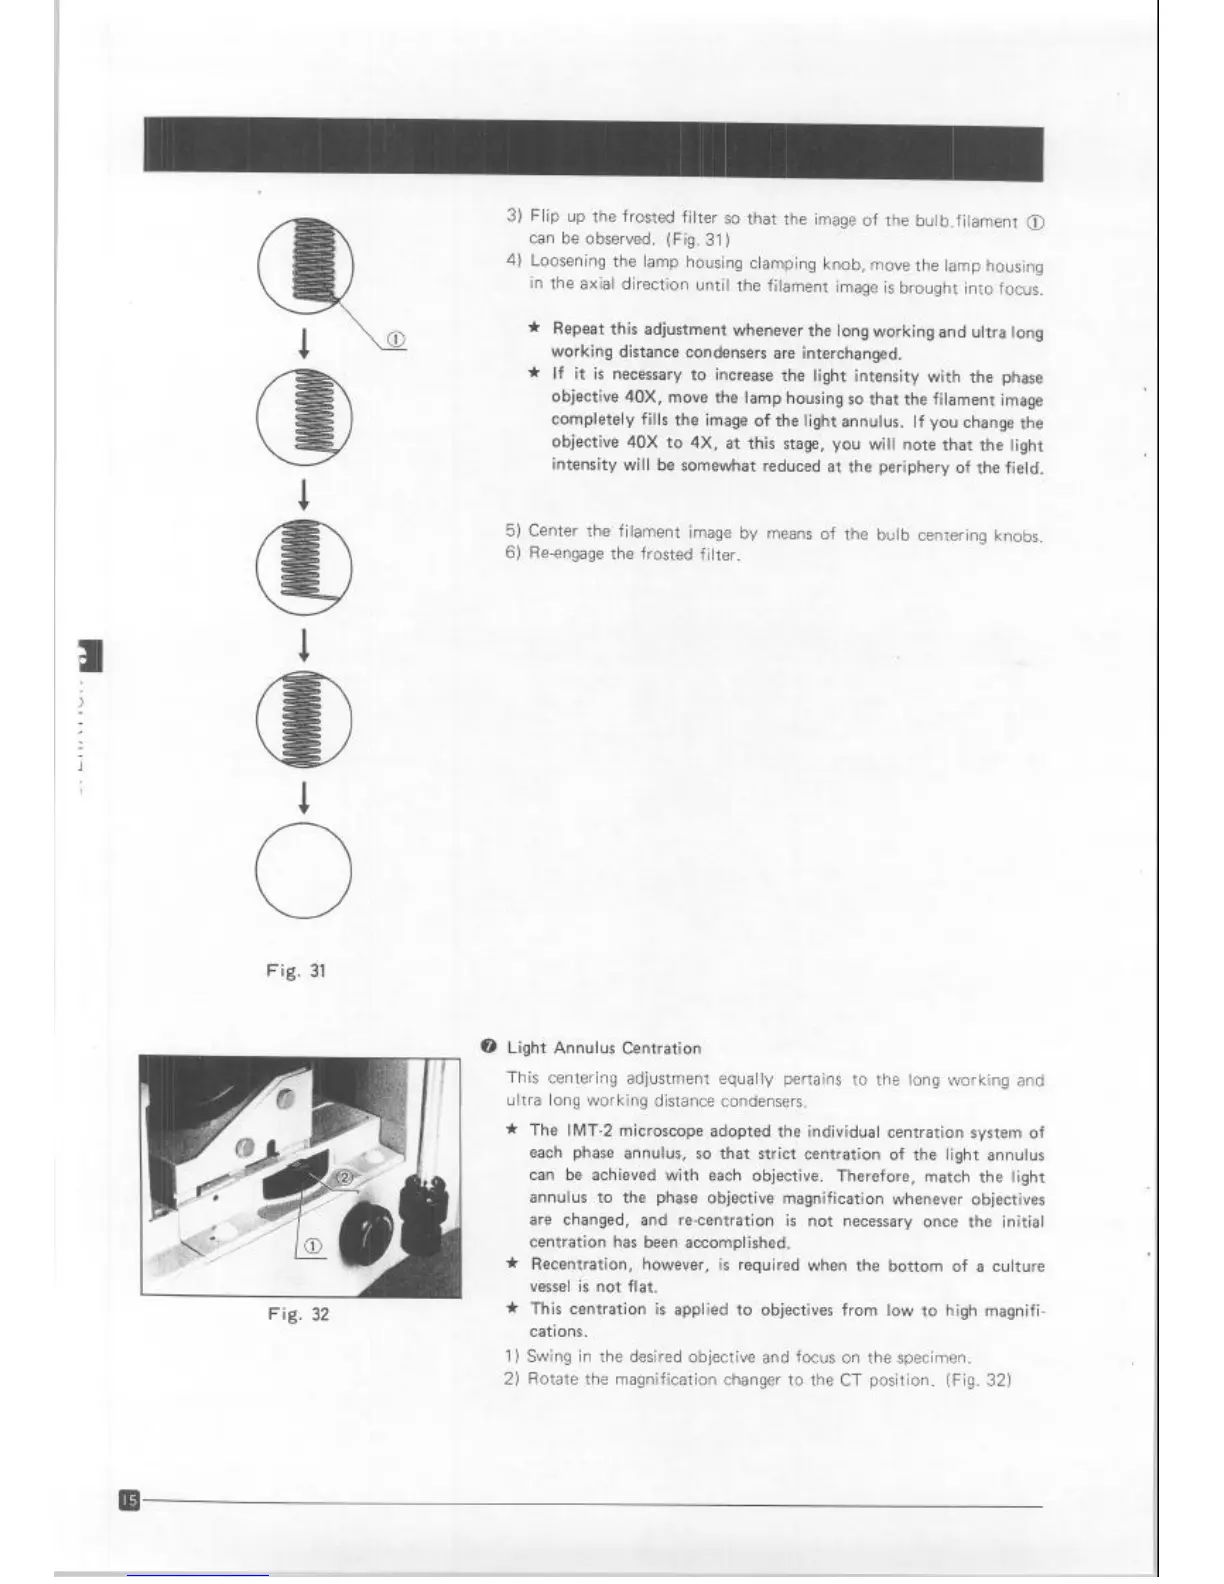
Fig. 31
Fig. 32
3) Flip up the frosted filter so that the image of the bulb.filament @
can be observed. (Fig. 31)
4) Loosening the lamp housing clamping knob, move the lamp housing
in the axial direction until the filament image is brought into focus.
* Repeat this adjustment whenever the long working and ultra long
working distance condensers are interchanged.
* if it is necessary to increase the light intensity with the phase
objective 40X, move the lamp housing so that the filament image
completely fills the image of the light annulus. If you change the
objective 40X to 4X, at this stage, you will note that the light
intensity will be somewhat reduced at the periphery of the field.
5) Center the filament image by means of the bulb centering knobs.
6) Re-engage the frosted filter.
@ Light Annulus Centration
This centering adjustment equally pertains to the long working and
ultra long working distance condensers.
*
*
*
1)
2)
The IMT-2 microscope adopted the individual centration system of
each phase annulus, so that strict centration of the light annulus
can be achieved with each objective. Therefore, match the light
annulus to the phase objective magnification whenever objectives
are changed, and re-centration is not necessary once the initial
centration has been accomplished.
Recentration, however, is required when the bottom of a culture
vessel is not flat.
This centration is applied to objectives from low to high magnifi-
cations.
Swing in the desired objective and focus on the specimen.
Rotate the magnification changer to the CT position. (Fig. 32)
Artisan Technology Group - Quality Instrumentation ... Guaranteed | (888) 88-SOURCE | www.artisantg.com