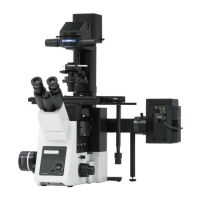
The IMT-2 microscooe features provisions for
selected according to preference.
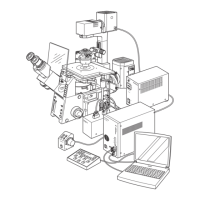
Fig. 40
A.
OM light path (for 35mm camera back)
1) A 35 mm camera back can be mounted in the same way a camera
tens is bayonet-mounted on a camera. (Fig. 38)
* lt is not recommended to take pictures of floating specimens in
liquid or on a micro-pipette, with objectives 40X
or higher, to
avoid shutter vibration as much as possible.
* Image magnification = Objective magnif. x 2.5 x Intermediate
magnif. (IX or 1.5X)
Ex.
40 x 2.5 x 1.5X = 150 (X)
2) Focus on the specimen, looking through the binocular tube.
8.
MTU light path
mounting of ohotomicrographic attachments at 4 places, which can be
(for direct mounting of the photomicrographic attachment PM-IOAD)
You can take pictures without shutter vibration, since the attachment
is designed vibration-proof.
1) The photo eyepieces available include NFK2.5X, 3.3X, 5X and6.7X.
* Insert the photo eyepiece into the port on the left side of the
base. (Fig. 39)
* When you insert the photo eyepiece into the photo tube, you
may feel resistance midway because of a spring; make sure to
completely insert the eyepiece until it stops.
2) Mount the photomicrographic attachment as indicated in Fig. 40.
If the unit is tilted, the image will be also tilted against the focusing
reticle in the microscope. To avoid tilting, make it a point tovisually
parallelize the horizontal contour of the attachment to the hori-
zontal line of the microscope.
3) Image magnification
= Objective magnif. x Intermediate magnif. (1X or 1.5X) x NFK
photo eyepiece magnif. x Camera magnif. (1X for 35 mm or
3X for large format)
Ex. 40x 1.5x5x 1X=300(X)
4) Focusing
Focus the frame reticle first, by rotating the helicoid mount of the
left hand eyepiece sleeve of the binocular tube, then focus the
specimen by means of the fine focus knob.
Artisan Technology Group - Quality Instrumentation ... Guaranteed | (888) 88-SOURCE | www.artisantg.com