10
IX2-UCB/U-HSTR2
5-2 Detailed Assembly Procedures
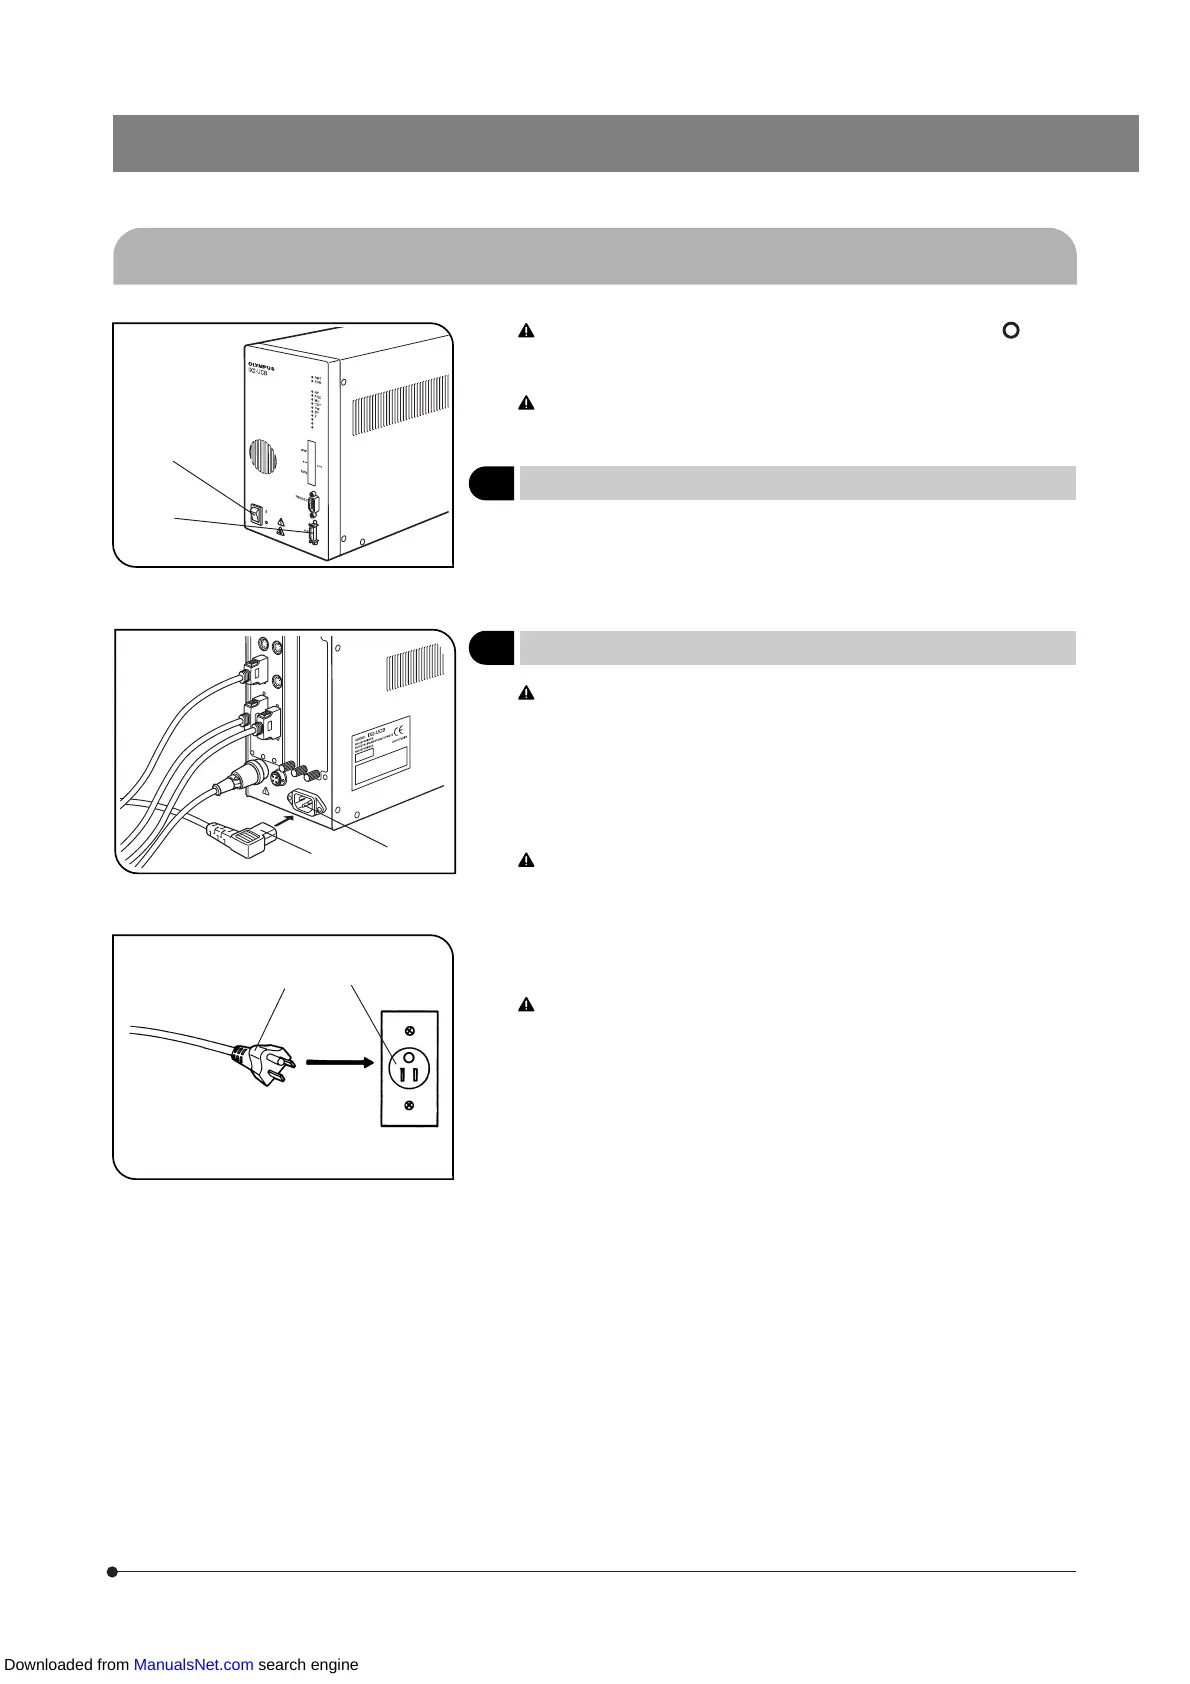
Fig. 4
Make sure that the main switch @ of the control box to “ ” (OFF)
before connecting the cable of the Hand Switch (and other modules)
and the power cord. (Fig. 4)
The power cord and connection cables are sensitive to bending or
twisting. Do not apply excessive force to them.
1
Connecting the Hand Switch Cable
(Fig. 4)
Align the connector of the Hand Switch with the HS connector ² on the
front panel of the Control Box and plug in firmly.
2
Connecting the Power Cord
(Figs. 5 & 6)
Always use the power cord provided by Olympus. If no power cord
is provided, please select the proper power cord by referring to the
section “PROPER SELECTION OF THE POWER SUPPLY CORD” at
the end of this instruction manual. If the proper power cord is not
used, product’s safety performance cannot be guaranteed.
1. Insert the connector | of the power cord into the power cord connector
³.
Connect the other end of the power cord to a power outlet with 3
conductors including the grounding line. If the power outlet is not
grounded properly, the electrical safety performance intended by
Olympus cannot be guaranteed.
2. Insert the plug ƒ on the other end of the power cord into the power
outlet ….
Distribute the power cord at a distance from the lamp housing. If the
power cord comes in contact with a hot part around the lamp hous-
ing, the cord may be melted, causing an electric shock hazard.
3. Bundle the connection cables using the Velcro (5 pieces) provided with
the microscope frame.
Fig. 5
Fig. 6
@
²
ƒ
…
|
³
Downloaded from ManualsNet.com search engine