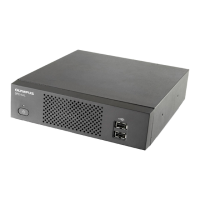
This document is an instruction manual for the Olympus SZX2-ILLT LED Transmitted Light Illuminator Stand. It provides essential information for safe operation, technical specifications, and maintenance.
Function Description:
The Olympus SZX2-ILLT is an LED transmitted light illuminator stand designed for use with Olympus SZX2 series microscopes (SZX16, SZX10). Its primary function is to provide various types of transmitted light illumination for observing magnified images of specimens in routine and research applications. The illuminator stand features a 4-position illumination cassette turret, allowing users to select between Brightfield (BF), Simplified Darkfield (DF), and Oblique brightfield illumination methods, as well as an idle position for specific observation needs. The light intensity is adjustable via a continuously variable dial, and the color temperature of the LED illumination remains constant regardless of intensity changes, eliminating the need for ND filters. The stand is designed to be stable, but users are advised to take anti-toppling measures and use the SZX-R drop prevention ring, especially when the microscope body is raised to a higher position or when using longer pillars.
Important Technical Specifications:
- Applicable Microscopes: SZX2 series (SZX16, SZX10).
- Applicable Focusing Assemblies: SZX2 series (SZX2-FOFH, SZX2-FOF, SZX2-FO).
- Transmitted Light Illumination: White LED illumination with an average life of 12,800 hours (when initial illuminance is 50%).
- Illumination Cassette Turret: 4-position (BF/DF/Oblique/-).
- Light Intensity Adjustment: Continuously variable dial.
- Dimensions (Base Section): 267(W) x 369(D) x 41(H) mm.
- Weight: 3.7 kg.
- Input Rating: 15 V DC, 1 A (AC adapter: 100-240 V AC, 1.0 A, 50-60 Hz).
- Operating Environment:
- Indoor use.
- Altitude: Max. 2,000 m.
- Ambient temperature: 5°C to 40°C (41°F to 104°F).
- Maximum relative humidity: 80% for temperatures up to 31°C (88°F), decreasing linearly through 70% (at 34°C), 60% (at 37°C) to 50% (at 40°C).
- Supply voltage fluctuation: ±10%.
- Pollution degree: 2 (IEC60664).
- Installation category (overvoltage category): II (IEC60664).
- LED Device Output: Max 1mW, Dual Wavelength: 460nm and 530nm.
Usage Features:
The illuminator stand offers several user-friendly features:
- Main Switch and Light Intensity Adjustment: The main switch (labeled "I" for ON and "O" for OFF) controls the LED illuminator. A dedicated dial allows for continuous adjustment of light intensity.
- Illumination Method Selection: A selector turret, located on the left side, allows users to choose between Brightfield, Simplified Darkfield, and Oblique brightfield illumination. The selected method is visible through the stage glass. The BF and DF cassettes are factory-mounted but can be repositioned. The idle position is recommended for observing high-contrast specimens.
- Oblique Illumination Adjustment: When oblique illumination is selected, the oblique effect can be adjusted by rotating a dedicated knob on the front of the stand.
- Illumination Cassette Position Change: The BF and DF illumination cassettes can be moved to different positions within the turret. This involves removing the stage glass frame using a provided driver, lifting the cassettes, repositioning them by aligning red indices, and then re-securing the stage glass.
- Attaching Sheet Films: Commercially available ND and CC sheet films (75 x 75 mm, up to two films with 0.1 mm thickness each) can be attached to the illumination selector turret. This requires cutting the film corners, removing the stage glass, placing the film(s) on the desired cassette, and then re-installing the stage glass.
- Attaching the Stage Plate: Optional stage plates, such as the SP-FL fluorescence center plate or SZ2-SPBW/SP-BW2 monochrome plate, can be used for reflected fluorescent light observation. This involves removing the stage glass, placing it upside down, and then placing the stage plate on top. It's important to note that this installation method compromises the simplified waterproof function of the stand, requiring immediate wiping if water is spilled.
- Antiglare Plate Attachment: The manual details two methods for attaching an antiglare plate (SZX2-CCV for SZX2 series and SZX-CCV for SZX series) to prevent glare from bright LED light. Both methods involve clamping knobs and positioning pins to secure the plate to the microscope body or objective.
- Pillar Installation: The pillar, which supports the microscope body, is installed by loosening clamping screws, inserting the pillar until it reaches the bottom, and then tightening the screws. The manual warns that using longer pillars (e.g., SZH-P400, SZH-P600) can reduce stability and necessitates toppling prevention measures and the use of the SZX-R drop prevention ring.
- Power Connection: The AC adapter and power cord must be connected correctly, ensuring the main switch is OFF before connection. Only Olympus-provided or approved power cords and AC adapters should be used, and proper grounding is essential for electrical safety.
Maintenance Features:
The manual outlines key maintenance and storage guidelines to ensure the longevity and optimal performance of the illuminator stand:
- Handling: The stand is a precision instrument and should be handled with care, avoiding sudden or severe impact.
- Environmental Conditions: Avoid direct sunlight, high temperature, humidity, or vibration. Adhere to the specified operating environment conditions.
- Cleaning Lenses and Glass Components: Use a commercially available blower to remove dirt, then gently wipe with cleaning paper or gauze. For fingerprints or oil smudges, use gauze slightly moistened with absolute alcohol, handling it carefully due to its flammability and ensuring good ventilation.
- Cleaning Non-Optical Components: For non-optical parts, use a soft cloth slightly moistened with a diluted neutral detergent. Avoid organic solvents.
- Water Spillage: The stage surface has a simplified waterproof construction. If water is spilled, immediately set the main switch to OFF, unplug the power cord, and wipe with a dry cloth. Also, remove the stage glass and wipe the window lens and surroundings with soft gauze. If water penetrates inside the equipment, contact Olympus for an electrical safety check.
- Disassembly: Do not disassemble any part of the equipment, as this can lead to malfunction or reduced performance.
- Infection Prevention: After observing potentially infectious specimens, clean all parts that came into contact with the specimen. Remove specimens before moving the illuminator stand to prevent accidental drops.
- Stability: Be aware that increasing the microscope's height or mounting accessories can make it unstable. Implement anti-toppling measures to prevent specimens from dropping.