4 Maintenance and Inspection
4-2 Replacing the battery
BN50T/BN75T/BN100T/BN150T/BN220T/BN300T
4-8
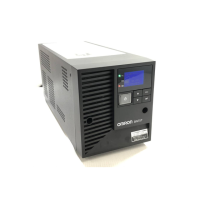
7. Attach the front panel.
Attach the front panel to the unit. 1)
Use a screwdriver to securely tighten (clockwise) the 2 screws at the top of the front
panel. 2)
1)
2)
Tighten the 2 screws.
Battery replacement is now complete.
Notes
Be sure to reset the battery life counter after replacing the battery.
After replacing the battery, reset the battery life counter from the “Control” - “Reset
B.life counter” screen in the menu on the unit’s LCD.
If you do not reset the battery life counter, a battery replacement alarm may occur
earlier than the expected battery life.
Write the battery replacement date on the included battery replacement date
label, and attach the label to the unit.
Or, enter the battery replacement date from the “Setting” - “Battery Settings” - “Battery
Installation” screen in the menu on the LCD.
4 Maintenance and Inspection
4-2 Replacing the battery
BN50T/BN75T/BN100T/BN150T/BN220T/BN300T
4
4-9
BN100T/BN150T
1. Use a screwdriver to loosen (turn counter-clockwise) the 2 screws at the top of the front
panel of the unit, until they turn freely. (The screws cannot be removed from the front
panel.) 1)
Lower the front panel and pull toward you to remove. 2)
Place the removed front panel on the unit. 3)
Loosen the 2 screws.
1)
2)
3)
Caution (for maintenance)
Do not pull the cables of the LCD or disconnect the con-
nectors.
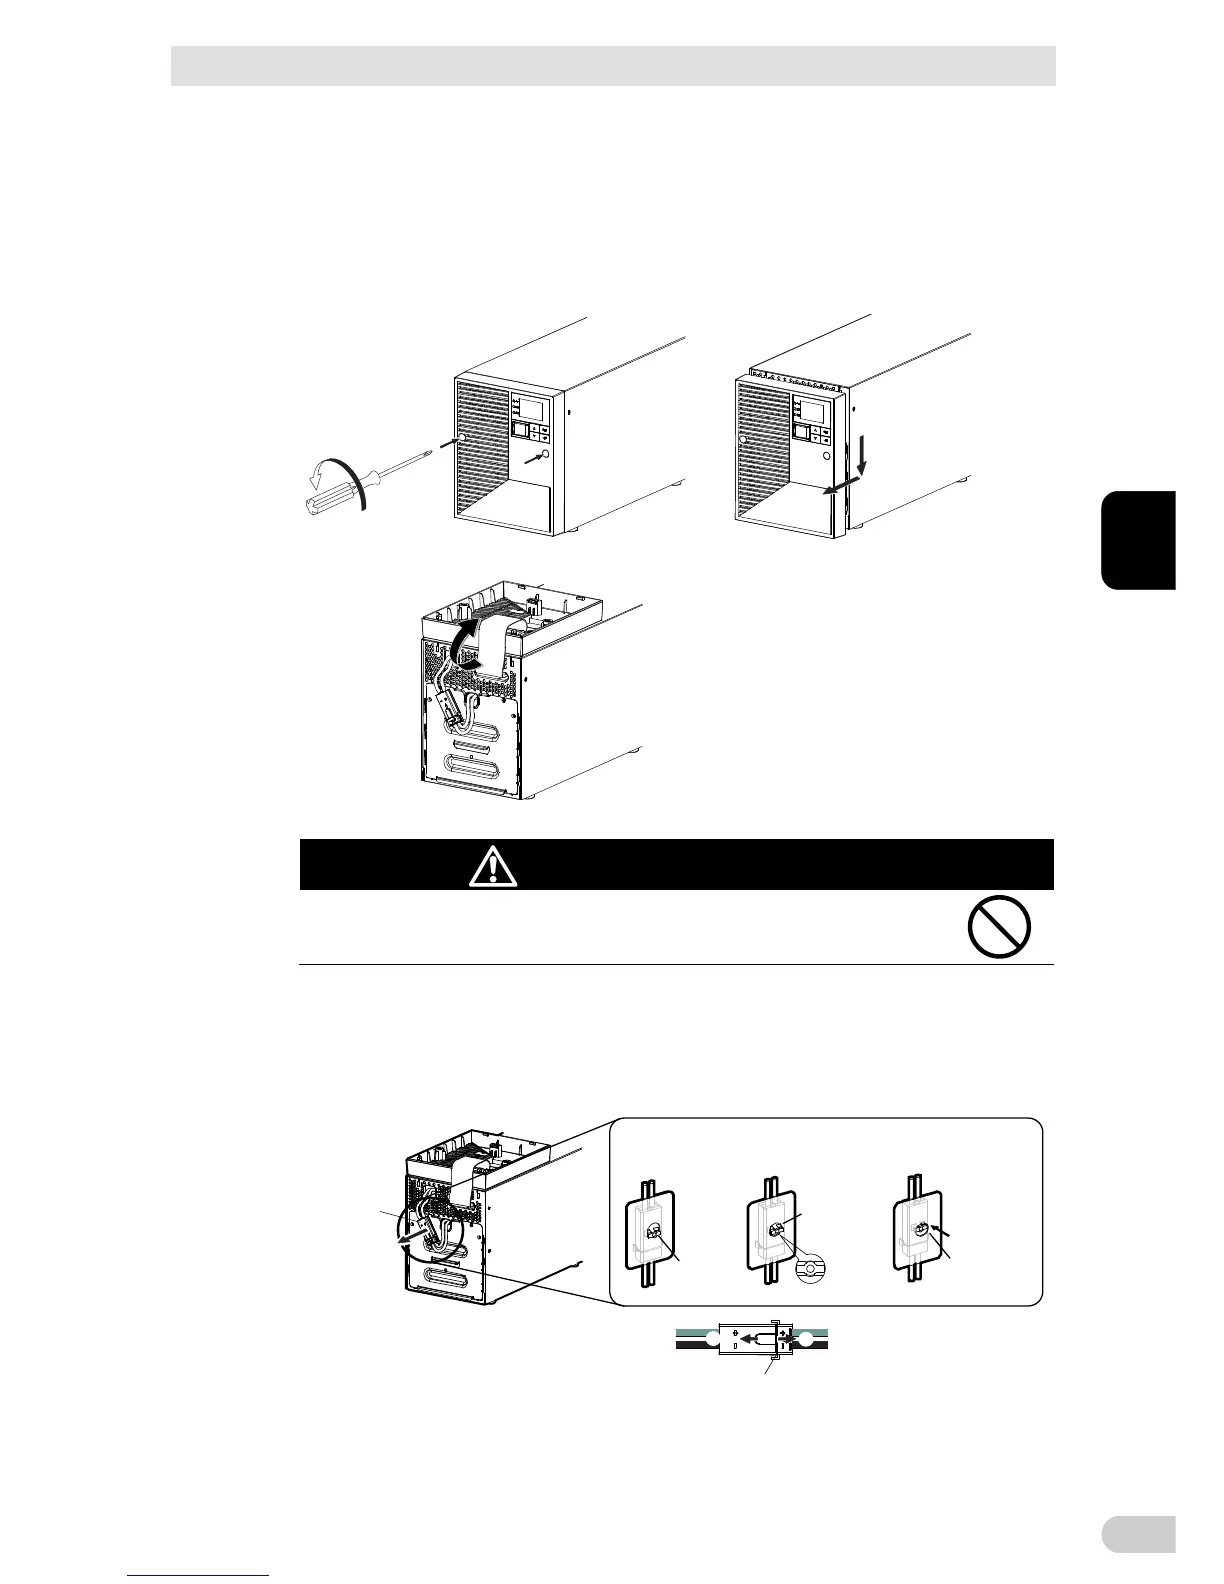
2. Remove the battery connector from the plate cover. 1)
The battery connector is locked in the fastening hole in the plate. Lift the connector
(2)-1), move to the center of the hole (2)-2), and pull the connector to the back to unlock
(2)-3).
Hold the battery connector, and pull the connectors apart. 3)
Pullout label (Pull this to remove.)
Battery
connector
2)-1 2)-2
3) 3)
2)-3
Connector
locked
Move
connector
to hole’s
center
Connector
unlock
Back of the plate cover
1)
 Loading...