22
Pull the holding clamp towards you, place your material between it and its frame, and release the clamp to
hold your material in place at the correct height.
Be aware that using the deeper bed and clamp limits your engraver’s processing area to 8 inches by 5 inches
(200×125 mm).
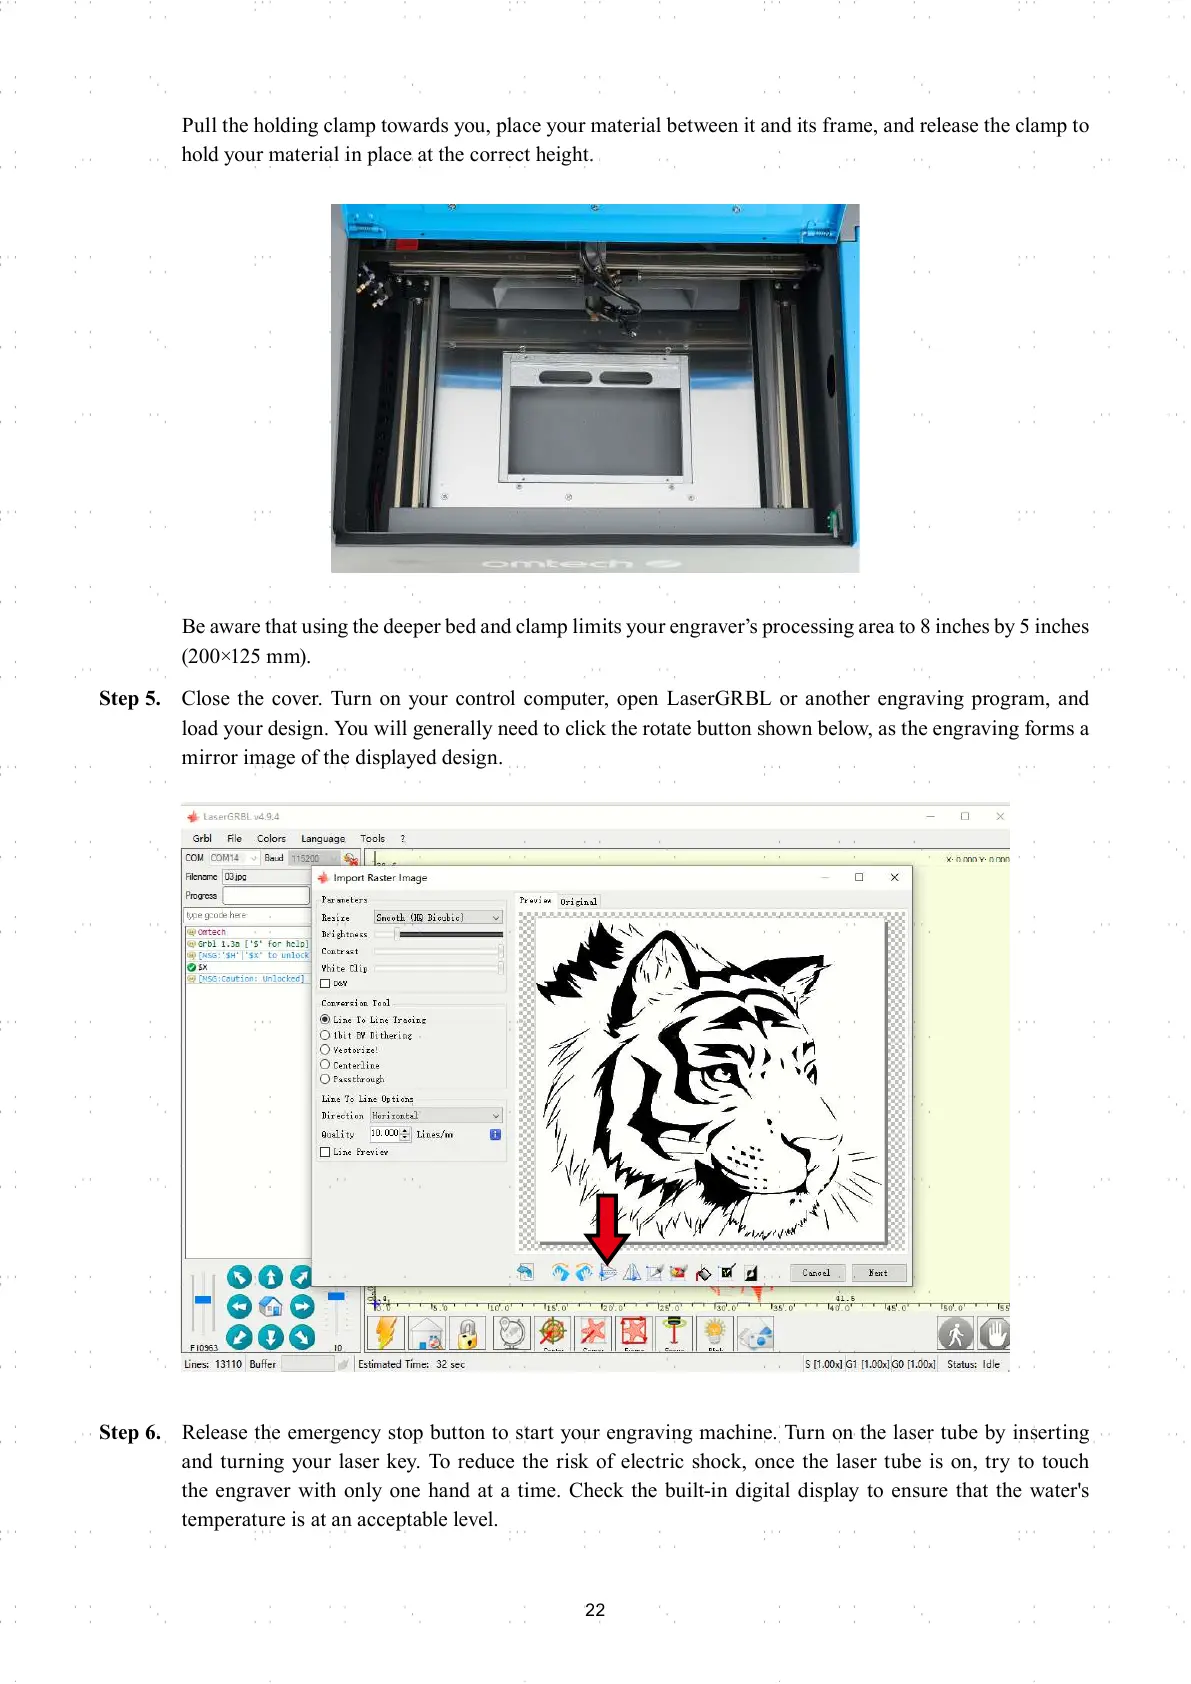
Step 5. Close the cover. Turn on your control computer, open LaserGRBL or another engraving program, and
load your design. You will generally need to click the rotate button shown below, as the engraving forms a
mirror image of the displayed design.
Step 6. Release the emergency stop button to start your engraving machine. Turn on the laser tube by inserting
and turning your laser key. To reduce the risk of electric shock, once the laser tube is on, try to touch
the engraver with only one hand at a time. Check the built-in digital display to ensure that the water's
temperature is at an acceptable level.