ONEAN X USER’S MANUAL
14
04
Use and ConfigUration of the eqUipment
2. On this position, press on the drop
until the first LED of the board display
on the controller begins to blink.
At this moment, the LED bar will
progressively light up. Each position
represents a different function.
a) Synchronization. 1St Led bLinking
Always with the batteries initially disconnected, and once the rst LED
begins to blink, you must press on the drop again to access the submenu.
In this submenu, the controller will start searching for a board for a
few seconds and the sync LED will begin to blink.
As the sync LED is blinking the battery must be inserted to complete
the synchronization (see 4.1.2.).
Once the board is synched, both LEDs will
blink at a higher pace indicating that the
process has been successfully completed.
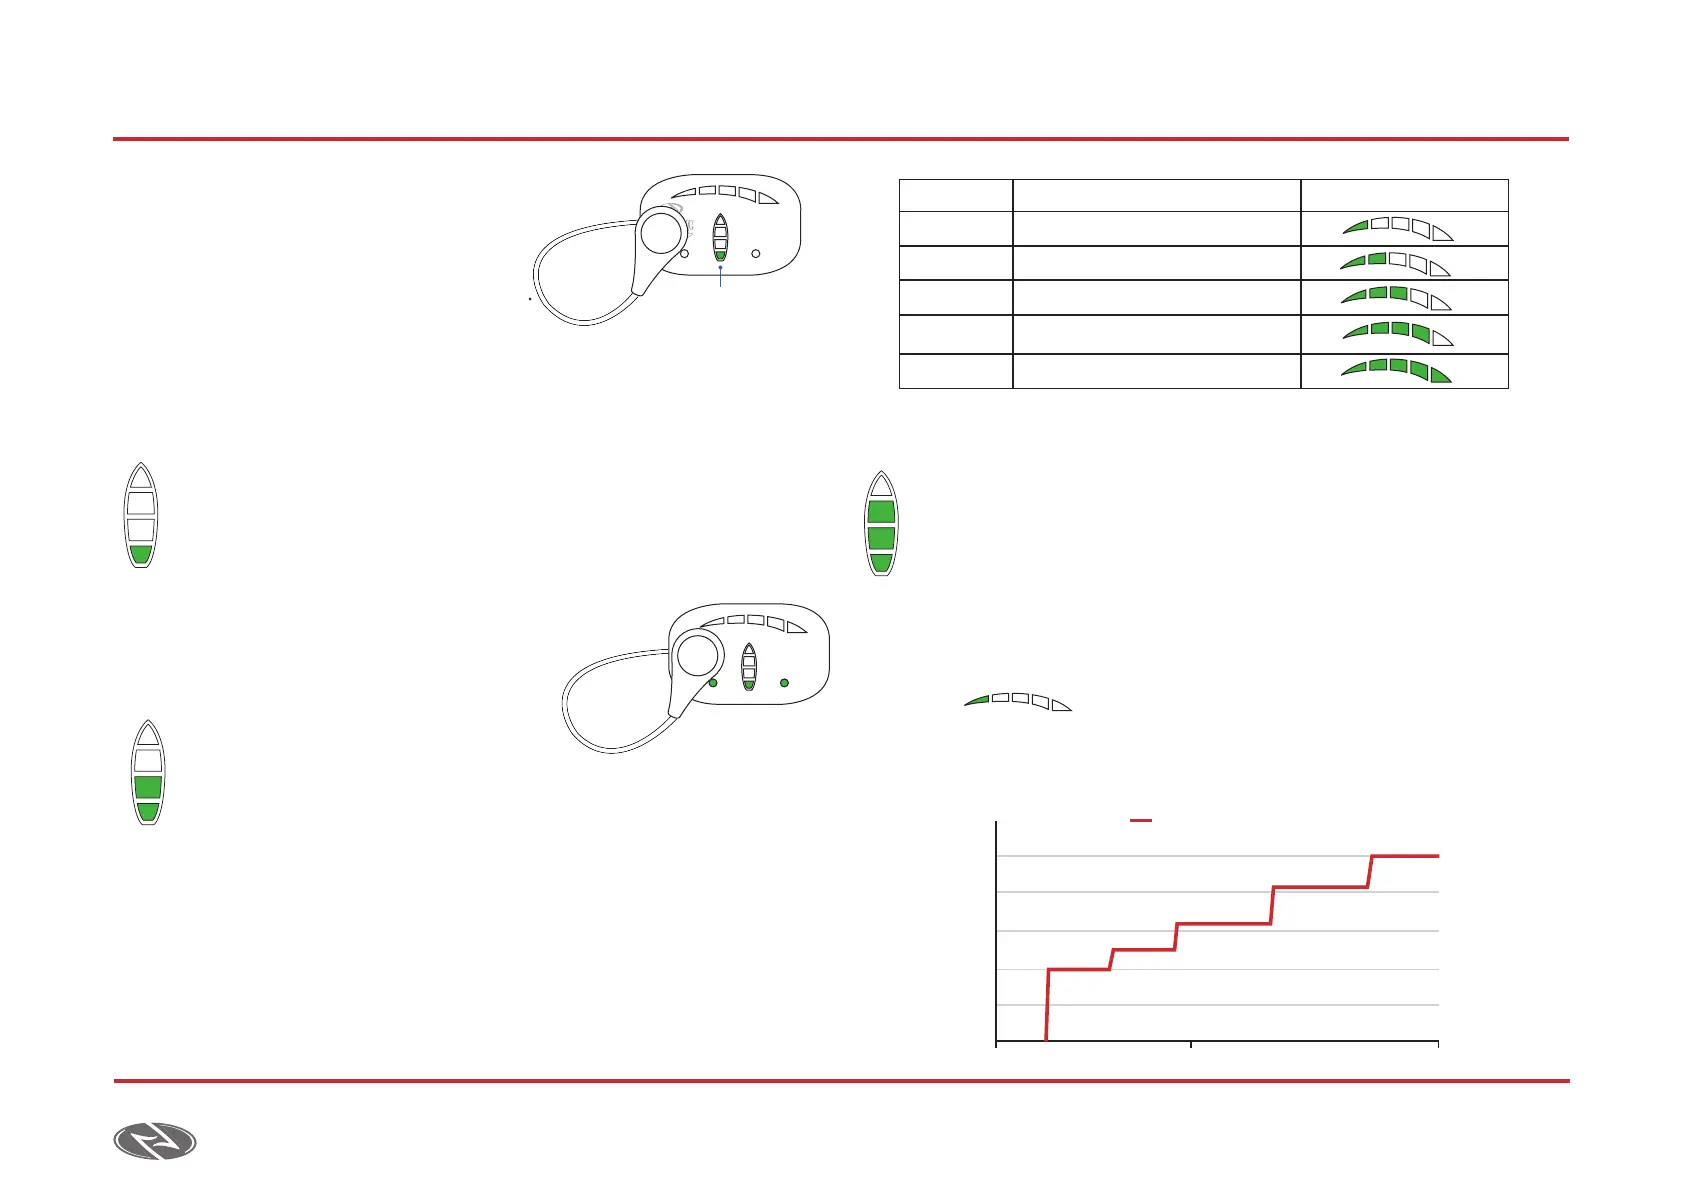
b) MaXiMuM Power. 2 LedS
bLinking
Once the rst two LEDs start
ashing you must press on the drop to access this submenu.
The power bar will progressively light up. Press on the drop
to set the desired value according to the following description.
c) controLLer SenSitivity. 3 LedS bLinking
Once the rst three LEDs are ashing you must press on the drop to
access the submenu.
The power bar will progressively light up. Press on the drop
to set the desired value according to the following description.
• 1 LED: Staggered 1.
• On this profile we have discretized the power levels of
the jet in 5 different ranges of pressure on the drop. It
allows us to control and hold the pressure on each range.
SYNC BATTERY
LED Blinking
2
SYNC BATTERY
LEDs Power [W] Display
1 LEDs 1.500 W
2 LEDs 2.300 W
3 LEDs 5.100 W
4 LEDs 7.400 W Factory Settings
5 LEDs 10.000 W
Power %
Low
0
20
40
60
80
100
Medium High
Staggered 1