ONEAN X USER’S MANUAL
12
04
Use and ConfigUration of the eqUipment
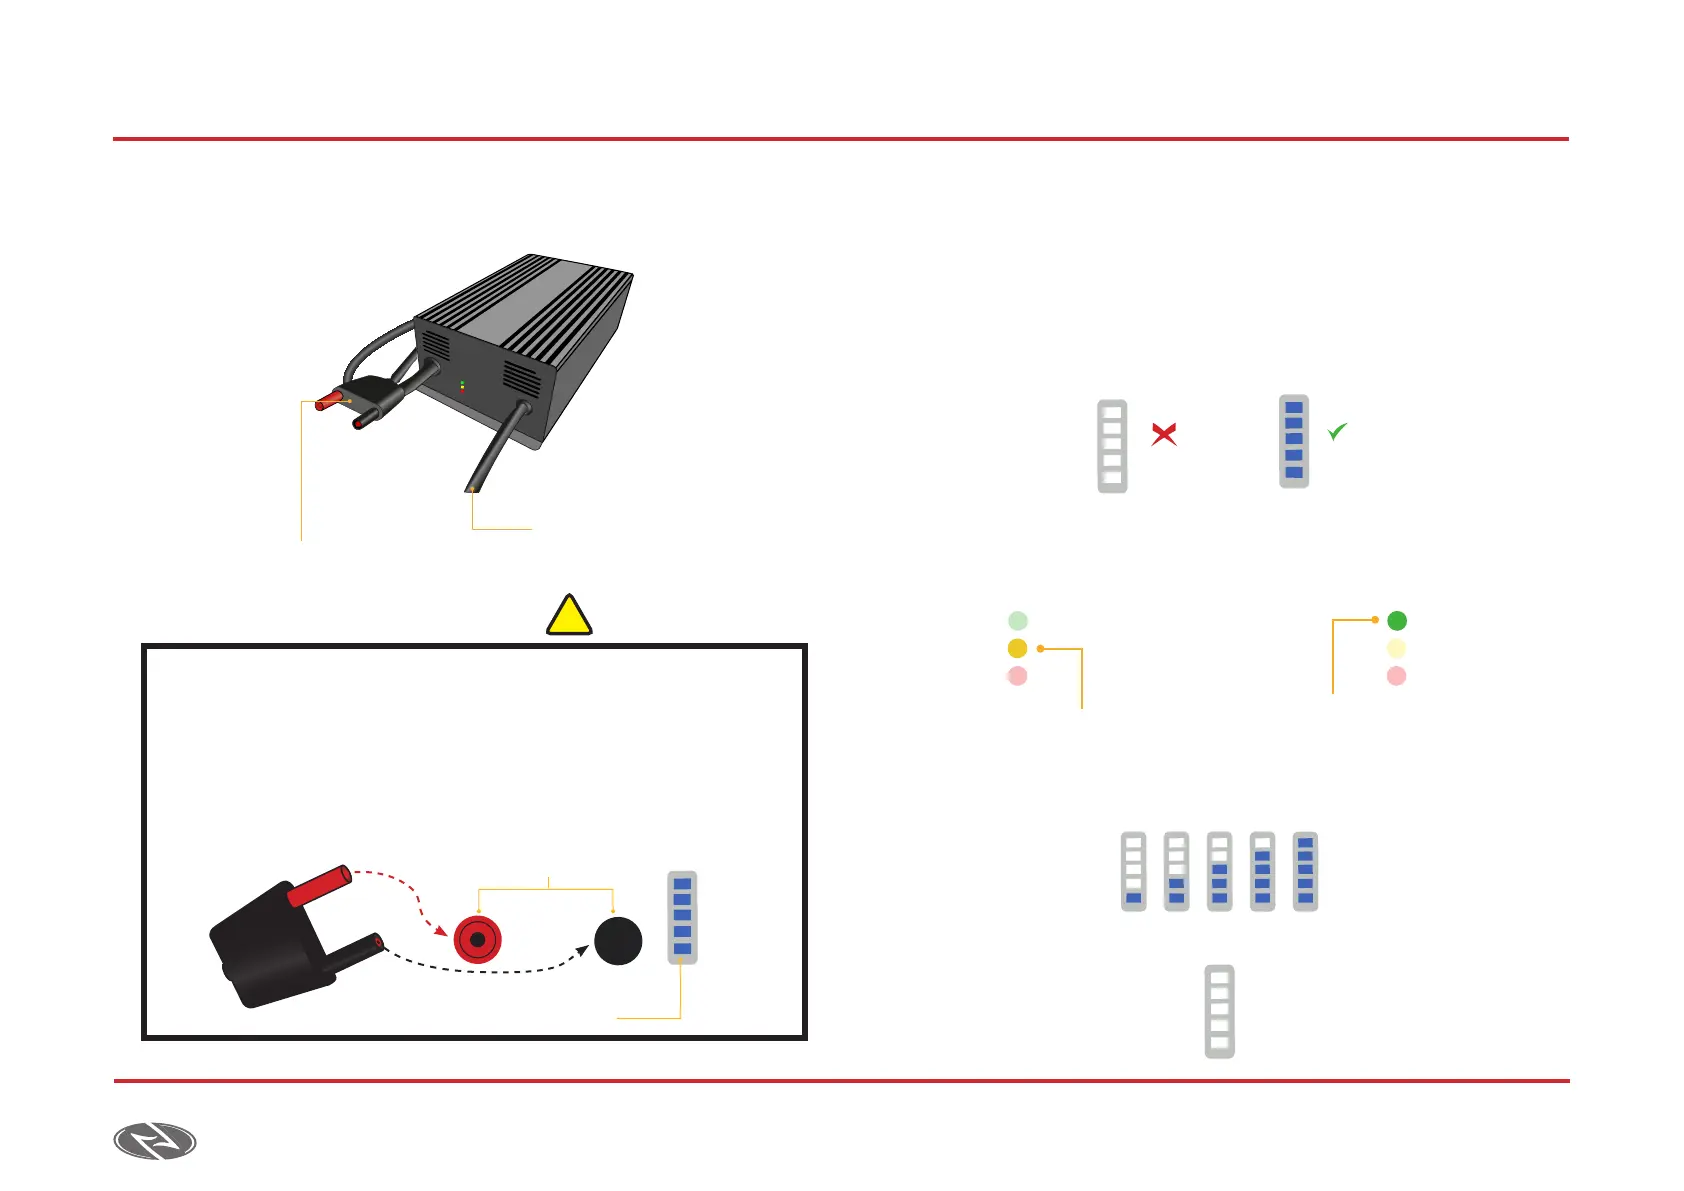
a) connection
1. In order to charge the battery it must be taken out from the board.
2. Insert the connector to the battery respecting the colours as shown in the
previous drawing (red with red and black with black).
3. When connecting the charger to the battery the LEDs will light up
indicating a successful connection. In case of the LEDs not lighting up,
please make sure that the charger is properly plugged to the wall
outlet and to the battery.
4. Once the battery is connected, the display LED indicator of the charger
will light up indicating the charge (img. A) until fully charging it, turning to
green (img. B).
5. The LEDs in the battery will progressively light up as the battery is being
charged.
6. When the battery is fully charged the LEDs will turn off and
you must proceed to disconnect the battery.
!
Frontal View
AC Cable
DC Cable
Static Yellow light indicates
normal charging
Green LED lights up when battery is
fully charged
¨A¨Charging
“B” Full charge
Charging indicator
Connector body
Battery connectors
WARNING!
Always connect the charger to the wall outlet rst and then to the
battery.
It is extremely important to respect the colours when connecting the
cable to the battery. Reverse polarity could have some devastating
consequences for the battery.
4.1.3 battery charge