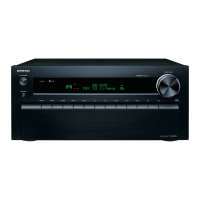
TX-NR929/ DTR-60.5/ DHC-60.5
OPERATION CHECK-3
2.CONFIRMATIONS OF OPERATIONS
2-10. CONFIRMATION OF HDMI MAIN OUTPUT OSD(ON SCREEN DISPLAY) OPERATION
a. Confirm that display SET-UP MENU for push SET UP buttons.
b. Confirm that specified operations for ENTER(with 4-cursor) buttons are made.
c. Confirm whether the screen displayed at the POWER ON is correct.
Refer to OPERATION CHECK-12.
2-11. MISCELLANEOUS
a. Confirm SELECTOR MUTING operation.
b. Check the action of Left, Right, Center, L-Sur., R-Sur., Subwoofer, Sur.Back-L,Sur.Back-R, Front High-L, Front High-R
,
Level Up/Down.
c. Confirm analog, digital and video REC SELECTOR operation.
d. Confirm Video output signal as shown Table 2., while Video signal are input as shown
Table 1.
*refer to table1,2 of OPERATION CHECK-10.
e. Confirm HD-AUDIO test by OAE QC sampling inspection.
f. Confirm the video signal from BD/DVD Composite in is output to HDMI monitor out at the initial setting.
Then, input video signal to Component IN1, confirm change to Component IN1 signal from composite video signal.
g. Confirm the firmware combination check.
1.
Push STANDBY/ON button while pushing down TV/CD button to display
"TEST-__".
2.
Next, if Enter keys are pushed, FL display "F/W Set OK" or "F/W Set NG" after it becomes a F/W COMBINATION TEST MODE.
2-12. CONFIRMATION OF COOLING FAN OPERATION *Only TX-NR929,DTR-60.5
a. When no input signal, confirm to fan no rotate.
b. When TEST4-43, confirm to fan slow speed rotate.
c. When TEST4-46, confirm to fan fast speed rotate.
2-13. CONFIRMATION OF H
DMI AUDIO OPERATION. *OPERATION CHECK-10. of Video & HDMI Test mode.
a. The sound of HDMI are confirm in the following disk.
DVD:TEAC DVD TEST Disk MDVD-111 T2-C1
DVD:ABX DVD TEST Disk TDV-540 T2-C1
SACD:PHILIPS SUPER AUDIO CD (Channel Configuration Test Disc) Ver 1.2 / May 2001
Blu-ray:ALMEDIO ABD-500
b. Confirm the HDMI Video output by the Component video input.
c. (CONFIRMATION OF HDMI I2S SIGNAL.)
1. Input the signals below from HDMI1 terminal.
ABD-500 NO.12 (LPCM7.1ch)
2. Change the state to TEST 6-00. Confirm the signal is output from L/R,SW/C,SL/SR,SBL/SBR.
d. (CONFIRMATION OF HDMI SPDIF SIGNAL.)
4. SPDIF signal is input from HDMI3 terminal.
5. When TEST 6-06, confirm the soun
d(HDMI IN3)outp
uts from the speaker(except DHC-60.5)/ from preout(only DHC-60.5).
6. When TEST 6-07, confirm the sound(DVD analog input) outputs from the TV of Main HDMI OUT and Sub HDMI OUT.
e. (CONFIRMATION OF HDMI DSD SIGNAL.)
7. When TEST 6-04, confirm the sound of DSD 5.1ch input HDMI IN 2, output from the speaker(except DHC-60.5)/
from preout(only DHC-60.5).
(CONFIRMATION OF HDMI ARC SIGNAL.)
f. Hook up ARC-jig to HDMI Output on AVR, and input SPDIF (less than or equal to fs: 96kHz) signal to ARC-jig.
g. When TEST 6-09, confirm the sound outputs from the speake
r. *On
ly
DHC-60.5
from BALANCE OUT
Note 1) During ARC testing, do not connect to the other HDMI inputs.
2-14. CONFIRMATION OF MHL
a. After set the "TEST 6-10", connect the MHL JIG. Confirm that "OK" of FL display lights.
b. After set to the "TEST 6-11", confirm that LED of MHL JIG does not shine.
c. After set to the "TEST 6-12", confirm that LED of MHL JIG sh
ines.
And confirm that P1 connector voltage of MHL JIG is within the limits of 2.35V to 2.61V.
e. Confirm real MHL check by QC sampling inspection.
Noets
Use HDMI cable that is not connected shielded case to 2PIN.

 Loading...


