10. Once all the sensors have been assigned, click on the button Close (12).
11. Press the button Exit Setting Mode (1).
12. Close the configuration window of the digital amplifier by clicking on the button OK (13).
13. Send configurations to the amplifier by following the instructions in section 6.5.
18. Next, turn to the amplifier and proceed as follows:
a. Connect a pink noise generator to the PRIORITY IN input of the amplifier. Activate the priority
of this input.
b. Using the buttons on the front of the amplifier, increase the priority volume until the desired
maximum paging volume level is obtained in this zone. Once the sensor has been configured, the
volume of the paging channel of the amplifier will never exceed this volume established,
independently of the noise level captured by the sensor.
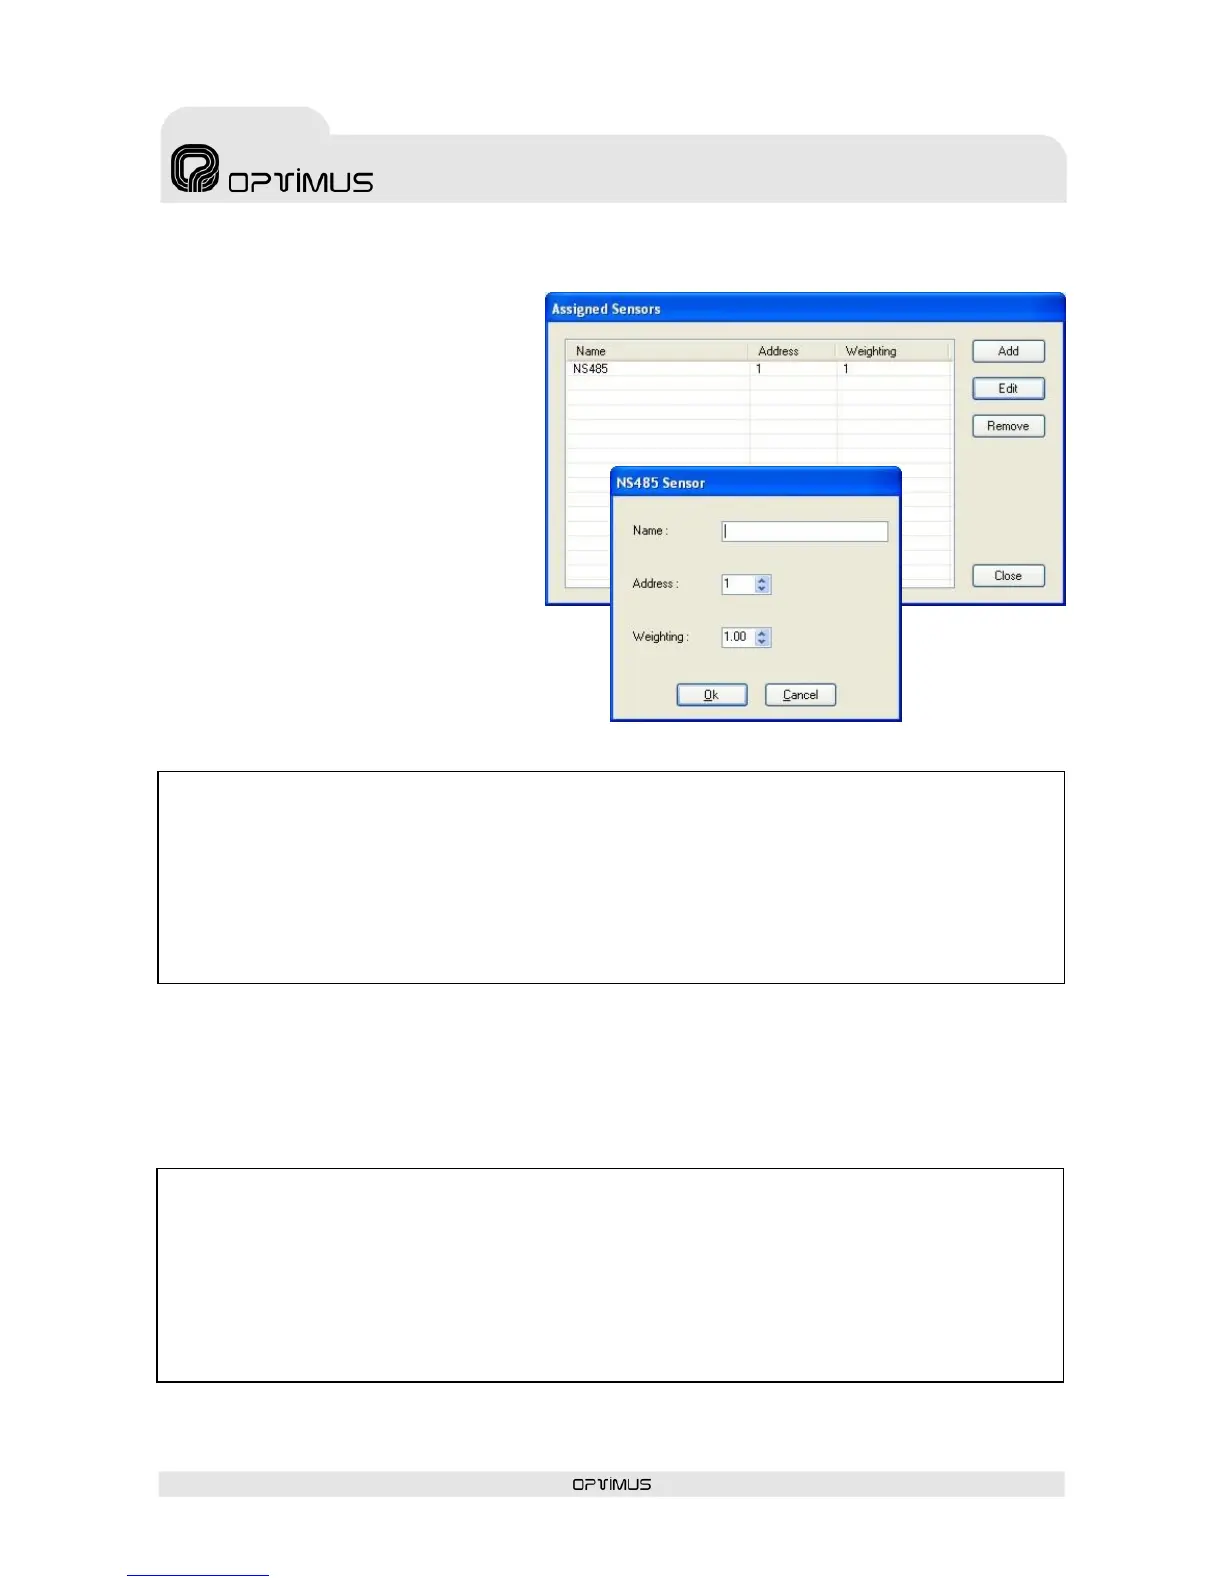
7. Press Add (7) to assign a noise sensor to the amplifier.
8. Configure the parameters of the
NS485 sensor.
Name (8): Enter a name to identify
the noise sensor.
Address (9): Enter the RS485
address of the noise sensor.
Weighting (10): If several noise
sensors are assigned to an amplifier,
the noise value is obtained by
calculating the weighted average of
the values obtained by each of the
sensors. The Weighting parameter
indicates the weighting of each of
the sensors in the calculation of the
noise value.
9. Press OK (11) (repeat steps 7 to 9
if you wish to assign more than one
sensor to the amplifier).
14. Edit the unit once again and select the Automatic Level Control tab.
15. Press the button Enter Setting Mode (1).
16. Select the Priority tab (14).
17. Deactivate Bypass (15).