Top: Choose “Top”, the projector can be operated by the re- `
mote control from top IR receiver.
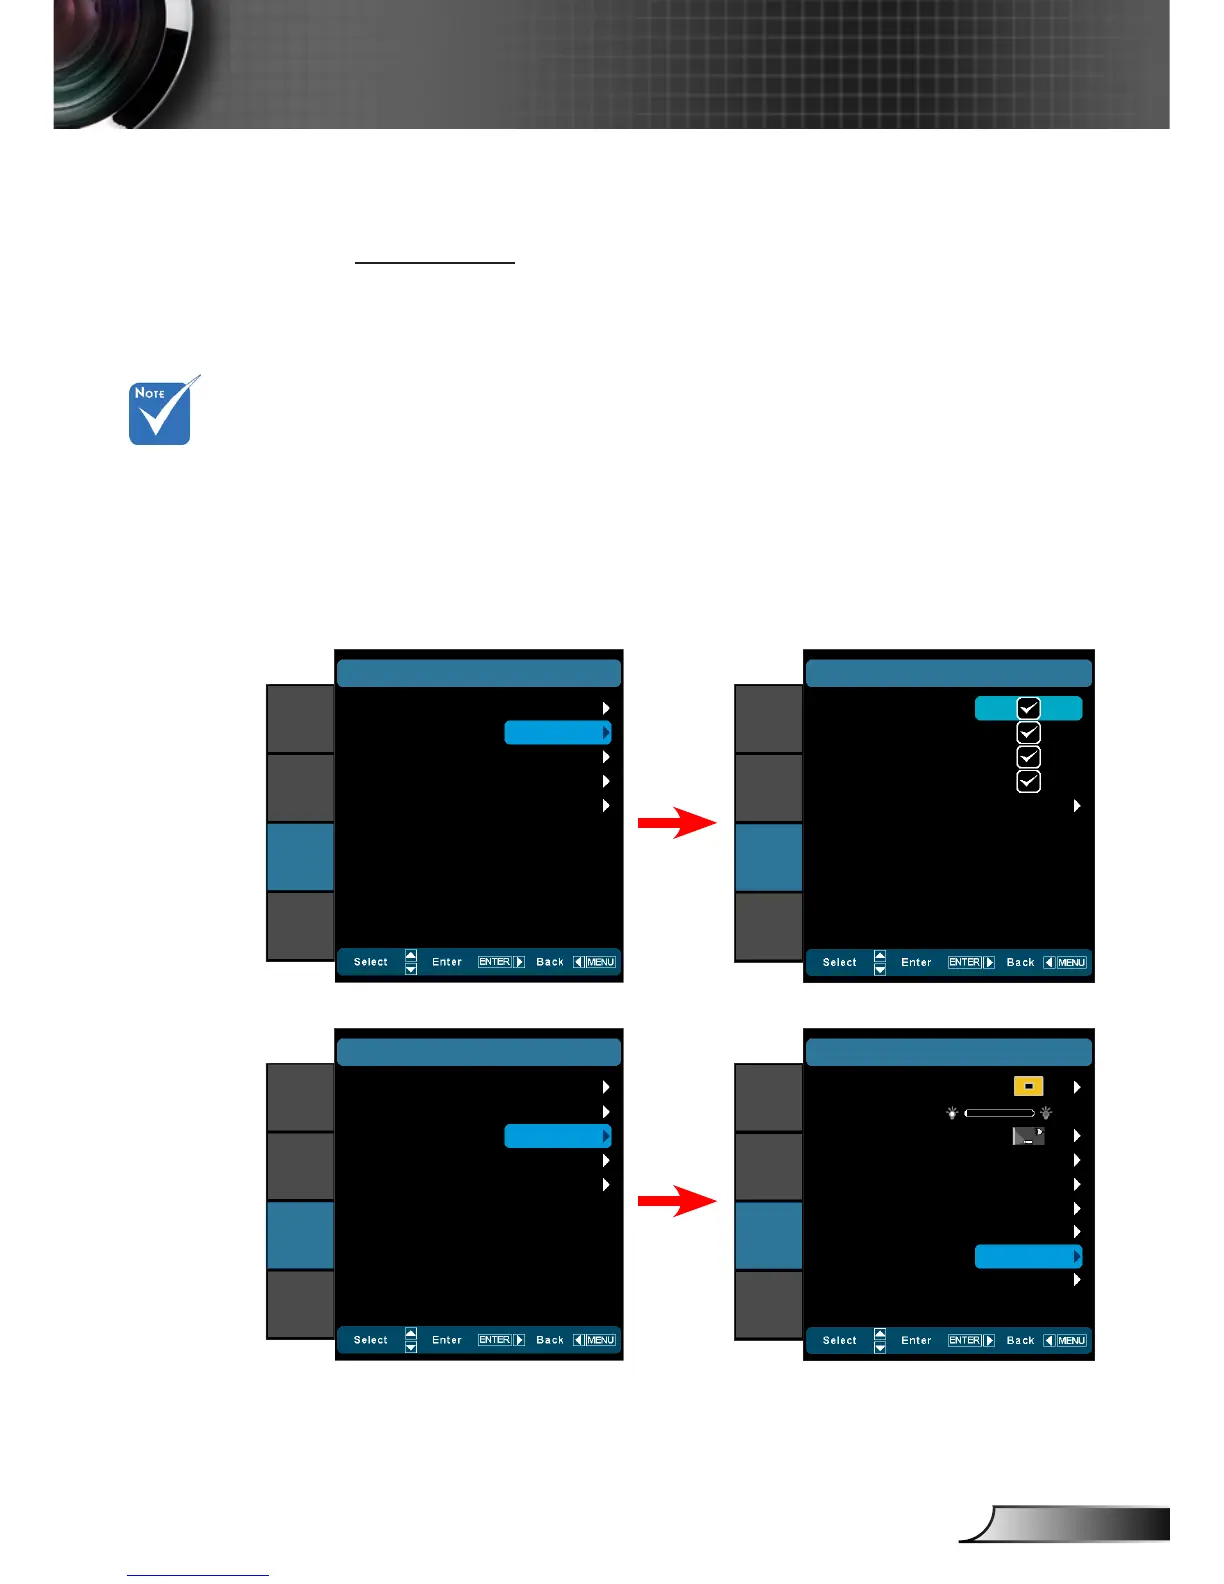
12V Trigger A
12V trigger A provides a standard trigger for motorized screens.
12V Trigger B
(#1)
Press the “Off” to disable the trigger. `
Press the “On” to enable the trigger and the programmable `
sub-menu. The sub-menu is accessed by selecting the “On”
option then pressing the “Enter” button on the remote control.
Checking an option in the sub-menu will activate the trigger
when the corresponding display mode is selected. For the ex-
ample, 4:3 has been selected – this means that Trigger B will
be active when the projector display mode is set to 4:3. The
trigger will be inactive for all the other display mode options.
(#1) When the mov-
able lens is selected,
this item will be gray
out and become
“Auto235”.
Off
SYSTEM
|
12V Trigger B
On
Auto235
Auto 3D
Exit
IMAGE
DISPLAY
SYSTEM
SETUP
4:3
SYSTEM
|
12V Trigger B
16:9
LBX
Native
Exit
IMAGE
DISPLAY
SYSTEM
SETUP
Auto235: `
Off
SYSTEM
|
12V Trigger B
On
Auto235
Auto 3D
Exit
IMAGE
DISPLAY
SYSTEM
SETUP
Menu Location
SYSTEM
LED Hours
Projection
Test Pattern
Background Color
IR Function
Movable
IMAGE
DISPLAY
SYSTEM
SETUP
0
Auto235
Off
Black
All
12V Trigger A
12V Trigger B
FW:B01
Anamorhic Lens
Off
Auto 3D: When “Auto 3D” is enabled, the projector will auto- `
matically detect when a 3D image is shown and will activate
the trigger on this port.