Delta Elec. Inc. EP7155i & EP1691i
Company Confidential Optoma_______________________ Delta____________
56
2010/01/11
Step 3:
Make sure the USB cable is firmly attached between projector and computer.
Press holds the <Left> keys and connects the power cord to the projector at same time,
The Power LED will flashing RED one time and please make sure the system is not under 1W
stay.
Step 4: Press <Down>, <Up>, <Right>, <Up> keys in sequence using keypad buttons, or
using the IR remote controller for those with limited keypads.
The Power LED will flashing RED one time and the Flash-Tool
mode will be enabled.
.
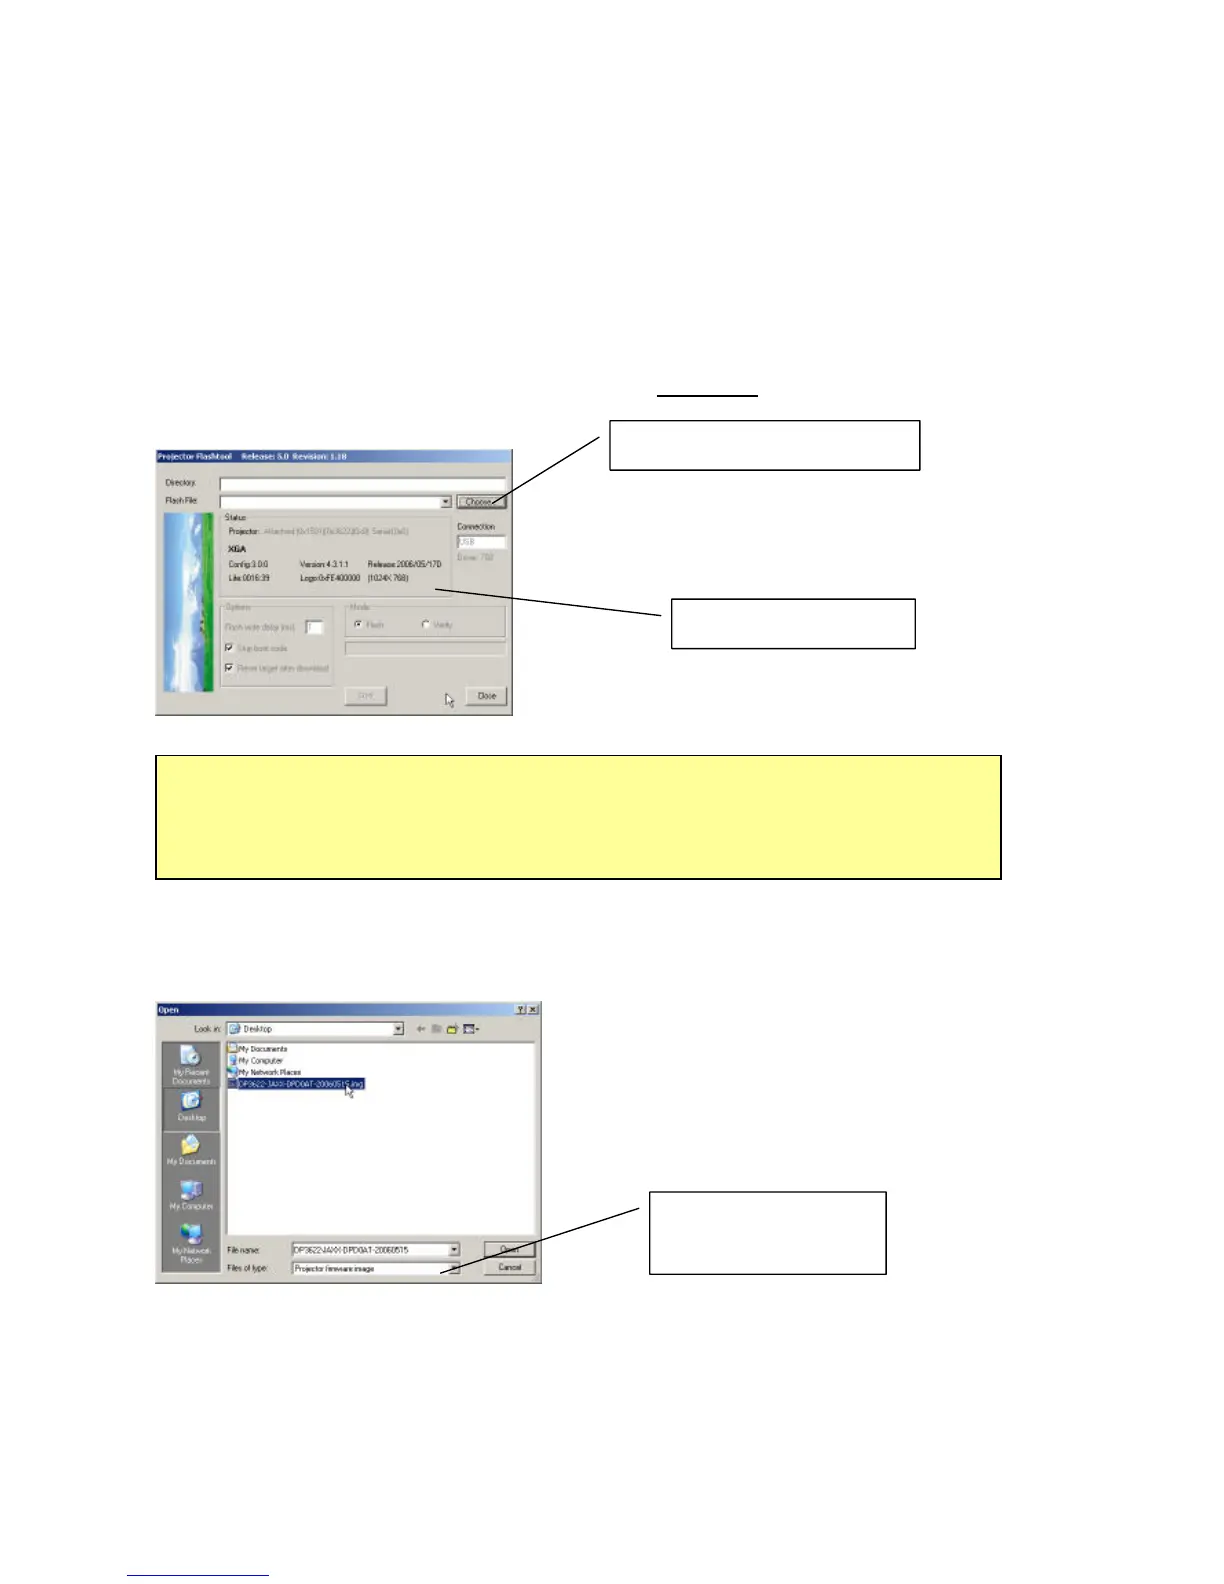
Step 5:
Press the “Choose” button to locate the new firmware which can be downloaded
from website (for example: DP3622-JAXX-DPD0A.img). Select the desired .img file by either
double clicking the file, or pressing the “Open” button
Note:
The Flash-Tool will validate the signature of the binary image file for upgrading. The
“Start” button will not enable if the binary image is not a valid projector firmware.
Projector information
Note:
The Windows hardware wizard will pop up if the USB device driver is not installed.
Simply select the recommended options, and let Windows Wizard does the trick.
Use .img file type for
firmware binary data.
Press “Choose” to select file
 Loading...