USING PRINTER TO PRINT OTHER ITEMS
It is possible to print other items
- such as cardstock used to print
invitations, greeting cards, etc. In the
case, it will be necessary to adjust the
thickness adjustment latch located
at the back of the printer to the
correct thickness.
Note: Use the Release Lever to
remove any item that does not feed
properly. There is a short video on
the User CD called “Using Lever to
Remove Jammed Item” that may
be helpful.
UNDERSTANDING THE OPERATION OF THE PRINTER
Place book cover on the Table/Bed with the edge up against the fence. Send the file to
the printer and wait for the Ready light to illuminate. Press the Print Button. The Sensor/
Drive Roller located towards the back (see Figure 5-1) motor will start turning. Move the
book cover towards the Drive Roller. Once the book cover makes contact with the Drive
Roller it will start feeding.
Note: You have 6 seconds to move the book cover and make contact with the Drive
Roller. After 6 seconds, Foil Xpress Direct will go into an Error State -- and will sound
an alarm and blink once indicating Paper Feed Error.
Note: If you move the item towards the Sensor/Drive Roller without pressing the Print
button, it will move the item through without printer - so make sure you Press the
Print Button to print on the item.
44
Understanding
the Operation
of the Printer
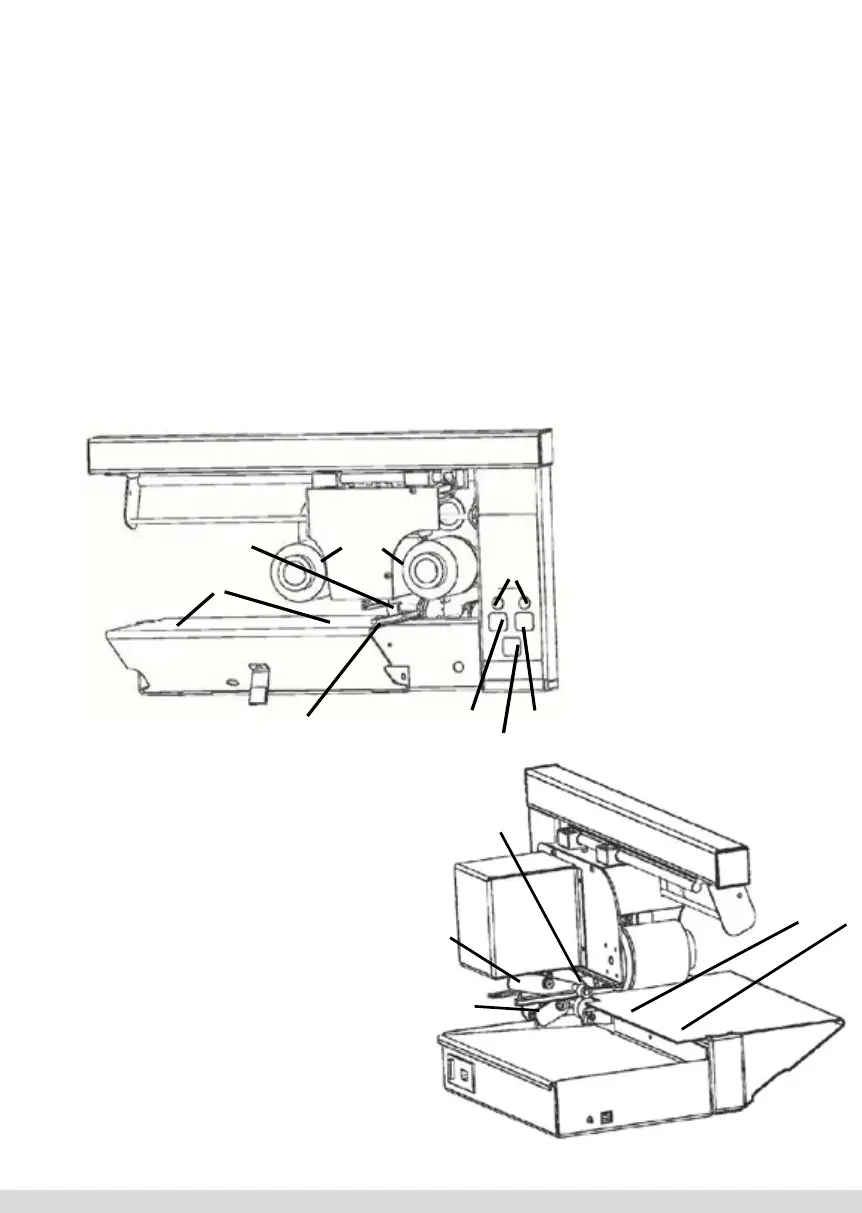
Figure 5-1.
Front View
Print Area
Foil
Reset Mode
Table/Bed
Power
& Ready
Place book cover on the Table/Bed with the
edge up against the fence. Send the file to the
printer and wait for the Ready light to illumi-
nate. Press the Print Button. The Sensor/
Drive Roller located towards the back (see
Figure 5-1) motor will start turning. Move
the book cover towards the Drive Roller.
Once the book cover makes contact with the
Drive Roller it will start feeding.
Note: You have 6 seconds to move the
book cover and make contact with the
Drive Roller. After 6 seconds, Foil Direct
will go into an Error State -- and will
sound an alarm and blink once indicating
Paper Feed Error.
Note: If you move the item towards the
Sensor/Drive Roller without pressing the
Print button, it will move the item through
without printer - so make sure you Press
the Print Button to print on the item.
Sensor/Drive Roller
Fence
Note: There is a short
video on the User CD un-
der “Instructional Video”
called “Moving Book into
PRINT Position” that may
be helpful.
45
Using Printer to
Print Other
Items
It is possible to print other items - such as
cardstock used to print invitations, greeting
cards, etc. In the case, it will be necessary to
adjust the thickness adjustment latch located
at the back of the printer to the correct
thickness.
Print Area
Table/Bed
Foil
Sensor/
Drive Roller
Thickness
adjustment
latch
Note: There is a short video on the User
CD under “Instructional Video” called
“Moving Book into PRINT Position” that
may be helpful.
Release
Lever
Note: Use the Release Lever to remove any
item that does not feed properly. There is a
short video on the User CD called “Using
Lever to Remove Jammed Item” that may
be helpful.
Figure 5.1. Front View
65