43
Adjustment
The handlebar position and angle depend on the user and his/her comfort, efciency and balan-
ce. Your hands must be in a comfortable position in which the controls can be easily handled. If
your hands, arms or shoulders are in an uncomfortable position, you should adjust the handle-
bar or look for components that better meet your needs. Check with your authorized dealer.
Some handlebars have marks that indicate where they can be cut. If your handlebar does not
have these marks, do not shorten it. If you want to shorten it but are unsure, please check with
your authorized dealer.
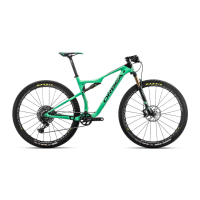
Adjusting the handlebar angle
- Loosen the bolt in the stem clamp enough to be able to turn it.
- Position the handlebar at the desired angle, and check that the stem is centered.
- Tighten it as specied in the inspection.
Adjusting the stem inclination angle
- Loosen the stem angle adjuster bolt until you can turn it.
- Position the stem at the desired angle.
- Adjust the bolt as specied in the inspection.
Changing handlebar height with a traditional (quill) stem
Al requerirse ciertos conocimientos y herramientas especiales, es conveniente que sea hecho
Since this process requires certain skills and special tools, we recommend it be performed by
your dealer.
- Loosen the stem binder bolt with two turns counterclockwise.
- Lightly tap the bolt with a wooden or plastic mallet to unlock the stem cone.
- Adjust the stem to the desired height.
- Re-tighten the bolt and verify that the handlebar is perpendicular to the front wheel. Do not
over-tighten the bolt; it could break and seriously compromise your safety.
- Check that the handlebar binder bolt is sufciently tightened by applying lateral pressure to
the handlebar while holding the wheel between your legs.
Note: If your bicycle is equipped with an ahead (threadless) stem, there are practically no op-
tions for regulating handlebar height. Therefore, we ask that you consult your dealer and do not
perform any adjustments yourself.
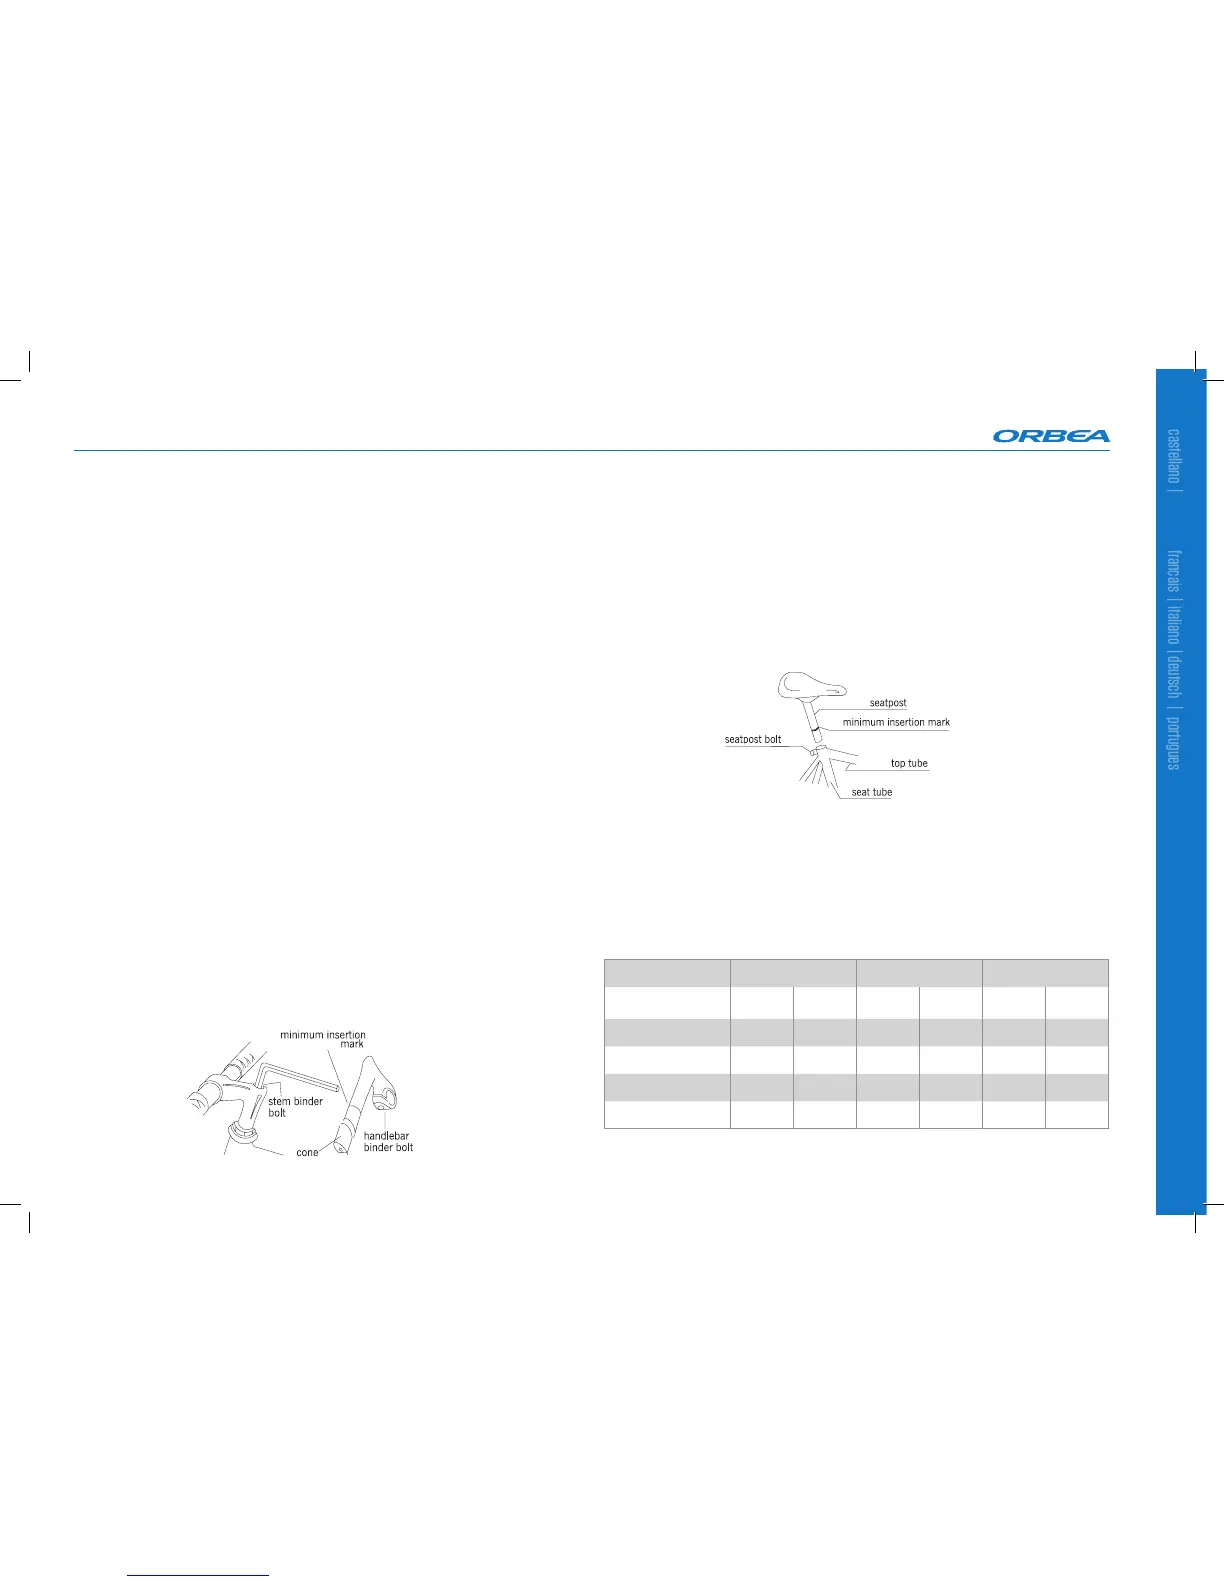
2. SADDLE AND SEATPOST
The saddle is where you sit on the bike when riding, and it is supported by a seatpost. The
seatpost is connected to the frame with a clamp or quick release. Proper adjustment of each
component is important for your safety, comfort and pedaling efciency. This section will talk
about how to inspect, adjust and lubricate your saddle, seatpost and clamp.
Inspection
Once a month, you need to inspect the quick-release of the seatpost or seat tube clamp.
Make sure that the saddle is secured to the frame assembly and has no horizontal, vertical or
rotational movement with respect the axis of the seat tube. If you notice any of these types of
movements, properly readjust all connections.
You should always heed the torque indicated by the piece. If that information is not available, it
will vary based on the size of the Allen wrench required for the bold:
Nm Lb.In Kg.cm
Allen wrench size (mm) Min. Max. Min. Max Min. Max.
3 2,5 3 22 27 25 31
4 4 5 35 44 41 51
5 6 8 53 71 61 82
6 11 15 97 133 112 153