26
Step 5:
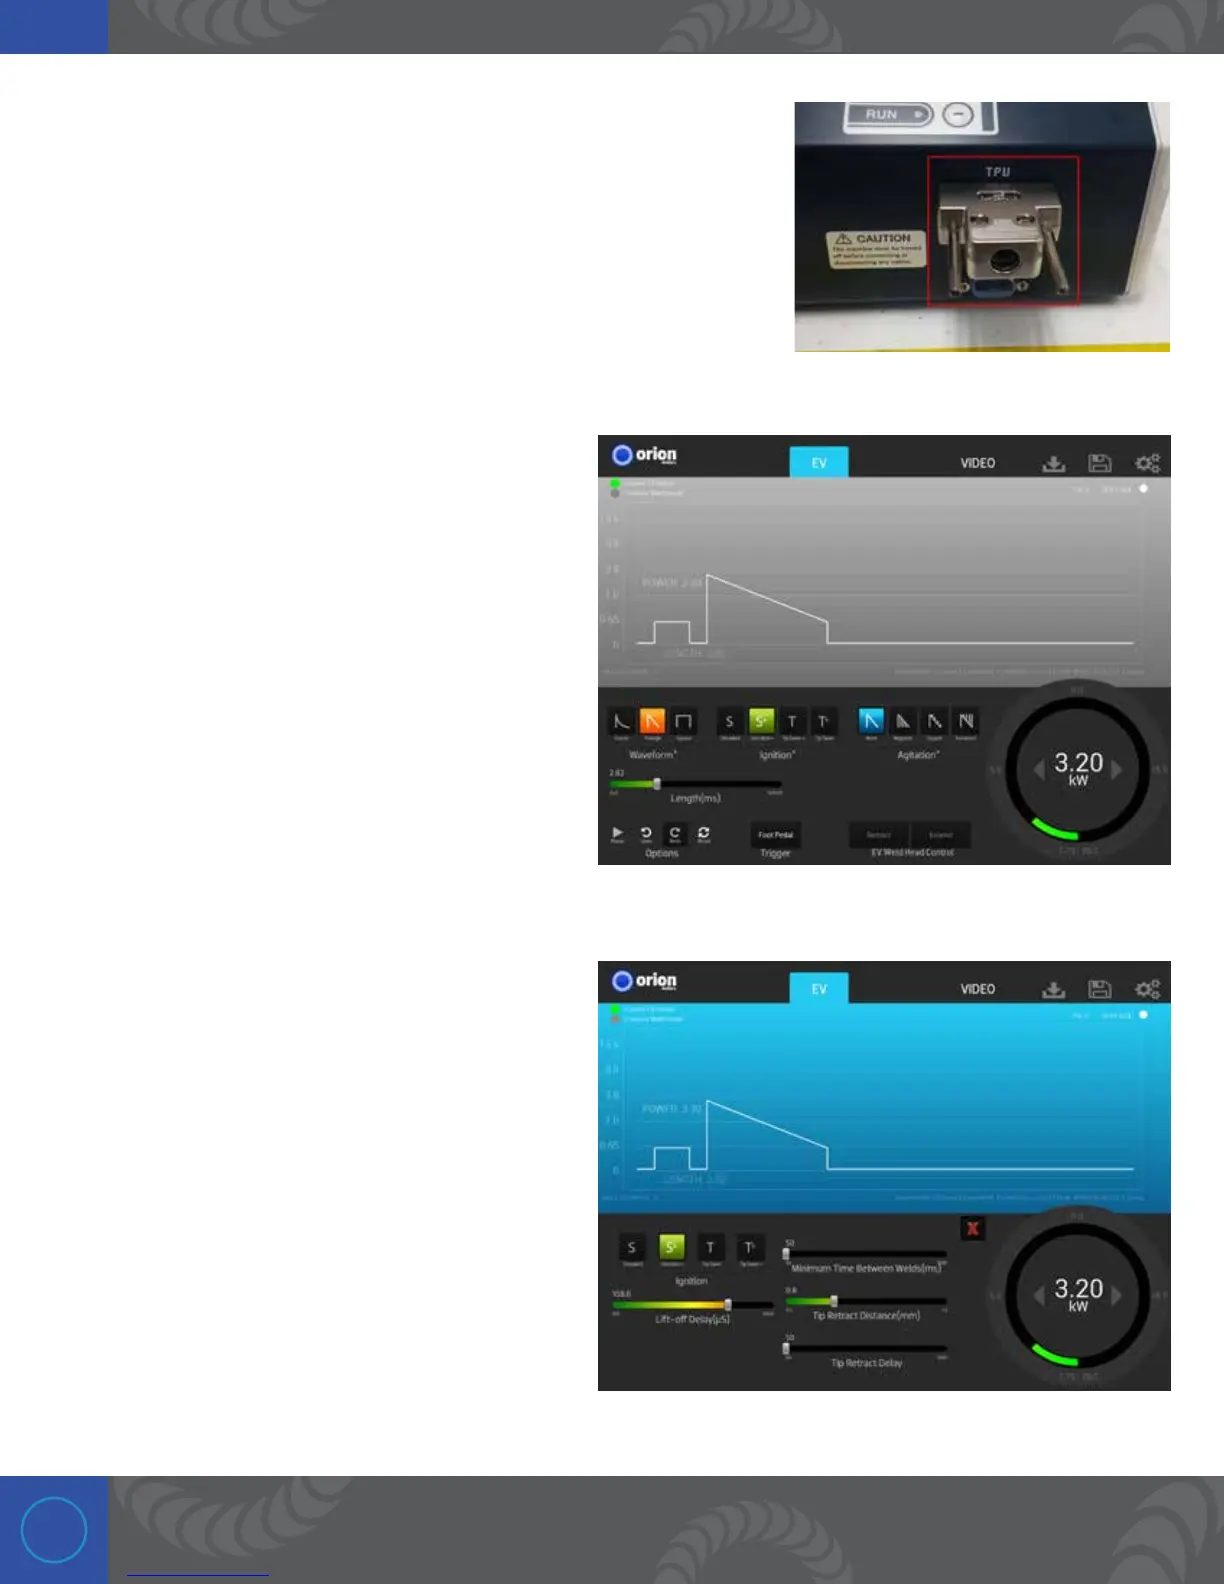
Once you have the IP address, you will need to disconnect the hand
held pendant and connect the Bypass Connector into the TPU
connector on the Janome before proceeding with setup.
Step 6:
2. e next few steps will focus on setting up the
welding parameters. First, choose the Triangle
waveform.
3. Set the ignition to Standard+.
4. Set the agitation to None.
5. Set the power between 2-4kW. is is only
for setup and training purposes. Normal power
settings are between 8-12kW.
6. Set the length between 30-40ms.
7. Press Play button to put welder in play. e Weld
Ready indicator dot will turn green
Step 7:
1. Press the word “Ignition” to open the advanced
settings menu for the ignition settings.
1. Set the Lift-off Delay between 100-110 uS.
2. Set the Minimum Time Between Welds to 50ms.
3. Set the Tip Retract Distance to 0.8mm.
4. Set the Tip Retract Delay to to 50ms.
5. When done, you can exit this advanced settings
menu by pressing the red “X” in the upper right
corner (below the graph portion of the screen).

 Loading...


