4
Chapter 2: Welder and CNC Setup
Step 1: Place CNC table onto workspace
• Clear a space on a sturdy table or work bench for the system to reside.
• e table should have a flat area cleared that is at least 36”(91 .5cm) wide and 24”(61cm) deep.
• Provide at least 40”(101 .6cm) of overhead clearance (above the tabletop).
• Ideally, locate the table near a 110VAC outlet.
• Connect power cord.
Step 2: Determine how to mount the Orion 250i2 welder
ere are two options. One option is to mount the welder next to the CNC table. is option is best when
planning to make hand-held welds in addition to making automated welds. e second option does not
involve the use of the microscope or hand held stylus. is option is best when only using the welder to
make automated welds on the CNC table.
OPTION 1: MOUNT THE WELDER NEXT TO THE CNC TABLE
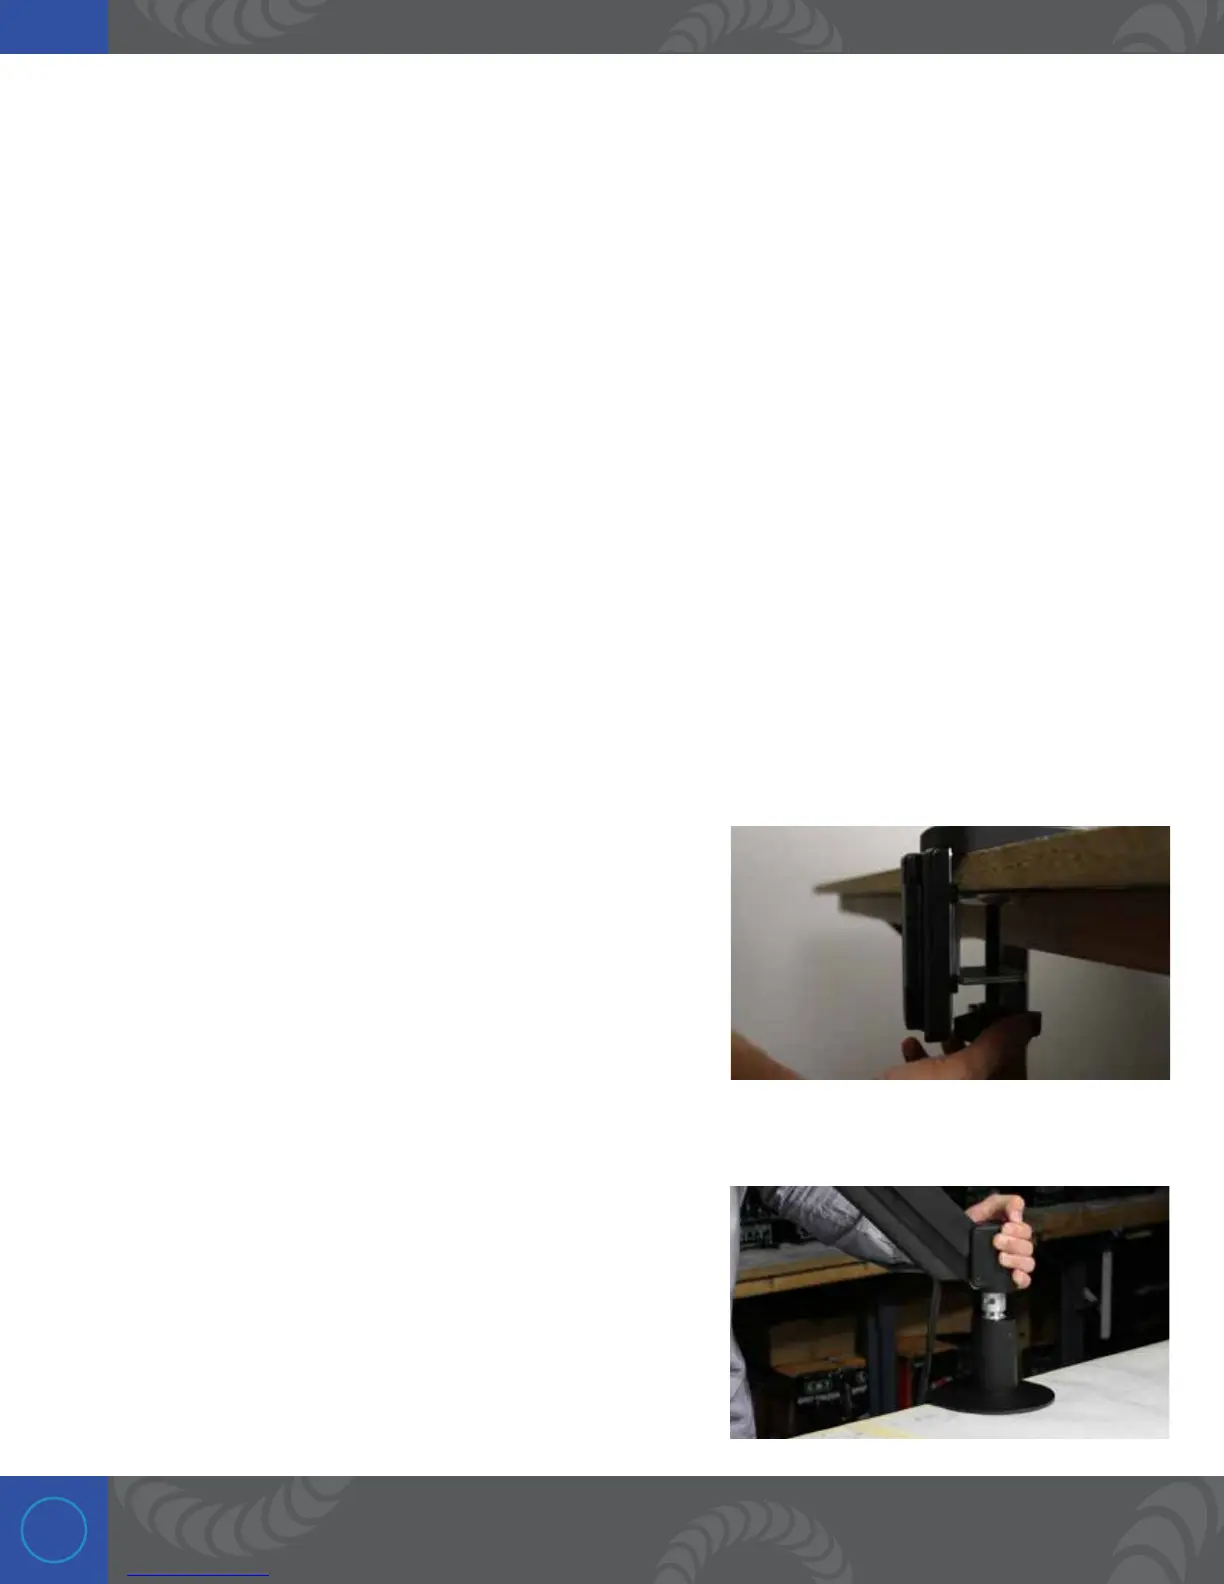
STEP 1: ATTACH THE ARTICULATING ARM TABLE MOUNT
e Orion microscope arm table mount will clamp to any
tabletop. Simply place the table mount
on your tabletop in the desired location and then tighten the
screw located at the bottom of the table mount with an allen
wrench. Align the table mount screw with the center hole of the
included steel plate and then tighten. is steel plate will help
spread the weight of the system and provide more support.
STEP 2: INSERT THE ARM INTO THE MICROSCOPE ARM TABLE MOUNT
Insert the bottom end of the microscope arm into the
microscope arm table mount.

 Loading...


